
Photographing ribbon worms requires a bit of patience, creativity, and an appreciation for natural light. It’s a bit like trying to capture a shy friend in a candid moment—you want to be unobtrusive while also showing them at their best. Armed with a good camera and the right techniques, you can reveal the intricate beauty of these unique animals. Whether you’re a seasoned photographer or just starting out, let’s explore how to make the most of your shots in natural light.
Understanding Ribbon Worms
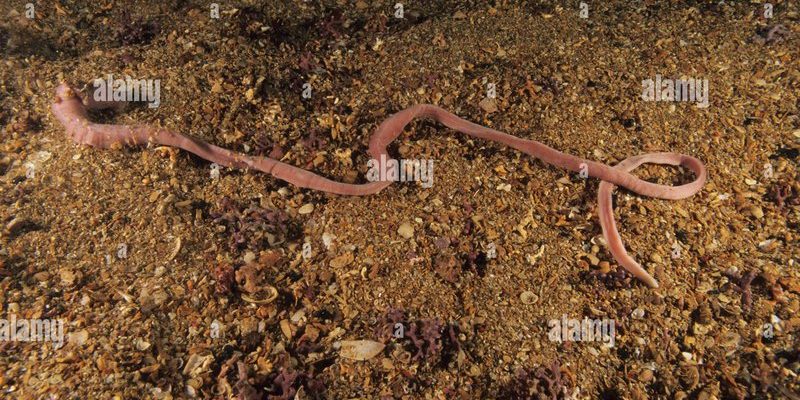
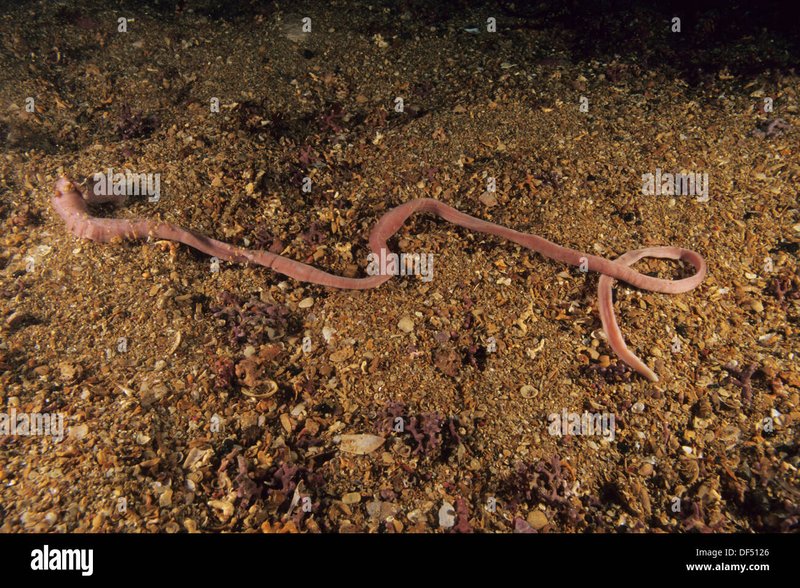
Before diving into photography tips, it’s essential to understand what ribbon worms are. These fascinating creatures belong to the phylum Nemertea. They can be quite colorful—often featuring vibrant reds, greens, or yellows. With their long, slender bodies, they can stretch out to several feet in length, which makes them visually striking.
Ribbon worms have a unique ability to glide along surfaces and can even change their shape. This behavior is a photographer’s dream, as it allows you to capture different poses and perspectives. They’re often found in tidal pools or under rocks, so being aware of their natural habitat will help you anticipate where to find them.
You might be wondering, what’s the best time to photograph these creatures? The answer lies in **natural light**. Early mornings and late afternoons provide the softest and most flattering lighting. This golden hour can enhance the colors and textures of ribbon worms, making your images pop.
Choosing the Right Camera Settings
To get the best photographs of ribbon worms, you’ll want to be familiar with your camera settings. If you’re using a digital camera or even a smartphone, here are the basics to consider:
1. **ISO**: Keeping your ISO low (around 100-400) will help reduce noise in your photos, especially in bright natural light.
2. **Aperture**: Use a wider aperture (like f/2.8 or f/4) to create a beautiful blurred background. This helps the ribbon worm stand out against its surroundings.
3. **Shutter Speed**: A faster shutter speed (1/250 or above) is ideal if you’re photographing them in motion, as it will help freeze their movements.
Adjusting these settings may seem daunting at first, but think of it as tuning an instrument before a performance. Each component plays a crucial role in creating a harmonious photograph that captures the essence of life in its environment.
Here’s the thing: don’t be afraid to experiment! Each environment will have different lighting conditions. So, if a shot doesn’t turn out as you hoped, tweak your settings and try again.
Finding the Perfect Location
Location is everything when photographing ribbon worms. Since they thrive in coastal areas, tidal pools are wonderful spots to start your exploration. Look for habitats with shallow water, sandy bottoms, and plenty of rocks.
When you arrive at a potential location, take a moment to observe before snapping away. Ribbon worms can be elusive, often hiding under rocks or burrowing into the sand. Patience is key; they’ll often reveal themselves if you wait quietly.
**Tip:** Carrying a small notebook or using your smartphone to jot down locations where you’ve seen ribbon worms can help you track and revisit fruitful spots.
Additionally, consider the tides. Photographers often get the best results during low tide, when more of the tidal pools are exposed.
Using Natural Light to Your Advantage
Natural light can make or break your photos. The **golden hour**—the time shortly after sunrise or before sunset—offers a soft, warm glow that enhances colors beautifully. Here are some tips for utilizing natural light effectively:
– **Positioning**: Try to position yourself so that the sunlight is at an angle to the ribbon worm. This can create shadows that add depth and dimension to your images.
– **Reflectors**: If you’re after a specific look, consider using natural reflectors like sand or water to bounce light back onto your subject. This technique can brighten up the colors and reveal finer details.
– **Avoid Overhead Sun**: Shooting in the middle of the day can result in harsh shadows and washed-out colors. Instead, stick to early mornings or late afternoons when the light is softer.
Let me explain further—natural light changes throughout the day, and even the angle of the sun can significantly alter your photo’s mood. So keep an eye on the weather and adjust your plans if needed.
Composing Your Shot
Once you’ve found the right location and light, it’s time to think about composition. Good composition draws viewers into your photo and highlights your subject. Here are a few techniques to consider:
– **Rule of Thirds**: Imagine dividing your frame into thirds, both horizontally and vertically. Place your subject (the ribbon worm) along these lines or at the intersections for a more engaging shot.
– **Leading Lines**: Use natural elements in the environment—like the shoreline or patterns in the sand—to lead the viewer’s eyes toward the ribbon worm.
– **Close-ups**: Don’t shy away from getting up close and personal. Macro photography can showcase the intricate details of ribbon worms, revealing their fascinating textures and colors.
You might be surprised at how much a small change in angle or distance can transform your photo. Experiment with different perspectives until you find what works best.
Edit Your Photos for a Polished Look
After you’ve captured your ribbon worm photos, it’s time to give them some love through editing. Even minor adjustments can enhance your images significantly. Here are some basic edits you can make:
– **Adjust Brightness and Contrast**: Sometimes, your images can look a bit flat. Increasing contrast can make the colors pop, while adjusting brightness can help emphasize details.
– **Crop**: If you notice distracting elements at the edges, don’t hesitate to crop your image. Focus on what matters most—your ribbon worm!
– **Filters**: Be careful with filters; they can sometimes alter the natural colors. If you do use them, opt for subtle adjustments that enhance rather than overpower.
After editing, your images can better reflect the beauty you saw in the moment.
Sharing Your Work
Now that you’ve captured and edited stunning images of ribbon worms, it’s time to share your work! Whether it’s on social media, a blog, or a photography platform, there are a few ways to showcase your creativity:
– **Tell a Story**: Share a bit about your experience photographing ribbon worms. People love behind-the-scenes insights that connect them to the image.
– **Use Hashtags**: If you’re posting on social media, don’t forget to include relevant hashtags. This will help others interested in marine life or photography find your work.
– **Join Communities**: Consider joining photography or nature groups, both online and offline. These communities can provide constructive feedback and encouragement.
And here’s a little secret: sharing your work often leads to new opportunities, like collaborations or even just meeting fellow photography enthusiasts.
In conclusion, **photographing ribbon worms in natural light** is a rewarding venture that combines creativity with a deep appreciation for the natural world. By understanding these unique creatures and employing effective photographic techniques, you can capture their beauty in a way that tells a story. So grab your camera, head to the coast, and explore the captivating underwater world waiting just beneath the surface. Happy shooting!