
In this guide, we’ll walk through the steps to craft a perfect enclosure for velvet worm observation. Whether you’re a budding entomologist or simply a curious nature lover, I’ll make sure you have all the information you need. So grab a cup of coffee, and let’s get started!
Understanding Velvet Worms: The Basics
Before diving into the specifics of creating an enclosure, it’s good to know a little about velvet worms themselves. Velvet worms, scientifically known as *Onychophora*, are ancient creatures that have been around for millions of years. They resemble a cross between a slug and a caterpillar, with soft, velvety skin and multiple legs.
These fascinating creatures generally thrive in humid environments, which is crucial to remember when setting up their home. Velvet worms breathe through their skin, so having the right level of moisture is key. If you’re thinking about observing them, you might be wondering how to keep them comfortable and happy. Creating an enclosure takes some thought, but it’s a rewarding project.
Choosing the Right Enclosure
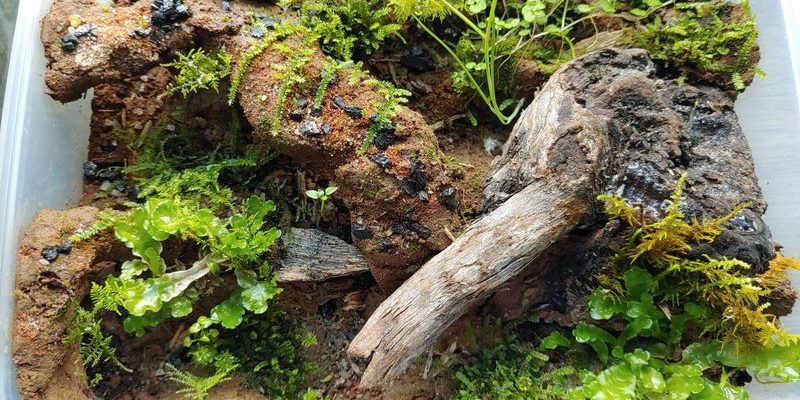
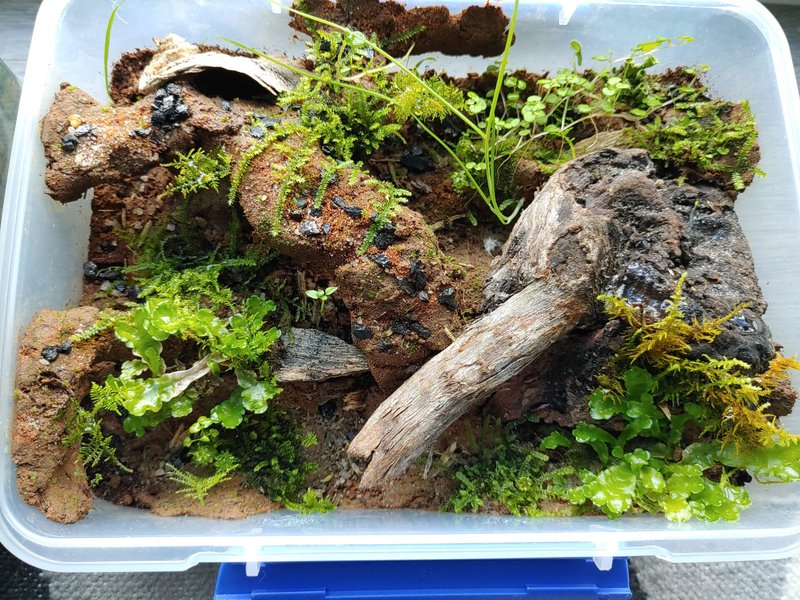
When you start designing your velvet worm enclosure, the first thing to think about is the container itself. A well-ventilated glass terrarium works wonders. You want something that allows light in but also maintains moisture.
Here’s what to look for:
- Size: Aim for a terrarium at least 10 gallons. It gives them enough room to move around.
- Access: A removable lid is essential. You’ll need to feed them and check on humidity.
- Ventilation: Ensure there are air holes or a mesh lid. Fresh air is vital for velvet worms.
If you’re not ready to invest in a fancy terrarium, you can even use a large plastic container with holes for air. Just keep in mind that glass looks nicer and allows you to watch them better!
Creating the Right Habitat
Now that you have your enclosure, let’s talk about what goes inside. Velvet worms need a comfortable environment to thrive. Here’s how to create their ideal habitat:
1. Substrate: Start with a base layer of moist soil or coconut coir. They love burrowing, so make sure there’s at least 2-3 inches of substrate. This simulates their natural habitat, helping them feel right at home.
2. Humidity: Velvet worms require high humidity levels—around 70-80%. To maintain this, you can mist the substrate and walls of the enclosure. A small water dish can also help regulate moisture.
3. Plant Life: Adding live plants can really enhance the space. Consider ferns or moss, as they provide hiding spots and help maintain humidity levels. Just make sure to choose non-toxic plants.
Temperature and Lighting Considerations
Temperature is another big factor in keeping your velvet worms happy. They prefer a cool environment, ideally between 20-24°C (68-75°F). Here are a few tips on how to create the perfect climate:
– Heating: Avoid direct sunlight, as that can overheat the enclosure. Instead, consider using a low-wattage bulb or a heat mat placed underneath to maintain a stable temperature.
– Lighting: A light cycle mimicking day and night is beneficial. Keep it simple with a standard light on for about 12 hours a day, ensuring the enclosure doesn’t overheat.
Keeping an eye on temperature is just as important as maintaining humidity. Invest in a simple thermometer to monitor conditions—you’ll thank yourself later!
Feeding Your Velvet Worms
Okay, so you’ve set up a cozy little home, but what about food? Velvet worms are carnivorous and primarily feed on insects. Here’s a handy guide on how to keep their diet balanced:
– Prey Size: Offer small insects like fruit flies, small crickets, or other soft-bodied insects. Ensure the prey isn’t larger than their heads.
– Feeding Schedule: Feed them about once a week. Overfeeding can lead to poor water quality, which is a big no-no. If you notice uneaten food, remove it after a day.
– Water Source: Velvet worms don’t drink water like other creatures. Instead, they get moisture from the food they consume, so ensure their insect diet is hydrated.
Feeding time can be quite interesting to watch. You might find it fascinating to see how they catch their prey with a sticky slime produced from their mouths. It’s like a mini live nature documentary right in your living room!
Maintaining the Enclosure
Keeping your velvet worm enclosure clean and healthy is crucial for their well-being. Plan on doing regular check-ups. Here’s what you can do:
– Remove Waste: Regularly check for fecal matter and uneaten food, removing it promptly to prevent mold or bacteria from forming.
– Humidity Check: Always keep an eye on moisture levels. If the substrate feels dry, it’s time to mist again.
– Inspect Plants: If you’ve added live plants, check for any signs of decay. Healthy plants contribute to a vibrant environment, while sick ones can lead to stagnant water or pests.
Cleaning might sound tedious, but it’s a small price to pay to ensure your velvet worms thrive. They’ll reward you with their delightful antics—trust me!
Common Challenges and Troubleshooting
Just like any pet, you might face some challenges along the way. Let’s briefly touch on a few common issues and how to solve them.
– Low Humidity: If your velvet worms start appearing sluggish or dry, it might be time to increase humidity. Mist more often or cover part of the enclosure to hold moisture.
– Temperature Fluctuations: If you notice them being less active, check if the temperature has dropped too low or spiked too high. Adjust your heating method accordingly.
– Pests: If you see unwanted guests like mold or pests invading the enclosure, remove any affected substrate and clean the area thoroughly.
Anticipating these challenges will help you stay ahead and keep your velvet worms happy and healthy.
Why Velvet Worm Observation Matters
Observing velvet worms isn’t just a fun hobby; it’s a chance to learn about an ancient species that plays a role in our ecosystem. By creating a suitable enclosure, you’re contributing to a deeper understanding of biodiversity and the importance of conservation.
It’s an opportunity to engage with nature in a way that fosters appreciation and respect for all living creatures. Plus, how cool is it to say you keep velvet worms at home?
Now that you’ve got the lowdown on creating an enclosure for velvet worm observation, you’re ready to get started. Remember to enjoy the process, learn as you go, and have patience—your new pets will be worth the effort! Get ready for some squiggly fun!