
So, how do you get started? With the right tools and a dash of patience, you can set up field cameras, like those from brands such as Bushnell or Browning, to capture these elusive critters in action. The process isn’t too complicated, but there are a few key steps that make all the difference. Let’s break it down together, step by step.
Understanding Velvet Worms: A Quick Overview
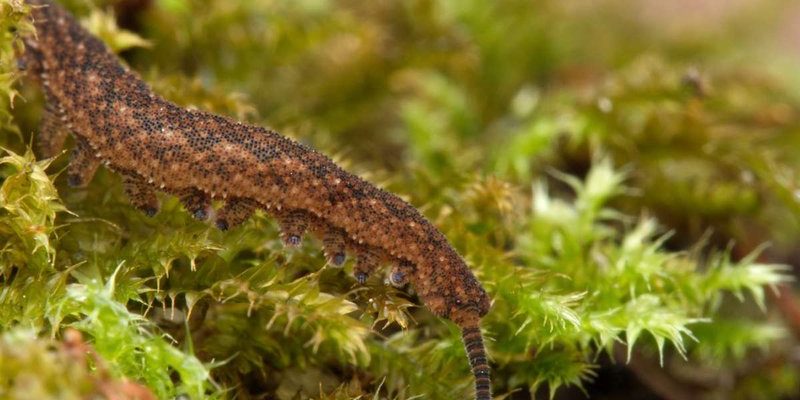
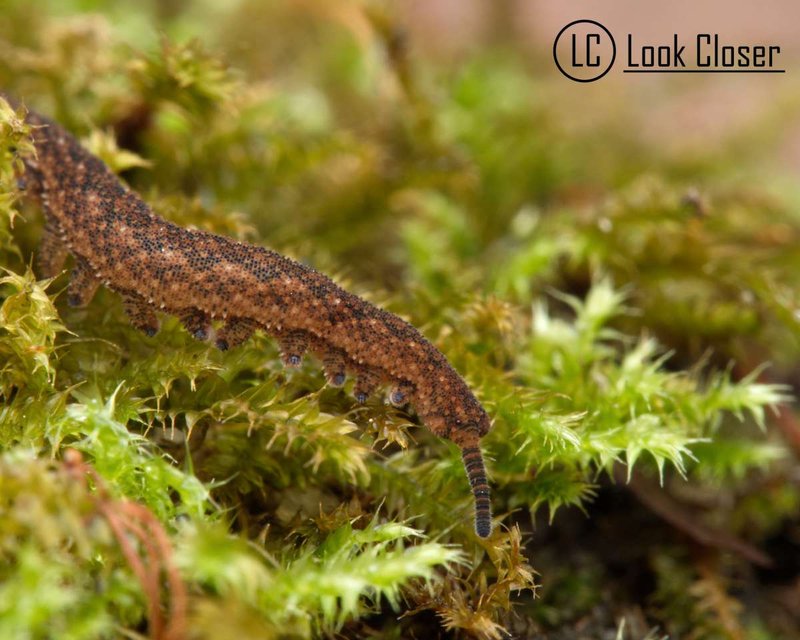
Before diving into camera setup, it’s essential to know a bit about velvet worms. These unique creatures belong to the phylum Onychophora and are often called “living fossils.” Their squishy bodies and multiple pairs of legs are intriguing, and they play a vital role in their ecosystems by controlling insect populations.
You’ll typically find them in moist, leafy environments, often under logs or rocks. Their predatory nature, coupled with their fascinating movement, makes them a perfect subject for monitoring. So, why should you care? Watching velvet worms can provide insights into environmental health, and you might just discover something new about these intriguing animals.
Selecting the Right Field Camera
Choosing the right field camera is crucial for capturing clear footage of velvet worms. Look for features like **high-resolution video**, **night vision**, and **motion detection**. Brands like Bushnell and Browning offer excellent options that can meet these criteria.
When selecting a camera, consider where you’ll be placing it. Do you need a camera that performs well in low light? Is it going to be exposed to the elements? Think about its battery life too—some models can last for months on a single set of batteries. It’s worth doing a little research to find the best fit for your needs.
Finding the Perfect Location
Once you have your camera, the next step is choosing where to set it up. This decision is like scouting for the best fishing spot. You want to find a place that velvet worms frequent. Look for areas with plenty of leaf litter, damp soil, or decaying logs.
It’s also smart to look at moisture levels in the environment. Velvet worms thrive in humid conditions, so a spot near a stream or in a shaded forest can be ideal. Once you’ve found a promising location, make sure to keep the camera as camouflaged as possible to avoid disturbing the worms or scaring them away.
Setting Up the Camera
Setting up your camera is straightforward, but there are a few key things to keep in mind. First, read the instructions carefully to understand things like how to **pair** and **sync** your camera with any apps or remotes. This step ensures you can monitor the camera remotely without constantly having to check it.
Next, position your camera at about ground level, aimed toward the area where you expect to see activity. Most cameras will have a field of view (FOV) that tells you how wide the picture will be. You want to maximize this to capture as much as possible. Secure the camera to a sturdy tree or pole to avoid it being knocked over by wind or passing animals.
Checking and Maintaining Your Camera
After setting up your camera, it’s important to check it regularly. Make it a routine—like watering a plant or checking the mail. This step helps ensure it’s still pointed in the right direction and is functioning properly. Check the battery too; some cameras alert you when the battery is low, but it’s best to check manually as well.
You might also want to review the footage at least once a week. This way, you can see if there’s any velvet worm activity and adjust the camera if necessary. Keeping up with these checks can help you capture the most exciting moments.
Interpreting Your Findings
Once you start capturing footage, the fun really begins. You might be wondering how to interpret what you see. Velvet worms can display unique behaviors, such as hunting or mating, and you might even catch a glimpse of their fascinating locomotion.
Take notes on things you observe, such as the time of day they’re most active or any interactions with other wildlife. This data can be really valuable for understanding not just velvet worms but also the larger ecosystem they are part of. Plus, sharing your findings with fellow nature enthusiasts can lead to great conversations and insights.
Common Troubleshooting Tips
Even the best field cameras can run into issues. Here are a few common troubleshooting tips to help you out:
- If the camera isn’t turning on, check the batteries. They might be dead or installed incorrectly.
- For connectivity issues, ensure you’ve paired it properly with your app or remote.
- If you’re getting too many blank images, try repositioning the camera to avoid false triggers from wind or passing animals.
- Don’t forget to reset the settings if something seems off—it’s often the easiest fix!
Final Thoughts
Setting up field cameras to monitor velvet worm activity can be a rewarding experience. Not only do you get a closer look at these remarkable creatures, but you also contribute to a growing understanding of their habits and habitats. Take your time with the setup—patience is key in both wildlife observation and enjoying nature itself.
So grab that camera, head out to your chosen spot, and immerse yourself in the wonders of the natural world. You might just find that velvet worms are a lot more fascinating than you ever imagined!