
To get started, you don’t need a ton of fancy equipment or expertise. With just a few simple materials and a little creativity, you can build a cozy home for your inchworms. Trust me; it’s not just a science project—it’s a fun adventure that will help you observe these little critters up close and personal.
In this guide, we’ll walk you through the steps to create a perfect inchworm habitat, from selecting the right container to choosing appropriate plants and environmental conditions. Whether this is your first school project or you’re a seasoned pro, you’ll find everything you need to bring your inchworm study to life.
Choosing the Right Container for Your Habitat
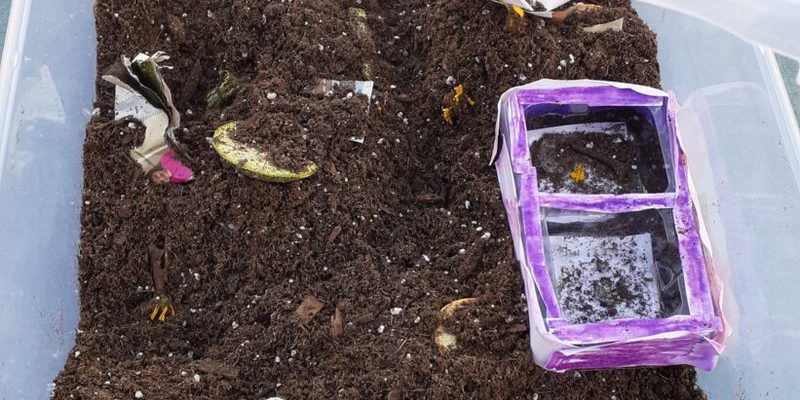
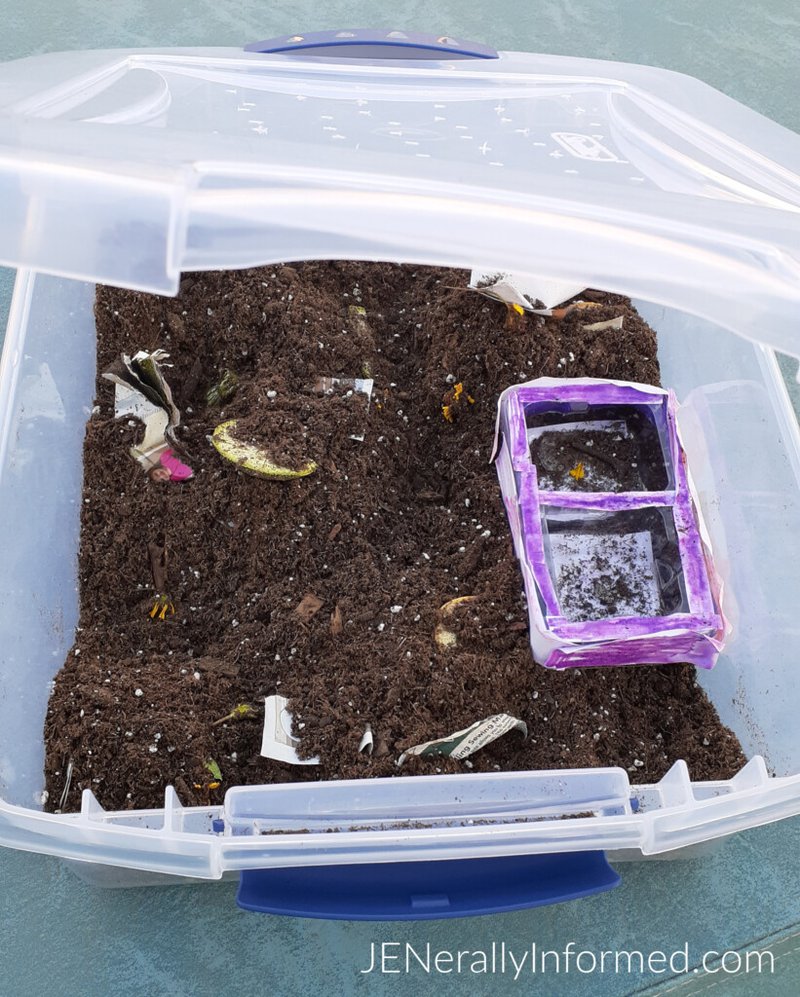
The first step in building a habitat is picking a suitable container. Think of it as choosing the right house for your tiny guests. You’ll want a container that’s spacious enough for the inchworms to move around but also not so big that they get lost. A clear plastic container or a large glass jar works great.
Make sure the container has a secure lid. Inchworms can be sneaky! You don’t want them escaping while you’re trying to study them. If your container doesn’t have air holes, you can gently poke some using a pin. Just make sure the holes are small enough that the inchworms can’t squeeze through.
Another thing to consider is transparency. A clear container allows you to easily observe the inchworms’ behaviors without disturbing them. You can watch them munching on leaves or doing their signature inching dance. How cool is that?
Gathering the Right Materials
Now that you have your container, let’s gather some materials that will create a comfortable living space for your inchworms. Here are some essentials:
- Plant leaves: Inchworms love to eat leaves! Oak, cherry, and maple are popular choices.
- Moist soil or paper towels: This will help create a humid environment, which inchworms enjoy.
- Small twigs or branches: These serve as climbing spots and makeshift homes.
When you collect leaves, it’s best to gather them from a pesticide-free area. You wouldn’t want your inchworms munching on anything harmful. If you’re unsure about what to collect, take a walk in your local park and examine the trees. It’s almost like gathering supplies for a picnic!
Setting Up the Habitat
With your materials in hand, it’s time to set up your inchworm habitat. Start by layering the bottom of your container with a small amount of moist soil or damp paper towels. This will help keep the humidity levels just right, which is crucial for your inchworms’ health.
Next, carefully place the plant leaves on top of the soil. You can arrange them in a way that mimics their natural setting—maybe some overlapping and some standing upright. This not only looks nice but gives the inchworms plenty of places to explore and hide.
After that, add a few twigs or branches in the mix. These can help support your leaves and give your inchworms a fun climbing area. Inchworms are curious little creatures, and they love to explore their surroundings, so providing a variety of surfaces will keep them happy!
Monitoring the Environment
Just like you check the weather before heading out, you’ll need to keep an eye on conditions inside your inchworm habitat. Here’s what to look for:
1. Humidity Levels: Inchworms thrive in a humid environment. You can use a spray bottle to lightly mist the leaves and soil if it seems too dry. Just avoid soaking them!
2. Temperature: Ideally, your habitat should be in a room that stays at a comfortable temperature—around 70°F (21°C) is perfect. Avoid places that get too hot or too cold, like near heaters or drafty windows.
3. Light: Inchworms prefer a little light, but not direct sunlight. You can place your habitat in a spot that gets indirect sunlight to keep things bright yet cozy.
You might want to keep a small notebook nearby to jot down any observations. Not only will this help you track what’s happening in the habitat, but it will also be super helpful for your report!
Feeding Your Inchworms
Now that you have a comfortable habitat set up, it’s time to focus on feeding your inchworms. They are pretty simple eaters, but making sure they’re well-fed is essential for their growth and health.
Start by offering fresh leaves from the plants you collected. Make sure to replace any old or wilted leaves regularly. Leaving old food can lead to mold, and you definitely don’t want that in your inchworm habitat.
To keep track of their eating habits, you can observe how quickly the leaves disappear. If you notice that they’re hardly touching the food, it might be worth trying a different type of leaf. Inchworms can be picky eaters sometimes!
Observing Inchworm Behavior
The best part of your inchworm study is observing their behavior. This stage is where the magic happens as you get to witness inchworms in action. They can be surprisingly fascinating!
Spend some time watching how they move. Do you notice their unique inching motion? It’s almost like watching a tiny, slow-motion dance. Inchworms can also change color as they mature. This transformation can be an awesome part of your project to report on.
You can also track how they interact with their environment. Do they prefer climbing on the twigs, or are they more drawn to the leaves? You might even catch them resting or hiding. Keeping a daily journal of observations can help you notice patterns and changes over time.
Wrapping Up Your Inchworm Study
As your inchworm study comes to a close, it’s important to reflect on what you’ve learned. Building a habitat has allowed you to witness their lives up close—something many people never get to experience.
Make sure to document all your findings in your report. Consider adding photos, drawings, or even charts showing how quickly they grew or what they preferred to eat. This isn’t just about completing a project; it’s about sharing your discoveries with others!
In the end, your inchworm habitat will not only help you understand these critters better but also ignite a passion for science and nature. So, go ahead and share your insights, and maybe even inspire others to create their own inchworm habitats!
If you have any questions or need a bit of guidance along the way, don’t hesitate to ask. Happy observing!