
Geese are known for their strong instincts and nurturing behaviors, making them unique in the avian world. If you’re thinking about breeding geese, it’s essential to know what to expect, from the moment the eggs are laid to when those adorable goslings take their first wobbly steps. So grab a cup of coffee, and let’s dive into the wonderful world of goose breeding!
Understanding Goose Egg Laying
Breeding geese starts with understanding how and when they lay eggs. Typically, geese begin laying eggs in late winter or early spring, depending on the breed and climate. The goose’s natural instincts kick in as the days get longer, prompting her body to prepare for reproduction. It’s like a gentle reminder from Mother Nature that spring is here, and it’s time to create new life.
You might be wondering how many eggs you can expect from your geese. Well, most breeds lay anywhere from 15 to 50 eggs in a single laying season. Some popular breeds known for their prolific laying include the Embden and Toulouse geese. The eggs are usually large and can range in color from white to light tan, depending on the breed.
One thing to keep in mind is that geese are somewhat territorial during the laying season. They prefer to lay their eggs in a safe, quiet area where they feel secure. If you’re raising them, providing a comfortable nesting spot will encourage them to lay eggs there. Think of it as creating a cozy little home for your geese to get down to business!
Creating a Suitable Nesting Area
Now that you know when and how many eggs your geese will lay, let’s talk about the nesting area. A proper nest is essential for your geese to feel comfortable laying their eggs. Ideally, the nesting space should be private, quiet, and away from disturbances, like other animals or loud noises.
To create an inviting nest, consider using a simple box with soft bedding material like straw or hay. It should be deep enough to allow the goose to feel secure but not so deep that she struggles to get in and out. If you’re raising multiple geese, having several nesting boxes is important, as this helps to reduce competition and stress.
Here’s the thing: keeping the nesting area clean and dry is crucial. Regularly check for any soiled bedding and replace it to maintain hygiene. A clean nest will help prevent issues like bacterial infections or pests, which can jeopardize the eggs and eventually the goslings.
Incubation: The Magic of Turning Eggs into Goslings
Once the eggs are laid, it’s time to talk incubation. If you’re going for natural incubation, the goose will take on the responsibility. Normally, geese will start sitting on their eggs once they have a full clutch, which can take a few days to a couple of weeks. During this time, she’ll rarely leave the nest—essentially becoming a full-time mom!
If you prefer to use an incubator, that’s another option. You’ll need to carefully set the temperature between 99°F and 100°F, with a humidity level of around 40% to 50%. It’s like creating a cozy little oven for your eggs! Turning the eggs regularly is also essential, as it helps the developing embryos position themselves correctly inside the shell. Many hatchers recommend turning the eggs three times a day to mimic the natural movements of a mother goose.
During the incubation period, which lasts about 28 to 35 days, it’s important to monitor the eggs for any signs of problems. Candling is a technique you can use to check the egg’s development by shining a light through the shell. This will help you determine if the egg is viable or if it may need to be removed from the incubator.
Monitoring Egg Development: The Candling Process
Now that you have a good grasp on incubation, it’s time to delve into monitoring the development of those eggs. Candling, as mentioned before, is a nifty technique used to check the progress of the embryos inside the eggs. You might be curious about how this works.
To candle an egg, find a dark room and use a bright flashlight or a candling lamp. Simply hold the egg against the light source, and you should be able to see the developing embryo. Here’s what you might see:
- Day 1-7: The egg looks mostly clear with some blood vessels beginning to form.
- Day 8-14: You’ll start to see a dark mass, indicating the growing embryo.
- Day 21 and onward: As the hatching date approaches, you should observe movement, and the egg may appear to be darker overall.
This process is not just fascinating; it helps you keep track of which eggs are developing properly and which may not make it. Remember to handle the eggs carefully, as they are quite fragile.
Preparing for Hatch Day
When hatch day finally arrives, it’s an exciting time! You’ll notice the eggs start to rock and may even hear soft peeping sounds coming from inside. It’s one of those magical moments that really makes all the hard work worth it.
Before the little ones start hatching, ensure that their environment is ready. Prepare a warm, dry, and safe area where the goslings can go once they hatch. This could be a brooder set up with heat lamps to maintain a cozy temperature. Newborn goslings will need warmth until they develop their feathers, which usually happens in a few weeks.
Once the goslings begin to hatch, it’s important not to interfere too much. This process can take several hours to a day as each little one works its way out of the egg. Make sure to have plenty of fresh water and food ready for them. They will be hungry and thirsty from their journey into the world!
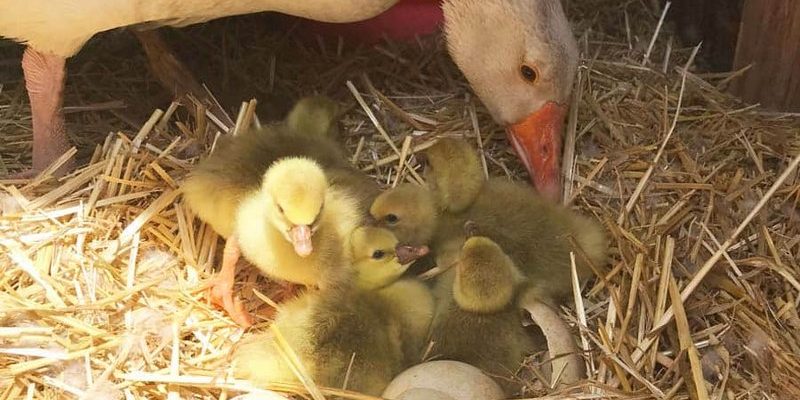
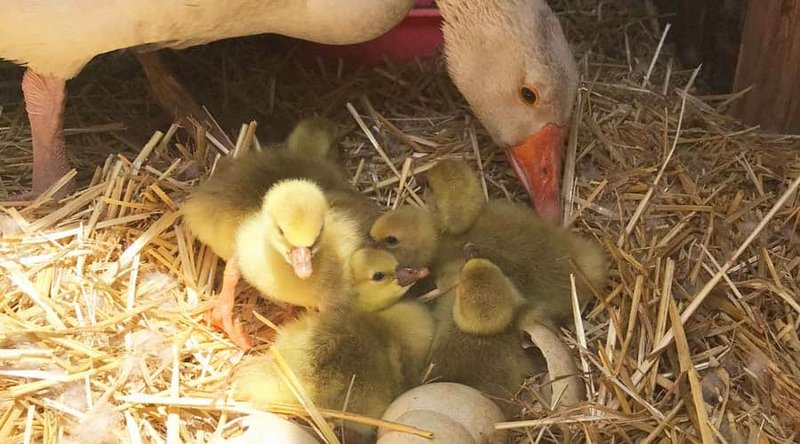
After Hatching: The Early Days of Goslings
Once your adorable goslings emerge, they require some special care to ensure they thrive. They need warmth, food, and water, but they also need love and attention. Goslings can be a bit clumsy at first, but they learn quickly.
Start by placing a shallow dish of water in their brooder, making sure it’s not too deep to avoid drowning. They’ll also need a starter feed designed for waterfowl, which is higher in protein to help them grow strong and healthy.
During these early days, spend time observing their behavior. It’s heartwarming to see them follow their mother or the caretaker closely. They’re naturally curious little creatures and thrive in a safe environment. Also, keep an eye out for any signs of distress or illness; this can be crucial in catching any potential issues early on.
Breeding geese, from egg laying to hatching, can be an incredibly rewarding experience. It’s like nurturing a small miracle right in your backyard. With the right knowledge, patience, and care, you can successfully navigate the journey from egg to adorable goslings.
Remember to provide a safe nesting area, monitor the incubation process carefully, and be prepared for the exciting hatch day. Each step you take in this process helps create not just healthy goslings but also enriches your understanding of these charming birds. So, if you’re ready to get started, gather your supplies, and embrace the challenges and joys of breeding geese!