

Cleaning your canary’s cage isn’t just about aesthetics; it’s crucial for your bird’s health and happiness. A clean cage helps prevent diseases, eliminates odors, and keeps your canary lively. When it comes to cage cleaning, it’s best to adopt a regular routine, much like how we might clear out clutter in our homes. It’s a straightforward task once you get into the swing of things, and it can even become a bonding activity between you and your feathery friend.
Why Regular Cleaning is Important
Keeping your canary’s cage clean is essential for multiple reasons. First and foremost, hygiene is critical. Just like humans, birds can get sick if they live in dirty conditions. Waste can build up quickly, leading to potential bacterial growth that can affect your bird’s health. You might be wondering, “What kinds of illnesses can a dirty cage cause?” Well, canaries can develop respiratory issues or infections due to dirty environments, making cleaning a paramount task.
Another reason for regular cleaning is to keep your canary happy. Imagine living in a messy room—it’s not very uplifting, right? A clean space promotes a positive environment for your pet. When the cage is clean, your canary will be more active and cheerful, happily fluttering about its space. This can also encourage singing, which is one of the joys of owning a canary!
Lastly, a clean cage improves the overall living experience for you. A fresh-smelling cage without mess makes your home more pleasant. Plus, it’s easier to spot any health issues when the cage is regularly cleaned—like noticing unusual droppings that might indicate an underlying problem.
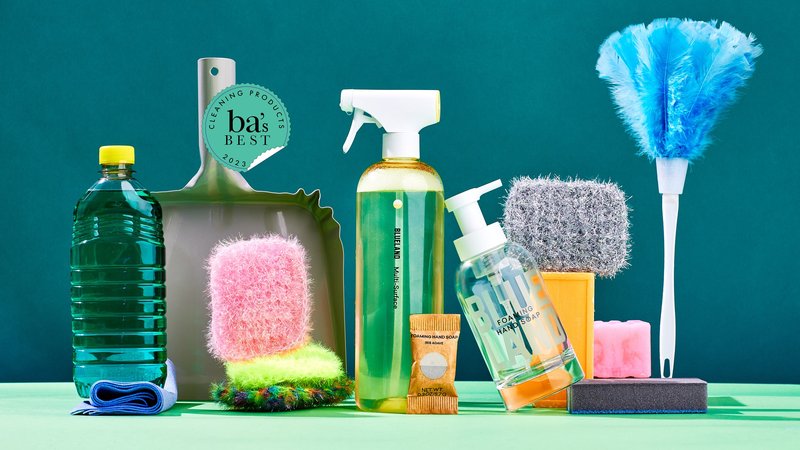
Gathering Your Cleaning Supplies
Before diving in, it’s crucial to gather your cleaning supplies. Think of this as preparing for a mini cleaning mission! Here’s what you’ll need:
- Warm water
- Unscented soap or vinegar
- A soft sponge or cloth
- A small brush for hard-to-reach areas
- Paper towels or a clean towel
- New bedding (like paper towels or bird-safe bedding)
- A safe disinfectant specifically for pet areas (optional)
Using natural cleaning agents like vinegar is great because they’re effective and safe for your bird. Just remember, the goal is to create a fresh and clean environment that won’t harm your canary in any way.
Steps to Clean the Cage
Cleaning your canary’s cage can be done in a few straightforward steps. Let me walk you through the process:
1. Remove Your Canary: It’s best to start by gently transferring your canary to a safe, secure location. Use a small travel cage or a hanging cage if you have one. Just make sure it’s safe and somewhere your canary feels comfortable.
2. Empty the Cage: Take out any toys, perches, and food dishes. This will give you a clear workspace to tackle the cleaning.
3. Clean the Cage: Using your warm water and unscented soap or vinegar, start scrubbing down the cage. Make sure to get into those nooks and crannies where droppings and debris might hide. If you see stubborn spots, let the soapy water sit for a minute before wiping them down.
4. Rinse and Dry: After cleaning, rinse the cage thoroughly to make sure there’s no soap residue. This is crucial since any leftover soap can be harmful to your canary. Once rinsed, dry it completely with a towel.
5. Reassemble the Cage: Now, it’s time to put everything back! Adding fresh bedding and rearranging toys can provide a new environment for your canary—think of it as a redesign.
6. Return Your Canary: Finally, let your canary back into its clean home. Watch as it explores its fresh surroundings!
Frequency of Cleaning
You might be curious about how often to clean the cage. Generally, it’s a good idea to do a thorough cleaning every week, but spot cleaning can be done daily or every few days. Here’s a simple breakdown:
– Daily: Remove droppings from the food and water dishes. Change the water daily to keep it fresh. Wipe down any messes to prevent buildup.
– Weekly: Perform a deep clean as described above. This includes changing the bedding, scrubbing the cage, and cleaning all toys.
– Monthly: Inspect the cage for any worn-out items, like perches or toys, which might need replacing.
Setting a regular cleaning schedule can help keep it manageable. Plus, it becomes part of the routine, which is healthy for both you and your canary.
Choosing the Right Cage Accessories
When it comes to accessories in your canary’s cage, the right choices can enhance cleaning. Opt for bird-safe materials for toys and perches that are easy to clean. Here’s a list of some ideal options:
- Plastic or glass food and water dishes (easy to scrub)
- Natural wood perches (they add texture and are great for the bird’s feet)
- Non-toxic toys that can be wiped down
Avoid items that can absorb water, as they can harbor bacteria. When in doubt, look for accessories that are marketed as easy to clean and safe for birds.
Common Problems and Solutions
Even with all your cleaning efforts, you may run into some common issues. Here are a few problems and easy fixes:
– Odors: If your canary’s cage has an unpleasant smell, it may indicate that droppings or food are lingering in hard-to-reach areas. Regular scrubbing and using vinegar can help combat odors effectively.
– Feather Buildup: Sometimes, feathers might accumulate in the cage. A small handheld vacuum or a damp cloth can easily pick them up.
– Mold or Mildew: If you notice mold growing, it’s crucial to clean the area thoroughly with a safe disinfectant. Ensure the cage is completely dry after cleaning to avoid this problem recurring.
Remember, staying on top of cleaning not only keeps your home smelling fresh but also keeps your canary healthier.
Final Thoughts on Canary Care
Cleaning and maintaining a canary’s cage might seem daunting at first, but it’s a vital part of being a responsible bird owner. By keeping up a regular cleaning schedule and choosing safe, easy-to-clean accessories, you ensure your feathered friend has a lovely and healthy environment.
The next time you look at your canary singing away, consider how much better it’s feeling in a fresh, tidy cage. After all, a little bit of effort goes a long way in ensuring your canary leads a happy life. So grab those cleaning supplies and let’s keep that cage sparkling! Your canary will thank you for it.