

In this article, we’ll dive into the world of silkworms and explore how they can elevate your educational projects. We’ll look at their life cycle, the science behind silk production, and how you can set up your own silkworm project at home or in the classroom. So, let’s unravel the mystery of these amazing insects and discover how to make your educational project as smooth as silk!
What Are Silkworms?
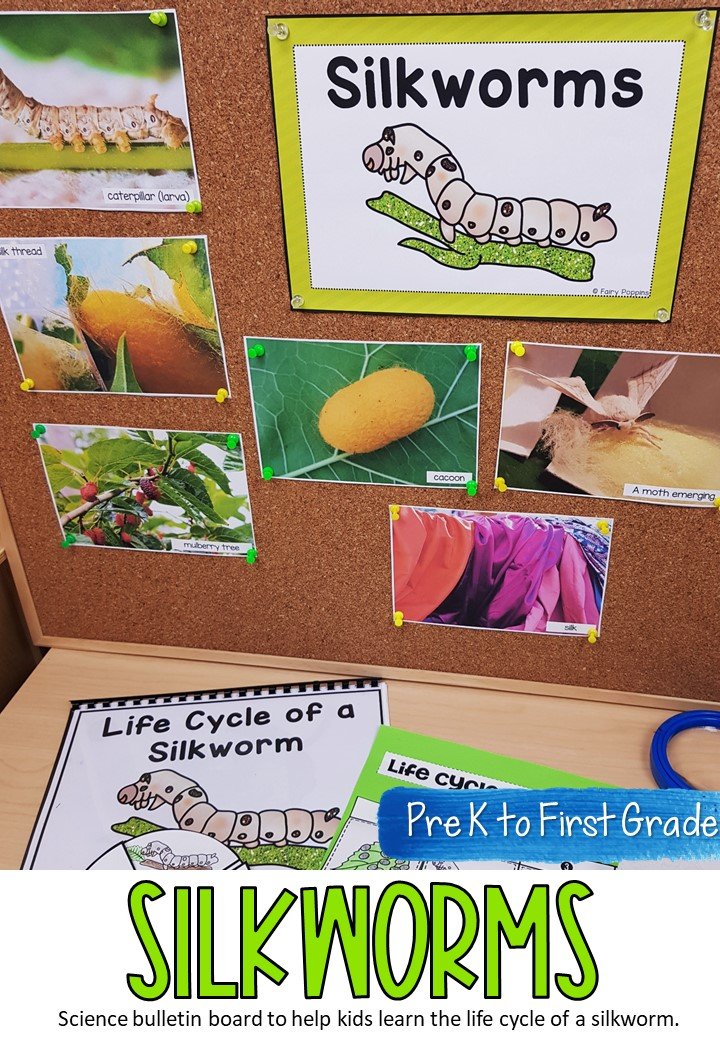
Silkworms are the larvae of the *Bombyx mori* moth. These little guys are well-known for producing silk, which has been cherished for thousands of years. When you think of silkworms, picture a little fuzzy caterpillar munching on mulberry leaves. They’re not just cute; they also have a fascinating life cycle that makes them perfect for educational projects.
The life of a silkworm starts as an egg. The eggs hatch into tiny caterpillars, which grow rapidly by eating leaves. This part of their life cycle is crucial because they need to consume a lot of food to transform into moths later on. After around 4-6 weeks of munching, they enter the pupa stage, wrapping themselves in silk cocoons. This whole process, from egg to moth, can provide a great visual for students learning about metamorphosis and life cycles.
Silkworms are also a great example of domestication. They’ve been bred for thousands of years for their silk, and they can’t survive in the wild anymore. This can lead to interesting discussions about how humans can change animals through selective breeding.
The Life Cycle of Silkworms
The life cycle of a silkworm is typically broken down into four stages: egg, larva, pupa, and adult. Let’s explore each of these stages in detail, so you can understand what makes these critters so unique.
1. Eggs
Silkworm eggs are tiny—about the size of a pinhead. When they arrive, they can look a bit like tiny granules of sand. A typical silkworm female can lay anywhere between 300 to 500 eggs, depending on her health and environment. In a science project, observing the eggs can create excitement. You can chart out how long it takes for them to hatch and how environmental factors, like temperature and humidity, can affect this.
2. Larvae
Once the eggs hatch, the larvae emerge and are ready to eat. This stage lasts about 4-6 weeks, during which they’ll molt several times. Silkworms grow rapidly and can increase significantly in size as they feed. Students can measure and record the growth of their silkworms, learning about data collection in the process. Plus, they’re pretty fun to watch!
3. Pupa
After their eating spree, the silkworms will move into the pupa stage. They spin a cocoon made from a single strand of silk, which can be as long as 1,000 meters! This transformation is an excellent visual metaphor for change, and students can discuss concepts like metamorphosis. You might even consider putting together a time-lapse video of this process if you have the resources.
4. Adult Moths
After about two weeks in the cocoon, the adult moths emerge. However, it’s important to note that these moths are quite different from the caterpillars. They don’t have functional mouthparts, so they can’t eat. Their only goal is to mate and lay eggs to kickstart the cycle all over again. This unique aspect can lead to discussions about life cycles and the survival strategies of different species.
Setting Up Your Silkworm Project
Creating a silkworm project can be an engaging way to enhance your learning. Here’s how to get started, whether you’re a teacher or a student curious about these fascinating creatures.
Choosing a Location
Find a warm, well-lit space for your silkworms. Since they thrive in warm conditions, a temperature range of 75-80°F is ideal. Avoid putting them in direct sunlight, which can be too harsh. A simple bin or container with proper ventilation will work great. It can be as straightforward as a glass jar with a breathable lid.
Feeding Your Silkworms
Silkworms feed primarily on mulberry leaves. If you can’t find fresh leaves, dried leaves or commercial silkworm food are great alternatives. In a classroom setting, discussing where the food comes from can spark conversations about local ecosystems and agriculture. You’ll need to regularly check your silkworms to ensure they have enough food.
Documenting Your Project
Encourage students to keep a science journal. They can record observations, draw pictures, and jot down data on growth and behavior. This documentation will help reinforce what they’re learning. Plus, it’s fun to look back on the snail-paced journey of these little critters and see how far they’ve come!
Handling and Observing Silkworms
While silkworms are gentle and easy to handle, teach everyone to be careful. They have soft bodies and can be easily harmed. Encourage students to observe them closely without disturbing their environment too much. You might think of them as little stars in a show you’re producing—great to look at but fragile!
Why Silkworms Matter
You might be wondering why raising silkworms is valuable beyond just being a fun project. Well, there’s a lot to learn!
Silk Production
Silk from silkworms has been prized for its beauty and strength for thousands of years. Understanding how silk is produced can lead to discussions about industry, economy, and sustainability. Students can consider the ecological impacts of silk farming and explore modern alternatives to silk, such as synthetic fibers.
Ecology and Biodiversity
Silkworms also play a role in understanding ecosystems. By discussing their interactions with plants and other organisms, students can gain a better appreciation for biodiversity. Plus, it’s an effective way to illustrate the importance of each creature in maintaining ecological balance.
Real-World Applications
Finally, projects like these can inspire students to think about careers in science, agriculture, and sustainability. By connecting hands-on activities with real-world applications, you are igniting a passion for lifelong learning.
Common Challenges and Solutions
Like any project, raising silkworms can come with its challenges. Here are a few common issues you may face and how to tackle them.
Feeding Errors
Sometimes, you might notice that your silkworms aren’t growing as quickly as expected. This could be due to insufficient or poor-quality food. Make sure to provide fresh mulberry leaves and check for mold or spoilage. If you’re using dried leaves or prepared feed, ensure they are also fresh and suitable for silkworms.
Temperature Control
If your silkworms seem sluggish, check the temperature. They thrive in warm, consistent environments. If your space is too cold or fluctuates wildly in temperature, consider moving them or using a heat lamp to maintain ideal conditions.
Health Monitoring
Keep an eye on the silkworms for any signs of health issues, like discoloration or lethargy. If you notice something off, consult an online resource or local experts who can help diagnose what’s going on. Sometimes simple adjustments can make a world of difference.
Incorporating silkworms into educational science projects isn’t just about creating something cool to show off. It’s about sparking curiosity, fostering a deeper understanding of biology, and nurturing a sense of responsibility for other living beings.
Whether in a classroom or at home, raising silkworms can provide a hands-on approach to learning that is rich with lessons and discoveries. So, if you’re looking for an engaging project that combines nature, science, and a bit of fun, why not give silkworms a try? You’ll find that the experience is as valuable as it is enjoyable!