
Hammerhead worms, scientifically known as *Bipalium spp.*, can be a gardener’s nightmare. They feast on earthworms and can disrupt your garden’s ecosystem. But don’t worry! In this article, we’ll explore some safe and effective techniques for removing these intriguing yet unwanted visitors from your space. Let’s dive into the world of hammerhead worms and learn how to handle them with care.
What Are Hammerhead Worms?
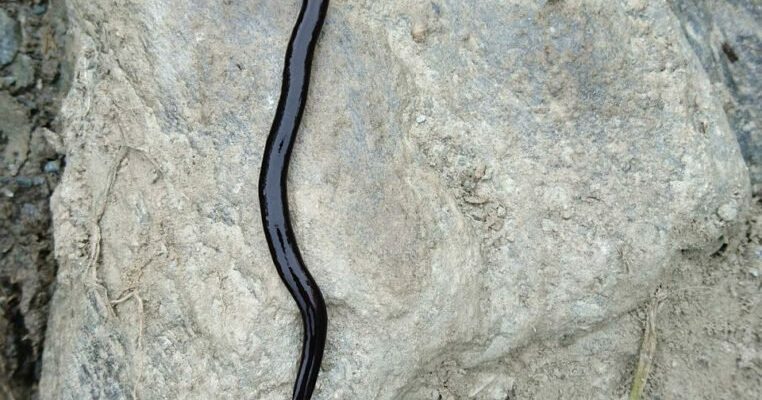
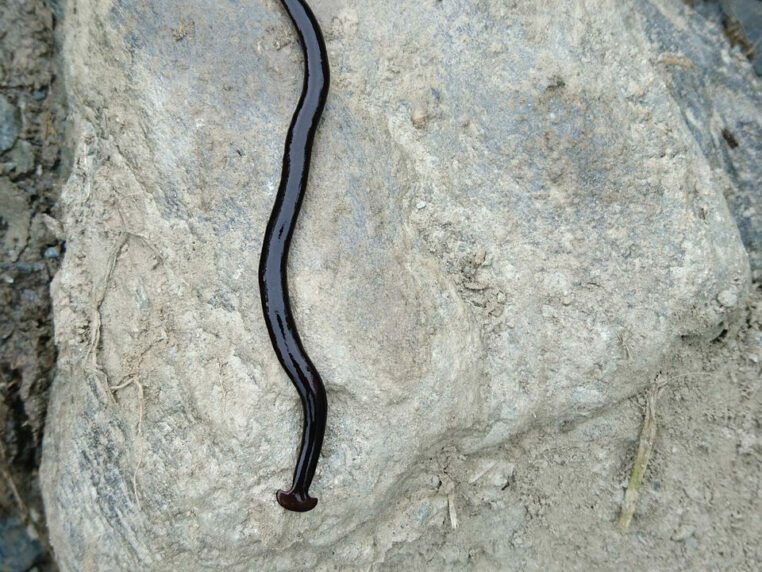
Let’s start with the basics. Hammerhead worms are native to tropical regions, but they’ve spread to various parts of the world, including the United States. They typically grow to about 6-12 inches long and have a flat body with a distinctive hammerhead shape. Their body can come in various shades, including brown, black, and gray. If you’re wondering why they matter, here’s the thing: these worms are predatory and primarily feed on earthworms, which are essential for healthy soil.
One key feature of hammerhead worms is that they’re capable of regenerating body parts. If you cut one in half, it can grow into two complete worms! This means removing them requires careful handling. Understanding their biology helps to realize that simply trying to get rid of them isn’t enough; we need to be strategic about it.
Assessing the Situation: Identifying Infestations
Before you jump into removal tactics, take a moment to assess your situation. Are there just a few hammerhead worms, or is it more of an invasion? You might find them in moist environments, like mulch or under pots, so check those spots carefully.
Here’s a quick checklist to help you determine your level of infestation:
- Look for the worms in damp areas of your garden.
- Check for any signs of damage to your earthworms or soil quality.
- Observe if you see any more of them over a few days.
Assessing the population will inform your next steps and help you understand the best way to tackle the issue.
Gathering Your Supplies for Safe Removal
Now that you’ve assessed the situation, it’s time to gather your supplies. You don’t need any fancy tools, but having the right equipment will make the process smooth and safe. Here’s what you’ll need:
- A pair of gloves (for hygiene and safety).
- A jar or container with a lid to safely transport the worms.
- Water or a solution of saltwater (to humanely deal with any excess worms).
Using gloves is vital—these worms can secrete a substance that might irritate your skin. Plus, nobody wants to handle slimy worms directly, right? Having a jar on hand allows you to transport them away from your garden easily, without harming them.
Safe Removal Techniques for Hammerhead Worms
So, how do you safely remove hammerhead worms from your garden? There are a few techniques you can try, depending on your comfort level and the severity of the infestation.
1. Manual Removal
If you only have a few worms, the manual removal technique is straightforward. Just follow these steps:
- Wear your gloves.
- Gently pick up the worm and place it into your container.
- Make sure the container is tightly sealed to prevent escape.
This method is quick and effective, but remember to check your garden regularly to catch any new arrivals early.
2. Saltwater Method
If you’re dealing with a larger number of worms, the saltwater method can be effective. Here’s how it works:
- Dissolve a few tablespoons of salt in a bucket of water.
- Carefully place the worms into the solution. The salt will dehydrate them, making them easier to handle.
- After a few minutes, release them far away from your garden.
While this method is humane, be cautious about how many worms you place in the saltwater solution at once, as it can be overwhelming for them.
Preventing Future Infestations
Now that you’ve successfully removed hammerhead worms, let’s talk prevention. Keeping your garden healthy will help deter these pests from coming back. Consider these points:
- Maintain good soil health by adding compost and organic matter.
- Avoid overwatering, as hammerhead worms thrive in damp conditions.
- Regularly check for any signs of new worms.
By creating an environment that’s less inviting for these worms, you’ll reduce your chances of future infestations.
When to Seek Professional Help
Sometimes, despite our best efforts, infestations can spiral out of control. If you’re finding it difficult to manage the hammerhead worm population, it might be time to reach out for professional help. Local pest control services or gardening experts can offer tailored solutions that are safe for your plants and soil.
Remember, there’s no shame in asking for help. Getting advice from experts can save you time and frustration, ensuring that your garden remains a healthy environment for all its inhabitants.
Final Thoughts on Hammerhead Worm Removal
Removing hammerhead worms doesn’t have to be an overwhelming task. With the right techniques and a bit of preparation, you can safely manage these creatures in your garden. Whether you opt for manual removal or the saltwater method, always keep your garden’s health in mind. A thriving garden doesn’t just benefit you; it’s a beautiful home for countless species and a vital part of our ecosystem.
So, the next time you spot a hammerhead worm, approach it with confidence, knowing you have the tools to handle the situation. Safe gardening is all about balance, and with your newfound knowledge, you’re well on your way to creating a flourishing space.