
Photographing ribbon worms isn’t just about pointing and shooting. It takes a bit of know-how, patience, and the right conditions. Think of it as an adventure, much like fishing with a camera instead of a rod. You’ll not only capture their beauty but also learn about their habitat, behavior, and the best techniques to spotlight their intricate details. So, grab your camera, and let’s dive into the world of ribbon worms together!
Understanding Ribbon Worms
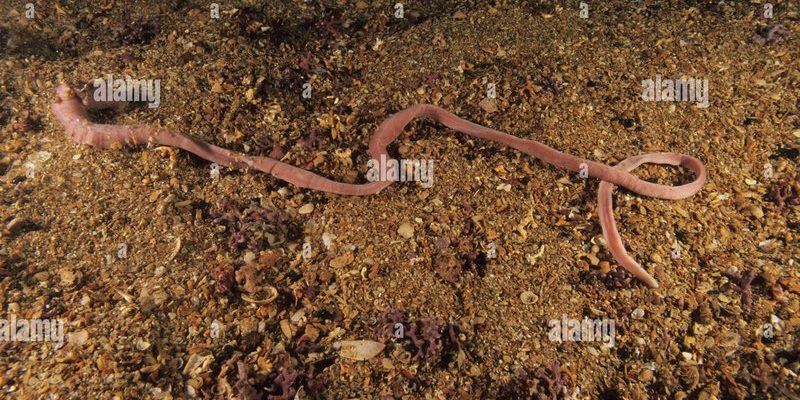
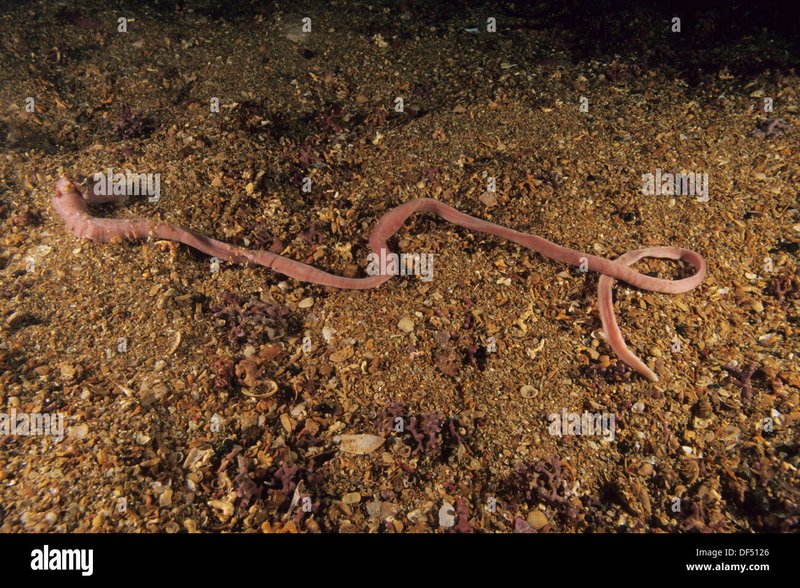
Before we get into the nitty-gritty of photography, let’s take a moment to understand what ribbon worms are. These fascinating invertebrates belong to the phylum Nemertea. They can vary greatly in size, from just a few centimeters to several meters long! Imagine a noodle—only much more colorful and alive. Ribbon worms can be found in marine environments, often hiding in sand, mud, or under rocks.
One of the coolest things about ribbon worms is their ability to extend and contract, which is how they move. They use a unique structure called a **proboscis** to catch prey, which can be both mesmerizing and a bit eerie to watch. As you observe them, you’re likely to see their vibrant colors—everything from deep reds to bright yellows. It’s nature’s palette, just waiting for your camera to capture it!
Understanding their behavior is key to taking great photos. Ribbon worms are often more active during specific times of the day, usually at dawn or dusk. This is when they are more likely to be out and about, making it the perfect time for you to set up your shot.
Choosing the Right Equipment
Now that you’re excited about photographing ribbon worms, let’s talk about the equipment you need. You don’t need the fanciest camera out there, but having the right tools can make a big difference. Here’s what to consider:
- Camera: A DSLR or mirrorless camera is a great choice, but even a good smartphone can work if it has a decent camera.
- Lens: A macro lens is ideal for capturing the intricate details of ribbon worms. This lens allows you to get up close without losing focus.
- Tripod: This can help stabilize your camera, especially in low light conditions or when shooting water.
- Lighting: Natural light is your best friend, but a reflector can help bounce light onto your subject.
It’s also worth considering accessories like lens hoods to minimize glare and cleaning kits to keep your lenses sharp. Let’s be real: no one wants to miss the perfect shot because of smudges on their lens!
Finding the Perfect Setting
Finding the right spot to photograph ribbon worms is just as important as having the right camera. These creatures love to hide, so look for them in tidal pools, sandy beaches, or rocky shores. The best places are usually during low tide when they’re more exposed.
As you explore, keep an eye out for natural features that could enhance your photos. For example, shooting against contrasting backgrounds, like dark rocks or bright sand, can make the colors of the worm pop. You might also want to consider the **time of day**. Early morning or late afternoon not only provides softer light but also adds a magical quality to your shots.
And here’s the thing: patience is key. Sometimes, you’ll need to wait for the right moment to capture a ribbon worm in action. Take your time, observe, and enjoy the moment. The world under the surface has so much to teach you.
Composing Your Shot
Once you find your ribbon worm, it’s time to think about composition. The way you frame your shot can make a huge difference in how vibrant and alive the photo feels. Here are a few tips to keep in mind:
– **Rule of Thirds**: Imagine splitting your frame into a grid. Placing the ribbon worm along these lines can create a more balanced and appealing photo.
– **Depth of Field**: Use a shallow depth of field to blur the background while keeping the worm in sharp focus. This technique draws attention to your subject and creates a stunning effect.
– **Angles**: Don’t be afraid to get low to the ground or shoot from above. Varying your angles can lead to unexpected, interesting photos. Sometimes the best shot happens when you least expect it!
Composition can feel a bit tricky at first, but the more you practice, the more natural it will become. Think of it like learning to ride a bike—it takes a little practice, and soon you’ll be capturing amazing images with ease!
Mastering Natural Light
Natural light is your ally when photographing ribbon worms. It’s softer, more flattering, and can bring out colors beautifully. However, there are a few things to keep in mind:
– **Time of Day**: As mentioned earlier, shooting in the early morning or late afternoon provides a golden hue that can enhance your photos. Midday sun can be harsh and may cause strong shadows, which can make your subject look less appealing.
– **Cloudy Days**: Don’t shy away from cloudy days! The diffused light can create a beautiful, soft glow that’s perfect for macro photography.
– **Avoid Direct Sunlight**: If you’re shooting in direct sunlight, look for shaded areas or use a reflector to bounce light onto your subject. Be mindful of the direction of the light—try to avoid shooting into the sun unless you want a silhouette.
Honestly, learning how to use natural light effectively can take a bit of trial and error, but the results are worth it. You’ll create dynamic images that tell a story and showcase the beauty of these unique marine creatures.
Editing Your Photos
After capturing your ribbon worm photos, it’s time to bring them to life with some editing. Don’t worry; you don’t need to be a pro to enhance your shots. Here are some simple tips for editing:
– **Use Editing Software**: Programs like Lightroom or even smartphone apps can help you adjust brightness, contrast, and saturation. A little tweak can go a long way.
– **Crop Thoughtfully**: Sometimes, all a photo needs is a well-placed crop to enhance the subject. Don’t hesitate to experiment!
– **Sharpen and Enhance Colors**: Highlighting the details and colors of the ribbon worm can make your photos pop. Just be careful not to overdo it—nature’s beauty shines best when it looks natural.
Editing is often the secret sauce that can elevate your photos from good to great. So take your time, and have fun playing around with different styles until you find what feels right!
Sharing Your Work
Now that you’ve captured stunning images of ribbon worms, it’s time to share your hard work with the world. Social media platforms like Instagram and photography forums are perfect places to showcase your photos. Sharing your journey can help inspire others and maybe even connect you with fellow enthusiasts!
Consider writing a caption that tells a bit of the story behind your photo. This can make your post more engaging and invite others to appreciate not just the image, but the experience you had while capturing it. Plus, using relevant hashtags can help your photos reach a wider audience. Think of it like sharing a slice of your underwater adventure!
It’s important to remember that every photographer starts somewhere. Don’t be discouraged if your first few attempts don’t turn out exactly as you envisioned. With every shot, you’re learning and improving—and that’s what makes it all worthwhile.
As you set out to photograph ribbon worms in natural light, remember to enjoy the process. Each click of the shutter is a chance to explore and express the beauty of the natural world. Embrace the adventure, and happy snapping!