
Photographing inchworms in their natural habitat requires a blend of patience, skill, and a good understanding of their behavior. You’ll want to be equipped with a reliable camera—something like the Canon EOS Rebel or a Nikon D3500 can work wonders. These cameras allow you to get up close and personal with your subjects. As we explore how to photograph these fascinating creatures, I’ll walk you through everything you need to know, from location tips to camera settings.
Understanding Inchworm Behavior
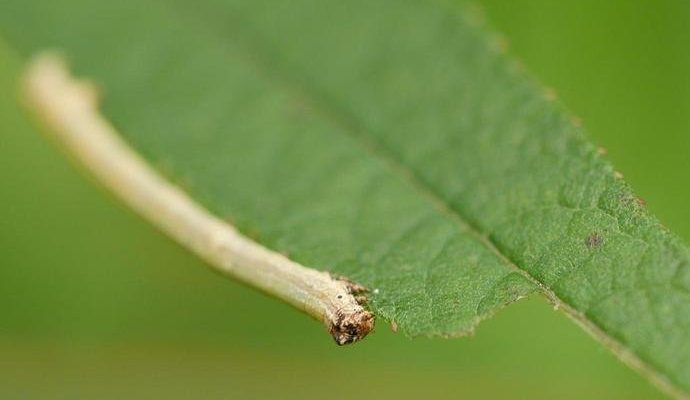
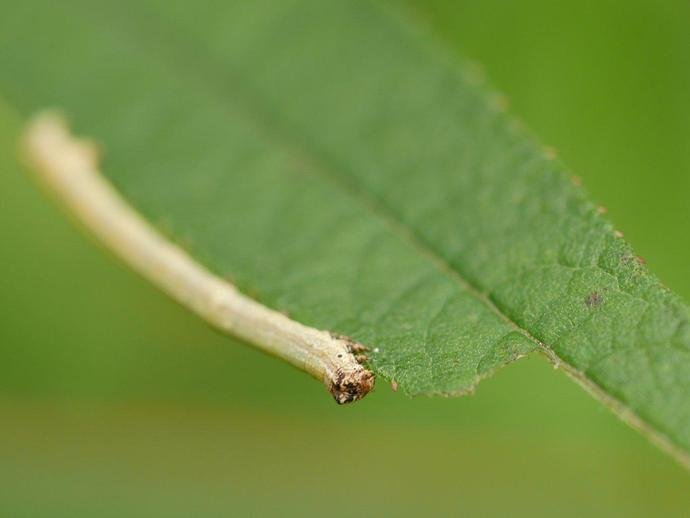
To photograph inchworms effectively, it’s essential to understand their behavior. These little guys are interesting creatures that belong to the larval stage of geometer moths. What sets them apart is their unique locomotion. Instead of crawling like most caterpillars, they move in a unique looping motion. It’s almost as if they’re mastering the art of balancing on an invisible tightrope.
You might be wondering why this matters for photography. Understanding their movement can help you anticipate where they’ll be next. This way, you can capture that perfect shot as they loop and stretch their bodies. Plus, knowing when they’re most active can save you time. Typically, inchworms are more active during warm, sunny days—so plan your shoot accordingly.
Choosing the Right Location
Finding the right spot is crucial when photographing inchworms. They generally thrive in wooded areas, gardens, or even your backyard. Pay attention to places where there are plenty of trees and shrubs. Inchworms love to munch on leaves, so you might find them hanging out on the undersides of leaves or resting on branches.
When you arrive at your chosen location, look closely! Inchworms can blend in well with their surroundings, often resembling the twigs or leaves where they rest. Try to find areas where there’s a healthy amount of foliage. This not only increases your chances of spotting them but also offers beautiful natural backdrops for your photographs.
Camera Settings for Inchworm Photography
Getting your camera settings right is essential for capturing the unique beauty of inchworms. If you’re using a DSLR or mirrorless camera, consider starting with a macro lens. This type of lens allows you to get up close to your subject without disturbing it. A focal length of around 100mm is ideal, but even a good 50mm lens can work if you’re close enough.
In terms of settings, keeping your aperture wide (like f/2.8 or f/4) will help you achieve a lovely depth of field, making the inchworm the star of the image while softly blurring the background. You might also want to set your shutter speed to at least 1/200 seconds to freeze their movement. It’s all about those tiny details!
Lighting Tips for Better Photos
Lighting can make or break your photos, especially with small subjects like inchworms. Early morning or late afternoon light is usually the most flattering, casting a soft glow that enhances colors and textures. Harsh midday sun can cause unwanted shadows and bright spots, making it difficult to highlight the delicate features of these little creatures.
If you find yourself shooting in bright conditions, consider using a diffuser. This can help soften the light, making your subjects pop without overwhelming them with brightness. Reflectors can also bounce light onto the inchworm, illuminating those tiny details that you want to capture.
Composition Techniques
Once you’ve found your inchworm and set your camera, it’s time to think about composition. The rule of thirds is a great starting point. Imagine dividing your frame into a grid of nine squares. Place the inchworm along those lines or at the intersections for a more dynamic image.
Don’t hesitate to experiment with angles, either. Sometimes shooting from below can create a dramatic perspective, while a bird’s-eye view might highlight their surroundings. **Here’s the thing**: varying your composition will lead to more interesting images. So, feel free to get creative!
Ethical Considerations in Nature Photography
While capturing beautiful images of inchworms is rewarding, it’s crucial to do so ethically. Always be mindful of their natural habitat. Try to avoid disturbing the plants they live on. Instead, observe from a distance. If you need to get closer, do so gently and respectfully.
Also, avoid handling them unless necessary. Inchworms can easily get injured, and their skin is sensitive. By being a responsible photographer, you’re not only ensuring the safety of these tiny creatures but also preserving the environment for other photographers in the future.
Editing Your Photos
Once you’ve snapped a few great shots, it’s time for editing. Even the best photographers can enhance their images in post-processing. Programs like Adobe Lightroom or Photoshop can help you adjust exposure, contrast, and color balance.
Focus on enhancing the natural beauty of your photos without overdoing it. A subtle increase in saturation can make those green leaves pop while keeping the inchworm’s colors true to life. Don’t forget to crop for composition if needed, ensuring the inchworm remains the star of your shot.
In conclusion, photographing inchworms in their natural habitat is a unique and rewarding experience. By understanding their behavior, choosing the right location, and employing the right camera techniques, you can capture stunning images that celebrate these small wonders of nature. So grab your camera, head out into the wild, and let your creativity flow. You might just discover a whole new world right at your feet!