
Inchworms, often seen inching along branches and leaves, belong to the larval stage of various moth species. The best part? They’re relatively easy to observe and care for, making them an ideal choice for classroom observation. Imagine sitting at your desk, watching as these little critters munch away at leaves, grow, and eventually transform into beautiful moths. It’s a captivating process that can spark curiosity and foster a love for nature among students.
In this article, we’ll explore how to observe inchworm metamorphosis in the classroom, what you’ll need to get started, and some tips for making the experience both educational and fun. Let’s dive in!
What Are Inchworms?
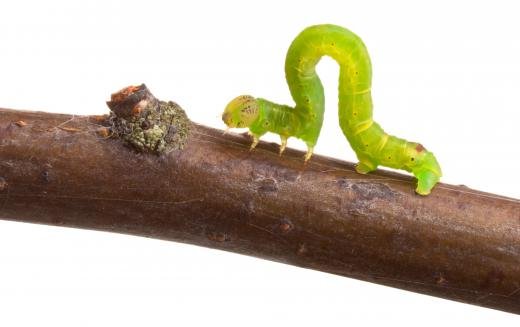
To understand how to observe inchworm metamorphosis, we first need to know what exactly an inchworm is. Inchworms aren’t a single species but are the larval forms of several types of moths, mainly from the Geometridae family. They’re called inchworms because of their distinctive way of moving—by “inching” along in a looping motion. It’s like watching a tiny green ribbon wriggle its way across a surface.
Inchworms are typically green or brown, which helps them blend in with leaves and twigs. This camouflage is crucial for their survival as it protects them from predators. You might be wondering, “How do they become moths?” Well, that’s where the metamorphosis comes in. These little guys go through four stages: egg, larva, pupa, and adult moth. Observing this transformation can be a delightful journey for students.
You can find inchworm eggs in the late spring or early summer, often laid on the underside of leaves. Once they hatch, the larvae (the inchworms) emerge, ready to munch on foliage to fuel their growth. This stage is the perfect time for classroom observation!
Gathering Supplies for Your Classroom Observation
Before diving into the observation, you’ll need a few supplies to create a suitable environment for your inchworms. Here’s a simple list to get you started:
- A clear container: A small terrarium or a large jar works well. Make sure it has a lid to keep the inchworms safe.
- Fresh leaves: Inchworms love to munch on a variety of leaves, like those from oak, cherry, or apple trees. Just make sure they’re pesticide-free!
- A magnifying glass: This will help students get an up-close look at the inchworms and their movements.
- A notepad: Encourage students to document their observations and sketch what they see. This boosts engagement and learning.
Gathering these supplies leads to excitement in the classroom, as students anticipate observing these tiny creatures. Setting up a dedicated area for this observation encourages participation and teamwork among students, making it a fun and collaborative experience.
Setting Up the Habitat
Once you have your supplies, it’s time to set up a comfortable habitat for your inchworms. Here’s how to create a cozy home for them:
1. **Prepare the container**: Make sure your container is clean and has ventilation. If it’s a jar, poke small holes in the lid for air circulation.
2. **Add leaves**: Place a few fresh leaves at the bottom. You can use a mix of leaves to provide variety and ensure the inchworms have plenty to munch on.
3. **Position your environment**: Keep the habitat in a cool, shady spot in the classroom. Direct sunlight can heat up the container too much and harm the inchworms.
4. **Maintain moisture**: Check the leaves for freshness. If they start to wilt, replace them with new ones. You can lightly mist the leaves with water to keep the environment humid but avoid overdoing it.
Creating a suitable habitat is crucial to ensuring the inchworms thrive and continue their remarkable transformation. Enjoy watching the students’ excitement as they embark on this observational journey!
Observing the Metamorphosis Stages
As inchworms grow, they go through several distinct stages, which can take a few weeks to complete depending on the species and environmental conditions. Here’s a breakdown of what students can expect to observe:
**1. Egg Stage**:
The journey starts when inchworm eggs are laid, usually on the underside of leaves. These tiny eggs are often camouflaged, making them hard to spot. If you have the chance to observe this stage, students can learn about the importance of camouflage in nature.
**2. Larva Stage**:
Once the eggs hatch, the inchworms emerge as larvae. This is the stage where students will spend most of their time observing their inchworms’ daily activities. They’ll notice how these little guys feed, grow, and even shed their skin, which is a crucial part of their development.
**3. Pupa Stage**:
After several weeks of eating and growing, the inchworms will find a safe spot to pupate. They can create a silk cocoon or attach themselves to a surface. This stage is fascinating because students will see how inchworms transition from larvae to their adult forms.
**4. Adult Stage**:
Finally, the inchworm will emerge as an adult moth. The transformation is incredible! Encourage students to take notes on how the moth looks compared to its inchworm form. Share insights on the adult moth’s role in the ecosystem, pollination, and how it contributes to biodiversity.
Students will feel a sense of connection to nature as they witness these transformations. This process encourages discussions about life cycles, environmental science, and the beauty of change.
Engaging Activities During Observation
To enhance the learning experience, consider incorporating a few engaging activities into the inchworm observation project. Here are some ideas that can make the process more interactive and fun:
- Nature Journals: Have students maintain a nature journal where they document their observations. Encourage them to sketch the inchworms, write about their behaviors, and note any changes they see.
- Group Discussions: After a day of observation, hold a group discussion. Ask students what surprised them or what they found interesting. This allows for sharing insights and fosters a sense of community.
- Creative Arts: Encourage students to create artwork inspired by the inchworms or the moths. They can craft models, draw pictures, or even write poems about the transformation process.
These activities not only deepen students’ understanding of the inchworm life cycle but also encourage creativity and critical thinking. They’ll remember this experience long after the metamorphosis is complete!
Common Challenges and Troubleshooting
While observing inchworm metamorphosis can be a thrilling experience, there might be a few challenges along the way. Here are some common issues to watch out for and how to address them:
**1. Unfavorable Conditions**:
If the inchworms seem lethargic or stop eating, it could be a sign of unfavorable conditions, such as too much heat or humidity. Ensure that the habitat remains cool and check that the leaves are fresh.
**2. Overcrowding**:
If too many inchworms are in one container, they might compete for food and space. Monitor their numbers and consider splitting them into separate habitats if needed.
**3. Disease or Mold**:
Sometimes, mold can develop on the leaves or in the container. If this occurs, remove any affected leaves and clean the container to prevent any harm to the inchworms.
Staying observant and proactive can help ensure a successful inchworm observation experience. Encourage students to troubleshoot these challenges and learn to care for living creatures responsibly.
Why Observing Inchworm Metamorphosis Matters
Understanding the inchworm’s metamorphosis goes beyond simply watching a caterpillar turn into a moth. It teaches students about life cycles, ecosystems, and the natural world around them. Here are a few reasons why this experience matters:
1. **Fosters Curiosity**: Observing inchworms makes students curious about nature and biology. This can spark a lifelong interest in science.
2. **Encourages Responsibility**: Caring for living creatures teaches responsibility. Students learn that every organism has a role to play and that they can make a difference.
3. **Promotes Environmental Awareness**: Students become more aware of ecosystems and biodiversity. Understanding the importance of insects like inchworms helps cultivate an appreciation for the environment.
4. **Supports Hands-on Learning**: Engaging in a hands-on observation project makes learning active and dynamic. Students can connect theoretical knowledge with real-life experiences.
In short, observing inchworm metamorphosis in the classroom is a powerful way to enhance education. It combines fun, hands-on learning with critical concepts in biology and environmental awareness.
As you wrap up this fascinating journey into the world of inchworm metamorphosis, remember that it’s more than just observing a life cycle—it’s about inspiring the next generation’s love for nature and science. Watching inchworms transform right before your eyes can lead to big questions and even bigger discoveries. So grab those inchworms, gather your students, and let the adventure begin!