
In this guide, we’ll dive into the ins and outs of live rock dipping and how it can help you eliminate bristle worms from your aquarium. With a few simple supplies and step-by-step instructions, you’ll be able to keep your live rock free from unwanted hitchhikers. I’ll even throw in some practical tips and alternatives, so you can feel confident in your care routine.
What Are Bristle Worms and Why Are They Problematic?
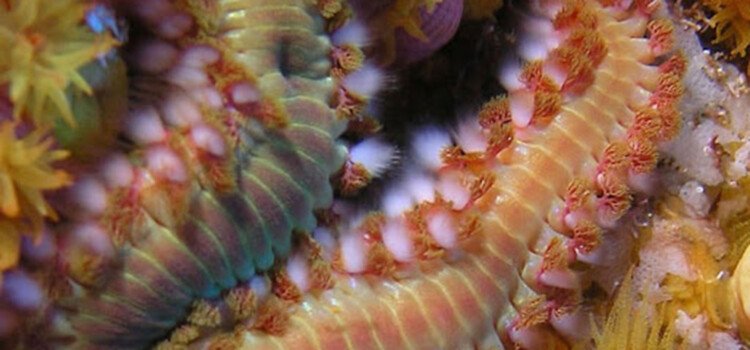
Bristle worms, those wiggly little creatures that sometimes appear on your live rock, belong to a group called polychaete worms. While they’re mostly scavengers and can help break down organic matter, having too many in your tank can indicate a problem. They’re like that one friend who shows up uninvited—great in moderation, but a nuisance when they overstay their welcome.
These worms multiply rapidly, especially in tanks that have excess nutrients. They thrive in environments with high organic waste, so their presence might suggest that you’re overfeeding your fish or that your water quality isn’t quite what it should be. Plus, their bristles can irritate fish and corals, leading to more significant stress in your aquarium ecosystem.
If you’re noticing these little guys creeping up in your tank, it’s time to take action. Don’t worry; live rock dipping is a simple, efficient way to help control their population.
What Is Live Rock Dipping?
Live rock dipping is a technique used to clean your live rock without harming the beneficial organisms that call it home. It’s a bit like giving your rock a spa day, getting rid of unwanted pests and debris while keeping your coral and beneficial microbes safe. The process involves briefly soaking the live rock in a solution that targets the unwanted critters.
There are a few different solutions you can use for dipping, each with its pros and cons. Some aquarium enthusiasts swear by commercial dipping solutions designed specifically for this purpose, while others prefer a more natural approach, like using saltwater. The key is to find a method that works best for your tank’s unique ecosystem.
Supplies You’ll Need
Getting ready for a live rock dip doesn’t have to be complicated, but you will need a few supplies to ensure everything goes smoothly. Here’s a quick list:
- Bucket: You’ll need one to mix your dipping solution.
- Dipping solution: Choose between a commercial dip or make your own with saltwater.
- Net or tweezers: These will help you handle the live rock without getting your hands too dirty.
- Timer: Keep track of how long you’re soaking the rock.
- Rinse bucket: This is for rinsing off the live rock post-dip.
Having these supplies at the ready will make the process much smoother.
Step-by-Step Guide to Live Rock Dipping
Ready to give your live rock a clean? Here’s a straightforward guide to help you through the live rock dipping process:
Step 1: Prepare Your Dipping Solution
If you’re using a commercial product, follow the manufacturer’s instructions for mixing the solution. If you opt for a DIY approach, mix a strong saltwater solution using aquarium salt and fresh water—aim for about 1.025 specific gravity.
Step 2: Soak the Live Rock
Place the live rock into your dipping bucket, making sure it’s fully submerged. Use your timer to keep track; typically, a soak of about 5 to 10 minutes is effective. During this time, you might notice some bristle worms and other debris dislodging from the rock. Don’t be alarmed; this is just the solution doing its job.
Step 3: Rinse and Inspect
After the soaking time is up, carefully remove the rock and place it in your rinse bucket filled with fresh aquarium water. This step is crucial, as it helps wash away any remaining dip solution and dislodged pests. Take a moment to inspect the rock. If you see any leftover bristle worms or other unwanted guests, you can use tweezers or a net to remove them.
Step 4: Return the Rock to Your Tank
Finally, gently place the cleaned live rock back into your aquarium. It’s a good idea to keep an eye on the water parameters for a few days after dipping—just to ensure everything is stable and that your tank’s ecosystem is adjusting well.
How Often Should You Dip Your Live Rock?
You might be wondering how frequently you should perform live rock dipping. It really depends on your specific situation. If you notice a sudden increase in bristle worm activity or other pests, it’s a good idea to conduct a dip.
For routine maintenance, dipping every few months can help keep populations in check. Just remember, it’s crucial to strike a balance. Over-dipping can stress your fragile marine life, so be mindful of your tank’s overall health.
Alternatives to Live Rock Dipping
While live rock dipping is effective, it’s not the only way to manage bristle worm populations. Here are a couple of alternatives you could consider:
- Predatory Fish: Introducing fish that eat bristle worms, like certain wrasses, can help keep their numbers down.
- Trap Systems: You might set up traps designed to catch bristle worms, reducing their population over time without chemicals.
Each approach has its pros and cons, so weigh your options carefully. Sometimes, a combination of methods works best.
The Bottom Line
Maintaining a healthy aquarium is all about balance. Live rock dipping is a practical, low-stress way to keep bristle worms and other pests at bay. By following these steps, you can enjoy a thriving aquatic environment without unwanted guests creeping around.
As you get into the rhythm of live rock dipping, don’t forget to monitor your tank closely. Observing how your fish and corals respond is part of the fun—and it’s also how you know you’re doing things right. So, grab your supplies, and let’s keep that aquarium beautiful and healthy!