Transporting silkworms isn’t as straightforward as tossing them in a box and heading out the door. There are several factors to consider, like temperature, moisture levels, and food supply. Think of it like packing for a long road trip—you wouldn’t forget snacks or water for the journey, right? So let’s dive into the best ways to transport silkworms safely over long distances, ensuring they thrive no matter where their new home may be.
Understanding Silkworm Life Stages
To successfully transport silkworms, it’s crucial to understand their life stages. Silkworms go through several growth phases: egg, larva (caterpillar), pupa, and adult moth. Each stage has different needs, so knowing where your silkworms are in this cycle can affect how you prepare for transportation.
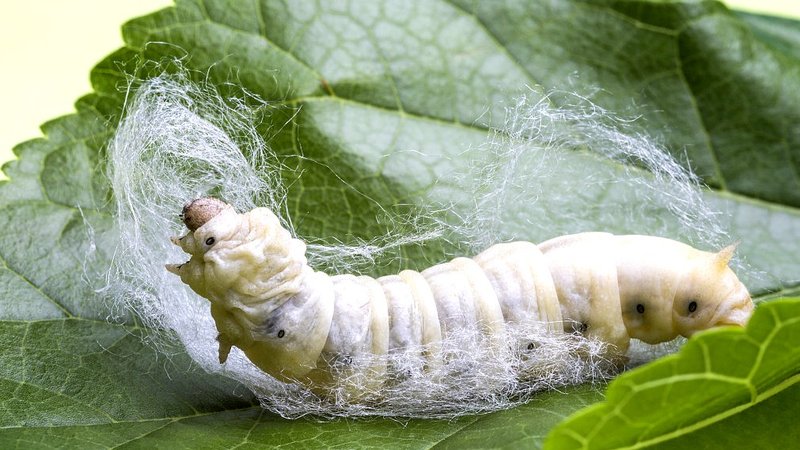
For example, if you’re dealing with **larvae** (the caterpillar stage), they will need **food**—typically, mulberry leaves—to sustain them. If they’re **pupae**, they won’t need food, but they’ll need a secure environment to prevent injury. Adult moths can fly, but you wouldn’t want them escaping during transport.
So, assess the stage they are in before figuring out how to pack and transport them. Here’s a brief overview:
- Eggs: Need controlled humidity and temperature.
- Larvae: Require food and moisture during transport.
- Pupae: Should be kept dry and secure.
- Adults: Need ventilation, but should be contained.
Understanding their **life stages** is the first step in keeping them healthy during transit.
Choosing the Right Transport Container
Now that you know what stage your silkworms are in, it’s time to pick the right container for transport. The container is like a cozy little hotel for your silkworms. It should provide a suitable environment while being secure enough to prevent escape or damage.
For **larvae**, a breathable box that allows air circulation is ideal. You could use a container lined with soft paper towels to absorb any moisture, which keeps things from getting too soggy. If you’re dealing with pupae, a box that’s dark and secure will help keep them from getting disturbed.
Here’s what to consider when choosing a container:
- Material: Use clean plastic or cardboard containers.
- Ventilation: Ensure there are holes for airflow.
- Temperature Control: Insulating materials can help maintain temperature during transport.
- Padding: Consider using soft materials to prevent movement and injury.
By selecting the right container, you’re setting your silkworms up for a smoother journey.
Maintaining Temperature and Humidity
Temperature and humidity are critical factors when transporting silkworms. Think of it like taking a delicate cake to a party—you wouldn’t want it to melt or get soggy, right? Silkworms thrive in certain conditions, so you’ll need to mimic their preferred environment.
The ideal temperature for transporting silkworms is around 68°F to 77°F (20°C to 25°C). If your journey is long, consider using ice packs or warming packs, depending on the weather. Just make sure those packs are insulated so they don’t come into direct contact with the silkworms.
Humidity is just as important. For larvae, aim for conditions that are not too dry or too humid. A small, damp cloth placed inside the container can help with moisture without drowning the little guys.
Here’s a quick rundown:
- Keep it cool: Maintain an ideal temperature throughout transit.
- Monitor humidity: Use damp cloths or moisture-absorbing materials.
- Check regularly: If possible, take breaks during long transport to check conditions.
By paying attention to temperature and humidity, you’ll help ensure your silkworms arrive healthy and happy.
Feeding Silkworms During Transit
If you’re transporting **larvae**, they are going to need a snack for the ride! Just like you wouldn’t want to be stuck on a long trip without food, silkworms also need sustenance. It can be a bit tricky to transport food safely, but with some planning, it can be done.
One option is to pack fresh **mulberry leaves** into the container with the larvae. Just make sure to pack them carefully to avoid overcrowding. If you can’t transport fresh leaves, consider using dried mulberry leaves or a silkworm feed made for travel.
If you’re transporting pupae or adult moths, they don’t need food, so sit back and relax on that front. Here’s how to handle feeding larvae:
- Fresh Leaves: Always the best option, just pack them well.
- Dried Leaves: A good alternative if fresh isn’t available.
- Silkworm Feed: Specialized food can be an option if you’re in a bind.
Having a game plan for their meals will make a huge difference in their wellbeing during transport.
Timing Your Transport
Timing is everything. If you’re transporting silkworms, you want to pick the right day and hour for the journey. Consider factors like temperature, humidity, and your silkworms’ current life stage.
If possible, aim for early morning or late evening when it’s cooler outside. Avoid extreme temperature days—like sweltering summer afternoons or chilly winter nights—if you can. It’s like planning a picnic; you want to pick a sunny but not-too-hot day for maximum enjoyment!
Here are a few timing tips:
- Avoid High Temperatures: Try to travel during cooler parts of the day.
- No Extreme Weather: Wait for a sunny day, not a stormy one.
- Plan for Stops: Schedule breaks to check on the silkworms if it’s a long trip.
Good timing can help keep stress levels low for both you and your precious cargo.
Checking on Your Silkworms Post-Transport
Once you’ve successfully transported your silkworms, it’s time for a little check-up. This is like giving your friends a warm welcome after a trip—you want to make sure they feel settled and safe in their new environment.
Start by gently opening the container and checking on their condition. Are they moving around? Do they look healthy? If you transported larvae, offer them some fresh leaves right away to help them settle in.
Here’s what to do post-transport:
- Inspect Condition: Look for signs of stress, like inactivity or visible damage.
- Provide Food and Water: Fresh leaves or food should be given immediately.
- Observe Behavior: Watch how they’re responding in their new environment.
Taking a few moments to care for them after transport helps ensure they thrive in their new home.
In conclusion, transporting silkworms over long distances requires careful planning, attention to their specific needs, and a dash of patience. By understanding their life stages, choosing appropriate containers, managing temperature and humidity, feeding them properly, timing your transport wisely, and checking in after the journey, you can help ensure your silkworms arrive in great shape. With a bit of extra effort, they can settle into their new environment without missing a beat. So go ahead, pack those silkworms for their adventure—you’ve got this!

