
Worms are nature’s recyclers, breaking down organic materials into nutrient-rich soil. By setting up a worm bin, you’re not only reducing waste, but you’re also boosting the health of your plants with homemade compost. It’s a win-win! Now, let’s dig into the details of how to create your own worm bin for kitchen waste.
Choosing the Right Worms for Your Bin
When it comes to starting a worm bin, not just any worm will do. You need **red wriggler worms** (Eisenia fetida), which are the rock stars of composting. They thrive in decaying organic matter and are super efficient at breaking down scraps. Honestly, they’re like the speedsters of the worm world, munching through food like it’s their job—because it is!
You might be wondering how to get these worms. Many people purchase them online or at local gardening stores. A typical starting amount would be around **one pound** of red wrigglers, which can handle a reasonable amount of kitchen waste each week. Once you have your worms, you’ll want to make sure they have a comfy home to settle into.
Picking the Perfect Container
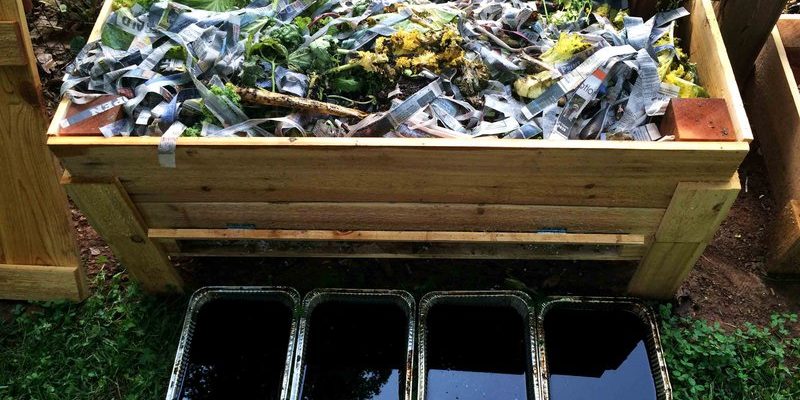
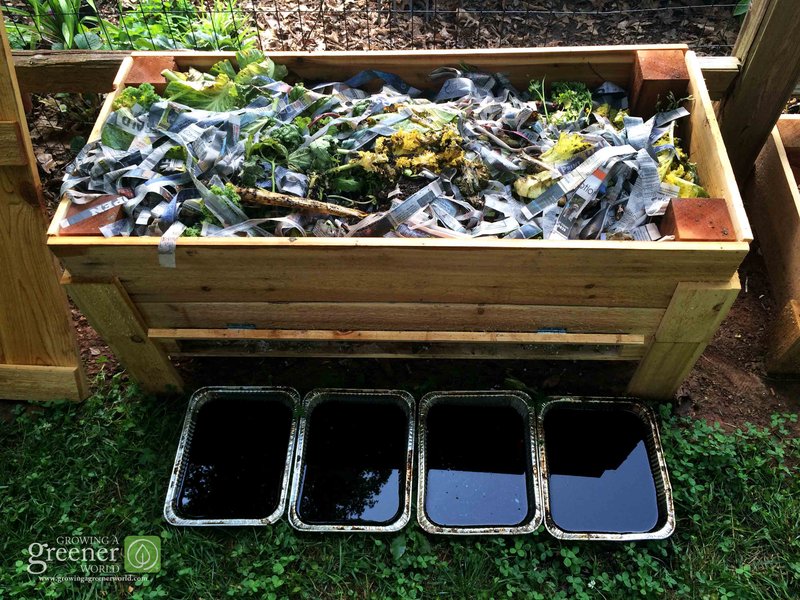
The container you choose for your worm bin can make a big difference in your worms’ happiness. You can use a wooden crate, a plastic storage bin, or even a specially designed worm bin. Just make sure your container is at least **10-12 inches deep**. This gives the worms plenty of room to work their magic.
Here’s the thing: whatever container you choose, it needs to have good airflow. Drill holes in the sides and the lid for ventilation. Worms need oxygen just like we do! If you’re using a plastic bin, aim for a size of about **18 gallons**—this will accommodate your worms and their food. Plus, it’s manageable for beginners.
Preparing the Bedding
Before adding worms, you need to prepare a cozy bed for them. Think of it as making a nice nest. This bedding provides the worms with a comfortable environment and a source of carbon. You can use shredded cardboard, newspaper, or dried leaves. Just make sure to tear everything into small strips—this makes it easier for the worms to munch on.
Once you have your material, moisten it lightly until it feels like a damp sponge. You want it wet but not dripping. Then, mix your bedding in the bin to help aerate it. The worms will appreciate this fluffy goodness as they start to settle in.
Adding Kitchen Scraps to Your Worm Bin
Now comes the fun part—adding your kitchen scraps! Red wrigglers love fruits and vegetable scraps, coffee grounds, and even crushed eggshells. Just remember, they’re not fans of meat, dairy, or oily foods. This could lead to odors and unwanted pests. Stick to the basics.
When adding scraps, chop them into smaller pieces to speed up the decomposing process. Aim for a balance: add scraps in moderation, similar to how you would feed a pet. Too much at once can overwhelm the system and lead to a smelly bin. A good rule of thumb is to add scraps weekly.
Maintaining Your Worm Bin
After setting everything up, the next big task is maintenance. Your worm bin shouldn’t require too much effort, but it does need some care. Keep the bedding lightly moist, and check regularly. If it’s too wet, add dry bedding. If it’s too dry, sprinkle a little water. It’s a bit like keeping a houseplant alive; the right balance is key!
You’ll also want to monitor your worms. If they’re escaping the bin, it might be too wet or too hot. They tend to seek a more comfortable environment! If you notice an unpleasant smell, chances are you’ve fed them too much or added something they didn’t like. A quick fix can be to remove excess food and maintain airflow by adjusting the bedding.
Harvesting the Compost
After a few months of care, you’ll notice that your worm bin starts to fill with dark, crumbly compost—this is your **vermicompost**, and it’s like gold for your garden! You might be wondering how to harvest it. There are a few methods to do this, but a popular one is known as the “migration method.”
You’ll want to push the contents to one side of the bin, then add fresh bedding and scraps to the other side. The worms will naturally migrate to the new food source. After a couple of weeks, you can scoop out the compost from the side where the worms used to be. You’ll be left with fresh, nutrient-dense compost ready to enrich your plants.
Common Troubleshooting Tips
Even with the best intentions, things can go a little awry in your worm bin. Here are some common problems and how to solve them:
- Bad Odors: This usually means there’s too much food or moisture. Check the balance and reduce the scraps if necessary.
- Worm Escapees: If worms are trying to escape, it might be too wet or too hot. Adjust the environment to make it more comfortable.
- Slow Decomposition: If you notice that scraps are not breaking down quickly, you might need to chop them smaller or add more bedding to assist with aeration.
By keeping a close eye and making small adjustments, you can ensure a thriving worm bin for years to come.
Why Start a Worm Bin?
Setting up a worm bin is not just a fun project—it’s a way to reduce your kitchen waste and create a natural fertilizer right at home. Every bit of compost you produce helps the planet by enriching the soil and promoting healthy plant growth.
Plus, it can be pretty fascinating to watch your worms do their thing! It’s like having a mini ecosystem in your home. So, why not give it a try? You’re not just feeding worms; you’re feeding your garden, too.
In wrapping things up, starting a worm bin for kitchen waste is a straightforward yet rewarding endeavor. With a little setup, care, and attention, you’ll be turning scraps into rich compost before you know it. Let those worms do their magic, and get ready to enjoy the benefits of a healthier garden and a greener planet!