
Let’s think of it like trying to take candid photos of a shy friend at a party. You want to capture their essence, but you also don’t want to make them uncomfortable or draw too much attention to them. In this guide, we’ll explore practical tips and techniques to help you achieve striking velvet worm photography while ensuring you leave them undisturbed.
So, grab your camera, and let’s dive into the world of velvet worms!
Understanding Velvet Worms
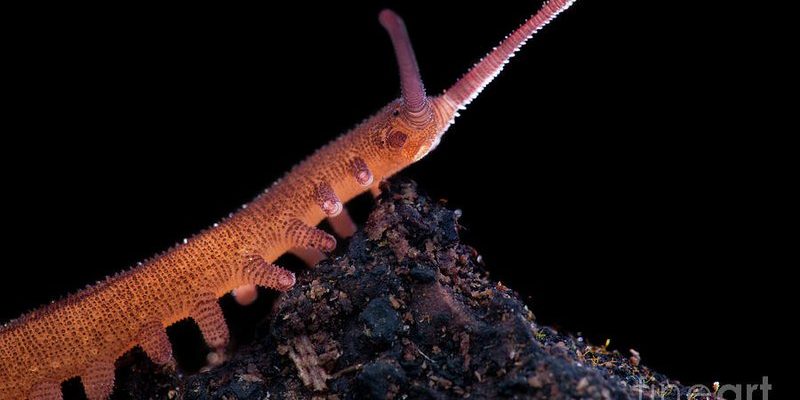
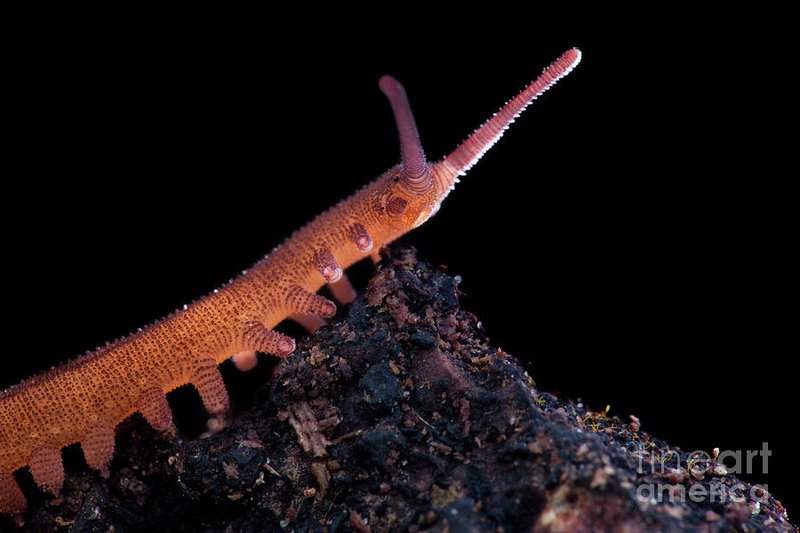
Velvet worms, also known as *onychophorans*, are fascinating creatures that live in moist environments, often in leaf litter or under logs. They have a soft, velvety texture that gives them their name. What makes them particularly interesting is their unique way of hunting; they secrete a sticky slime to capture prey, which can be quite a sight!
These creatures are relatively rare and can be sensitive to disturbances. So, understanding their behavior and environment is vital before you start snapping photos. They’re most active during humid conditions, typically at night. In the daytime, they may seek refuge in the cool, damp places they call home.
Here’s the thing: the more you know about your subject, the better your chances of getting those stunning shots. By observing them first, you can plan your photography session around their habits and increase the likelihood of getting great photos.
Choosing the Right Gear
Selecting the right gear is a crucial step in photographing velvet worms. You don’t need a fancy camera to get started—many modern smartphones can take excellent close-up shots. However, if you want that professional touch, consider investing in a DSLR or mirrorless camera with a macro lens.
Here are some essential pieces of gear to consider:
- Macro lens: This will allow you to get up close and personal with the velvet worms without invading their space.
- Tripod: A sturdy tripod can be your best friend for stability, especially in low-light conditions.
- Remote shutter release: This helps to eliminate camera shake when you press the shutter button, ensuring crisp, clear images.
- Natural light: Whenever possible, use natural light to bring out the true colors and textures of the worms.
Using the right gear can make a significant difference in your results. Remember, the goal is to capture these creatures in their natural environment, so try to keep it simple and light.
Finding Velvet Worms in Their Natural Habitat
Now that you’re geared up, you need to find your velvet worms. These creatures prefer humid, dark, and damp environments. Look for them in areas rich in leaf litter, moss, or under logs. Early mornings or after rain are the best times to spot them, as they’ll often be more active then.
When searching for velvet worms, tread lightly. They’re delicate, and too much disturbance can scare them away. Here are some tips for finding them without causing a fuss:
1. **Look under debris:** Gently lift leaves or logs and take a peek underneath. Be careful not to crush any creatures that might be hiding there.
2. **Observe quietly:** Stay still and watch for movement. Velvet worms can blend into their surroundings, so patience is key.
3. **Consider their surroundings:** They thrive in specific ecosystems, often in tropical or subtropical forest areas, so do some research to find suitable habitats.
Finding these elusive creatures requires patience and mindfulness. It’s about blending into their environment rather than forcing a sighting.
Approaching and Positioning for Shots
Once you’ve located a velvet worm, it’s time to think about how you’ll approach them. Moving too quickly or making loud noises can startle them, so slow and steady wins the race here.
Here’s a simple approach to positioning for your shots:
1. **Stay calm:** Take a deep breath! Approach the worm slowly, allowing it time to acclimatize to your presence.
2. **Get low:** Velvet worms are often found close to the ground. Position yourself at their level to get the best angle.
3. **Use a wide aperture:** This helps create a shallow depth of field, allowing the worm to stand out sharply against a blurred background.
4. **Mind your shadow:** Be aware of where your shadow falls—if it blocks the light or makes the worm feel threatened, adjust your position accordingly.
Photographing a velvet worm is like trying to capture a whisper. It takes gentleness, patience, and a keen eye to get that perfect shot.
Shooting Techniques for Velvet Worms
Now that you’re in position, let’s get into some shooting techniques to help you capture those stunning images. You want to highlight the unique features of the velvet worm, like their texture and movement.
Here are a few techniques to consider:
– **Focus on their texture:** The soft, velvety skin of velvet worms is their standout feature. Use macro settings on your camera to really showcase that detail.
– **Play with angles:** Don’t just shoot from the front. Try different angles to capture the worm in action or interacting with its environment.
– **Be patient:** Sometimes, the best shots come when the creature is in motion. Wait for a moment where the worm exhibits behavior that tells a story—like hunting or retreating.
– **Experiment with settings:** Play around with ISO settings and shutter speeds to find what works best under varying light conditions.
Capturing the essence of a velvet worm can take practice, but with the right techniques, you’ll end up with photos that truly reflect their beauty.
Respecting Velvet Worms and Their Environment
As a photographer, it’s your responsibility to respect your subjects and their habitats. Velvet worms are not just photo opportunities; they play an important role in their ecosystems. Here are ways to ensure you’re being a responsible photographer:
1. **Minimize disturbance:** Always take care not to damage their habitat. If the ground is soft, be careful where you step.
2. **Limit handling:** Avoid picking them up or manipulating them for the best shots. This can stress them out and disrupt their natural behavior.
3. **Leave no trace:** After your photography session, make sure to return the area to its original condition. Replacing leaves and logs can help make sure their home remains undisturbed.
Respect is key. You’re there to admire and document their world, not to alter it.
Editing and Sharing Your Velvet Worm Photos
After capturing your images, the fun doesn’t stop. Editing your photos can help bring out the colors and details that make velvet worms so enchanting.
Here are a few tips for editing and sharing your work:
– **Enhance colors subtly:** Use editing software to tweak brightness, contrast, and saturation, but keep it natural. You want the worm to look as lifelike as possible.
– **Crop for composition:** Sometimes a little cropping can draw attention to your subject, making it the focal point of your image.
– **Share responsibly:** When posting your pictures online, include details about where you found the worm and the importance of protecting their habitat. It can help raise awareness about these incredible creatures.
Editing is where you can really put your personal touch on your photos, turning good shots into great ones!
Photographing velvet worms is an exciting and rewarding endeavor that allows you to connect with nature in a unique way. By understanding their behavior, choosing the right gear, and applying considerate techniques, you can capture their beauty without disturbing them.
Remember, every time you step into the wild, you’re not just a photographer—you’re a storyteller, committed to sharing the charm of these extraordinary creatures. So, take your time, respect their space, and enjoy the process. Happy shooting!