
But here’s the thing: taking good photos of glow worms requires a bit more than just pointing and shooting. You need to understand how to create a soft, natural look to showcase their ethereal glow. We’ll dive into some essential techniques and tips that will help you achieve stunning shots, even without the bright glare of a flash. You might find that using a good remote can also help in capturing those moments without any shake.
Understanding Glow Worms
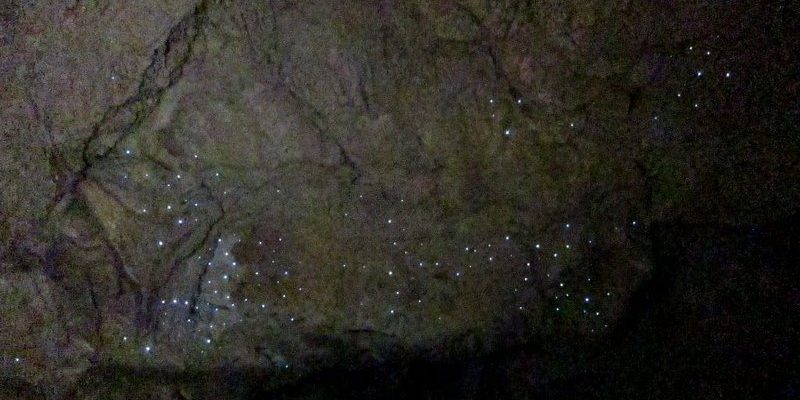
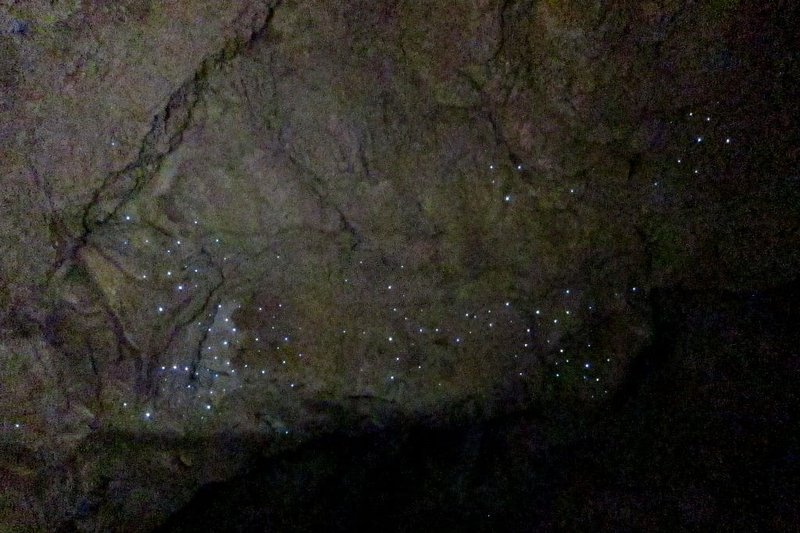
Before we jump into the nitty-gritty of photography, let’s take a quick moment to appreciate what glow worms really are. These little critters aren’t actually worms, but the larvae of certain beetles. They produce bioluminescent light as a way to attract prey and communicate. So, when you’re out there, you’re not just snapping pretty pictures; you’re witnessing a fascinating part of nature.
Glow worms are primarily found in dark, damp places, often in caves or beneath overhanging rocks. They thrive in low-light environments, so it makes sense that photographing them requires some finesse with your camera settings. You’ll need to be patient, as they do tend to be a bit shy when it comes to bright lights.
Choosing the Right Equipment
When photographing glow worms, your equipment matters. You’ll want a camera that allows for manual settings. Here’s a quick list of gear to consider:
- DSLR or mirrorless camera: These cameras offer great low-light performance.
- Tripod: A sturdy tripod is essential for keeping your camera steady during long exposures.
- Wide aperture lens: A lens with a wide aperture (like f/2.8 or wider) will help gather more light.
- Remote shutter release: Using a remote prevents camera shake when taking long exposure shots.
You might be wondering, “Can I use my smartphone?” While some smartphones can do a decent job, they typically struggle in very low light. If you primarily use your phone, consider investing in a tripod and remote shutter accessory designed for mobile photography to enhance your results.
Camera Settings to Use
Now that you’ve got your gear, it’s time to set up your camera. Photography is all about balance—especially with glow worms. You want to capture the light they give off without ruining the mood. Here’s how:
1. Set to Manual Mode: This gives you full control over your settings, allowing you to adjust shutter speed, aperture, and ISO as needed.
2. ISO Settings: Start with an ISO of around 800 or higher. Higher ISO settings will help in low light, but keep in mind that too high can introduce noise.
3. Aperture: Use a wide aperture (f/2.8 or lower) to let more light in. This will help to create that soft focus effect around the glow worms.
4. Shutter Speed: Since you’ll be working in the dark, a longer shutter speed (around 5–20 seconds) will allow your camera to gather enough light. Just remember, using a longer exposure can wash out the glow worms if it’s too bright outside.
Here’s the thing about long exposures: you want to be patient as you adjust these settings based on the conditions. Don’t hesitate to experiment until you find the perfect balance.
Finding the Right Location
You’ll find glow worms in various locations, but not all spots are created equal. Researching where to go is essential for success. Look for:
- Caves or grottoes: Many caves are famous for their glow worm populations.
- Forested areas: Damp forests near streams or waterfalls often host these creatures.
- National parks or nature reserves: Many parks have designated areas for viewing glow worms.
When scouting for locations, it’s helpful to visit the site during the day to plan your shot. Familiarize yourself with the terrain, so you’re not stumbling around in the dark later. Plus, knowing where to set up your camera will save you time when it gets dark.
Timing and Patience
Timing is everything when it comes to photographing glow worms. They are usually most visible at dusk and during the night, especially after a rain. Plan your shoot for early evening when the light fades. Here’s how to approach it:
– Arrive Early: Get to your spot before it gets dark. This allows you to set up your equipment and find the best angle without rushing.
– Be Patient: Glow worms may take time to appear fully. Use this time to test your camera settings, adjust your tripod, and even scout for additional angles.
– Observe Light Conditions: If there’s too much ambient light from nearby towns or streetlights, it might wash out the glow worms’ light. Move to a darker area if needed.
Patience is key, so take your time and enjoy the experience. You may find that the stillness of the evening adds to the beauty of the moment.
Composing Your Shot
Once you’re in the right spot at the right time, it’s crucial to think about composition. This can make or break your photo. Here are some tips to consider:
1. Focus on the Glow: Make the glow worms the focal point of your image. You might want to try a close-up to capture their sparkling lights, or you can include some surrounding elements like rocks or trees for context.
2. Rule of Thirds: Imagine dividing your frame into thirds both horizontally and vertically. Place your main subject (like a cluster of glow worms) along those lines or intersections. This creates a more balanced, interesting shot.
3. Foreground Interest: Incorporating elements in the foreground can lead to more dynamic compositions. Think about including some plant life or rocks to add depth to your photograph.
As you frame your shot, visualize how it will look once the light is captured. You might be surprised how slight adjustments can vastly improve your photo.
Post-Processing Your Photos
Once you’ve captured your shots, it’s time to make them pop with post-processing. You don’t need fancy software; even basic editing tools can enhance your photographs. Here’s what to consider:
– Adjust Brightness and Contrast: You’ll want to emphasize the glow. Increase the brightness slightly, but avoid overexposing the glow worms.
– Reduce Noise: If you had to use a high ISO, you might notice some graininess. Most editing software has noise reduction tools that can help clean it up.
– Crop and Straighten: Take a moment to crop out any distractions and straighten your image. This little step can make a big difference.
Post-processing is like putting the finishing touches on a painting—small tweaks can elevate your work from good to fantastic.
Final Thoughts on Photographing Glow Worms
Photographing glow worms without flash is a blend of art and science. By understanding your camera settings, choosing the right gear, and being patient in the field, you can capture the enchanting beauty of these glowing insects.
Remember, the key is to remain calm and enjoy the process. Every moment spent in nature brings its own rewards, and who knows? You might just find your next favorite photograph while you’re at it. Happy shooting!