
In this guide, we’ll explore some smart tips for photographing glow worms without using flash. Whether you’re just starting out or you’ve got some photography experience, these steps will help you capture that magical moment. You might be wondering how to set up your camera, what settings to use, or even where to find the best glow worm spots. Don’t worry, I’ll cover all that and more!
Understanding the World of Glow Worms
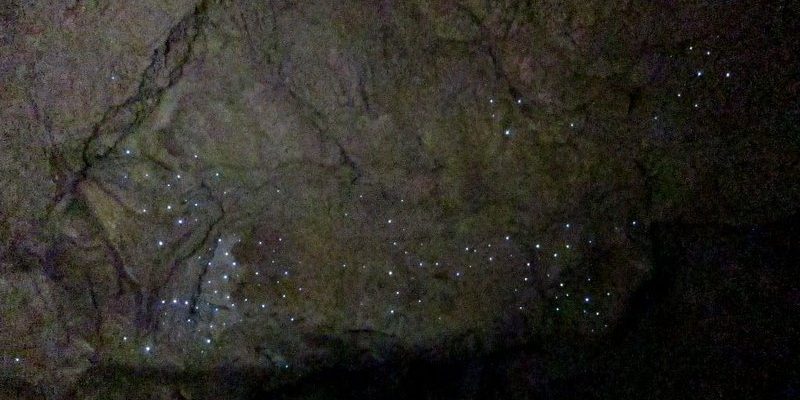
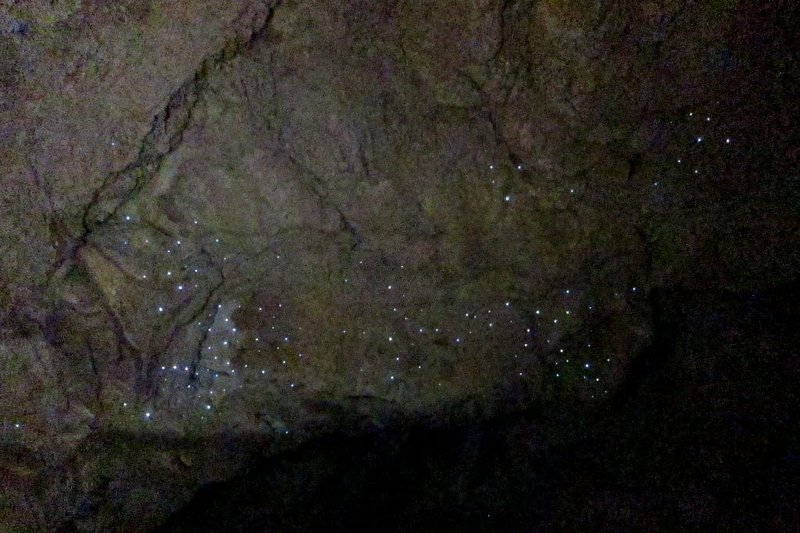
To photograph glow worms effectively, you first need to understand what they are and where they thrive. Glow worms aren’t actually worms. They’re the larval stage of certain beetles, primarily found in caves and damp areas. Their bioluminescence comes from a chemical reaction in their bodies, emitting a bluish-green light. This light serves to attract prey, creating a breathtaking sight for those lucky enough to witness it.
You might be wondering why photographing them can be so challenging. First off, glow worms are sensitive to light. Bright flashes can disturb them, leading to a fleeting opportunity to capture that ethereal glow. Plus, the low light conditions in their natural habitats make it essential to use special techniques to get good shots.
Knowing about glow worms and their environment will not only enhance your photography skills but also deepen your appreciation for these fascinating creatures. Imagine seeing a cave illuminated solely by these tiny lights; it’s truly a sight to behold!
Choosing the Right Camera
Not all cameras are created equal when it comes to low-light photography. If you want to photograph glow worms without flash, some cameras will do a better job than others. Ideally, you’ll want a camera that performs well in low light conditions. DSLRs and mirrorless cameras often have larger sensors, which can capture more light and detail.
If you’re using a smartphone, don’t fret! Modern smartphones have improved significantly in terms of low-light performance. Look for ones that offer a night mode or manual controls, which can adjust exposure times. Just keep in mind, you may need to hold your phone steady for longer to capture the glow.
When choosing a camera, think about the lens too. A lens with a wide aperture (like f/1.8 or f/2.8) allows more light in, helping you get clearer, brighter images of those tiny glimmers in the dark.
Setting Up for Success: Camera Settings
Now that you have your camera, it’s time to set it up for the perfect shot. Here are some key settings to focus on:
- ISO: Start with an ISO of around 800 or higher. A higher ISO means your camera sensor can pick up more light. Just be cautious: too high can lead to grainy images.
- Aperture: Use a wide aperture to let in as much light as possible. This gives you a nice blurry background, making the glow worms pop in your photos.
- Shutter Speed: Since you’re avoiding flash, using a slower shutter speed can capture more light. Experiment with speeds like 1/4 or 1/2 seconds, but remember to keep the camera steady!
Understanding these settings provides a strong foundation for capturing glow worms beautifully. Don’t be afraid to experiment! Each location and lighting condition might require slight adjustments.
Using a Tripod for Stability
If you want to take great photos of glow worms, a good tripod is your best friend. Since you’ll be using slower shutter speeds, any slight movement can blur your images. A tripod keeps your camera steady, letting you capture the delicate lights clearly.
When you set up your tripod, make sure it’s on solid ground to avoid wobbling. If you’re in a cave or a damp area, look for a stable spot. Some tripods are adjustable, so you can find the perfect height and angle to get a great shot without disturbing the glow worms.
If you don’t have a tripod, you can improvise. Leaning against a stable surface, like a rock or a wall, can help you maintain some stability. Just make sure you’re not obstructing your shot.
Finding the Perfect Location
Not every spot is ideal for photographing glow worms. They typically thrive in dark, moist environments like caves, forests, or near rivers. Research local areas known for glow worms, as they can vary significantly from place to place.
When you arrive at your location, take some time to observe. Look for clusters of glow worms that create a more striking visual. You might want to scout around during the day to identify the best spots for your nighttime shoot.
Timing is essential, too. The best time to photograph glow worms is usually after sunset when it’s dark enough for their glow to stand out. This is when they’re most active, making your chances of capturing them higher.
Techniques for Capturing the Glow
Once you have everything set up—your camera, settings, and tripod—let’s talk about techniques. Here are some tips for getting those stunning shots:
- Long Exposure: This technique allows the camera to capture the soft glow of the worms. Set your shutter speed to a longer duration (like 10-30 seconds) to let in more light.
- Focus on Composition: Try framing your shot with interesting foreground elements, like rocks or foliage, to add depth. This can create a more captivating photo.
- Experiment with Angles: Don’t be afraid to change your perspective. Moving your camera up, down, or to the side can reveal different aspects of the glow worms and the environment around them.
Using these techniques, you can create a dreamy, enchanting atmosphere in your photographs. It’s all about patience and creativity, so take your time!
Post-Processing Your Photos
Once you’ve captured your images, the fun doesn’t stop there. Post-processing can enhance your glow worm photos significantly. Software options like Adobe Lightroom or Photoshop provide great tools for tweaking your images.
Start with adjustments like brightness and contrast. Boosting these can make the glow worms pop even more. You might also want to play with color saturation to emphasize the bluish-green light. Just be careful not to overdo it—subtlety often yields the best results.
Cropping can also help you focus more on the glow worms, eliminating unnecessary distractions from the frame. You’ll find that a little editing can go a long way in elevating your final images.
Respecting Nature and Glow Worms
While photographing glow worms can be thrilling, it’s essential to respect their environment. These creatures are delicate and contribute to their ecosystem. Shine your light on them, but only with your camera!
Be mindful of the locations you choose. Follow rules for behavior in conservation areas, and always minimize your impact. Avoid touching or disturbing glow worm habitats, as this can disrupt their natural lifecycle.
By being a responsible photographer, you ensure that future generations can enjoy the same magical sights that you’ve captured. Remember: the experience of witnessing glow worms should be as cherished as your photographs.
Final Thoughts
Photography is an adventure, especially when it involves enchanting subjects like glow worms. By understanding their habitat, setting up your equipment correctly, and using the right techniques, you can capture their beauty without using flash. It’s all about patience, practice, and a bit of creativity.
So gather your gear, find a good spot, and immerse yourself in the beauty of nature. With these tips in mind, you’ll not only create stunning photos but also have a fantastic experience connecting with the wonders of the natural world. Happy shooting!