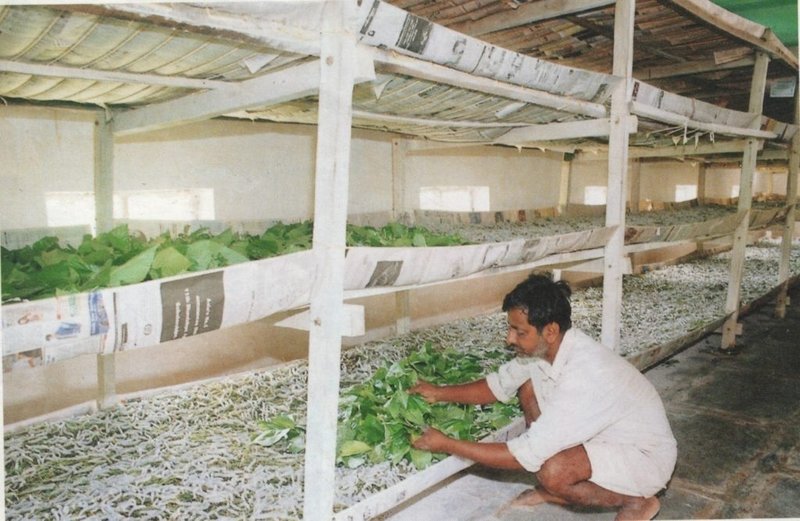
So, why raise silkworms? Besides the joy of observing their growth, silkworms are a valuable source of silk and have been farmed for centuries. They’re relatively low-maintenance and can be a cool project for families or anyone interested in nature. Let me walk you through some essential tips for housing and caring for silkworms at home, focusing on everything from their basic needs to the environment they thrive in. Here’s what you need to know!
Getting Started: Understanding Silkworm Basics
First things first, let’s get to know our little friends! Silkworms, specifically the species *Bombyx mori*, are the larvae of the silk moth. They primarily feed on mulberry leaves, which you can often find in stores or online. These creatures go through a series of growth stages called instars, with several moltings occurring before they finally spin their silk cocoons.
It’s important to note that silkworms are highly sensitive to their environment. They thrive in temperatures around 70°F to 85°F (21°C to 29°C) and need good ventilation. Providing the right conditions is crucial; otherwise, your silkworms might face health issues or worse, not survive. Are you ready to take on the challenge?
Choosing the Right Housing for Silkworms
You might be wondering where to house your silkworms. Silkworms need a clean and safe space to grow. A large plastic container is a popular choice because it’s easy to clean and can be found almost anywhere. You can use a simple storage bin or even a small aquarium. Just make sure there’s enough room for them to move around and grow!
For ventilation, poke several small holes in the lid of your container. This will allow airflow without letting tiny escapees find their way out. If you’re feeling crafty, you can even cover the holes with mesh to keep pests out while giving your silkworms plenty of fresh air.
Feeding Your Silkworms: What They Really Want
Now that you have the housing set up, let’s talk about their diet. Silkworms feast primarily on mulberry leaves. Fresh leaves are ideal, but if you can’t find them, options like dried mulberry leaves or even silkworm chow (a specialized feed) can work in a pinch. They eat a lot, and that’s good! Healthy silkworms will munch through their food quickly, so make sure to provide enough to keep them happy.
It’s crucial to keep their environment clean. Remove any uneaten food daily to prevent mold and bacteria. Trust me, a clean setup means healthier silkworms, and they’ll reward you with faster growth!
Caring for Silkworms: Temperature and Humidity
Maintaining the right temperature and humidity is vital for your silkworms’ well-being. You should aim for a temperature around 75°F (24°C). If you live in a cooler area, consider using a heat mat under the container to keep things cozy. Remember, extreme temperatures can be harmful to silkworms.
Humidity is equally important; they need a bit of moisture to grow. Aim for around 60-70% humidity. You can increase humidity by lightly misting the container with water—just don’t overdo it. Too much moisture can lead to mold problems. A hygrometer is a handy tool to measure humidity levels in their housing.
The Magical Transformation: Silkworm to Silk Moth
As your silkworms grow, they’ll eventually reach the pupating stage, where they spin their cocoons. This is one of the most fascinating parts of their life cycle! You’ll notice them getting a bit less active and seeking out a quiet space to spin. They can take about 3-7 days to complete this transformation, depending on their environment.
Once they’ve spun their cocoons, you have a choice. You can harvest the silk by boiling the cocoons in water, which kills the pupae but allows you to collect the silk threads. Alternatively, if you want them to emerge as moths, just leave the cocoons alone. After about 10-14 days, the moths will hatch! They’ll be hungry and looking for a partner to mate with, but keep in mind that they don’t eat during their adult stage.
Common Mistakes to Avoid
Every new endeavor comes with its own set of potential pitfalls. Here are a few common mistakes to avoid while rearing silkworms:
- Overcrowding: Too many silkworms in a small space can lead to stress and disease. Make sure your container is spacious enough for the number of silkworms you’re keeping.
- Neglecting Hygiene: Leaving spoiled food or waste in their habitat can create a breeding ground for bacteria. Clean their housing regularly!
- Ignoring Temperature and Humidity: Be vigilant about changes in temperature and humidity. Sudden fluctuations can be harmful.
By being attentive and proactive, you can help ensure a thriving environment for your silkworms!
Wrapping Up Your Silkworm Journey
Raising silkworms can be a unique and rewarding experience. From watching their remarkable transformation to learning about their life cycle, there’s a lot to gain from this hobby. Just remember, patience and care are key.
So, whether you’re in it for the silk or simply for the joy of learning, housing silkworms at home can be a fulfilling project. You might even find yourself sharing your discoveries and successes with friends and family. What better way to learn about nature than to bring a little bit of it right into your home? Enjoy your journey with your new fuzzy friends!

