
Think of it like planting a garden. You’ll need to provide the right environment, a pinch of care, and a little bit of patience. Whether you want to raise them for silk production, as feed for pets like reptiles and birds, or just for the sheer joy of learning, this guide will walk you through everything you need to know. So, grab a cup of coffee, and let’s dive into the world of silkworm rearing!
Understanding Silkworms: The Basics
Silkworms, scientifically known as *Bombyx mori*, are the caterpillar stage of the silk moth. Raised primarily for their silk, these little guys have been domesticated for thousands of years. You might be wondering how they fit into your life. Well, they’re not just for silk production. Many enthusiasts rear them as a fascinating pet option!
Typically, silkworms feed on mulberry leaves, which are their favorite treat. Young silkworms (or larvae) munch on these leaves, growing rapidly, and shedding their skin multiple times in a process called molting. Imagine a teenager going through a growth spurt—silkworms go through the same thing! This means you’ll need to stay on top of their feeding and housing needs, keeping their environment just right.
Setting Up Your Silkworm Habitat
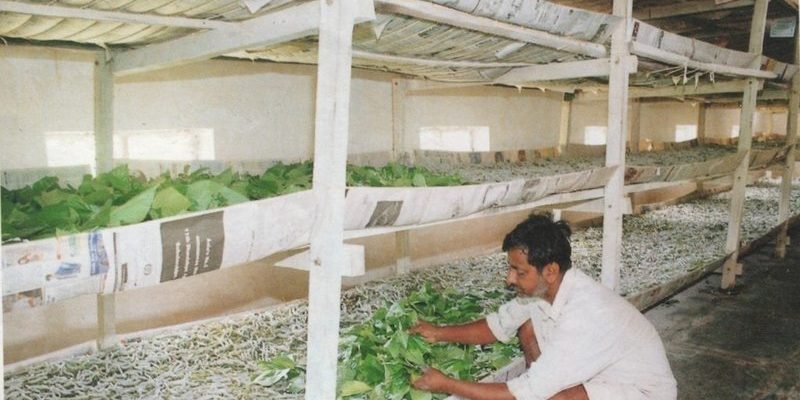
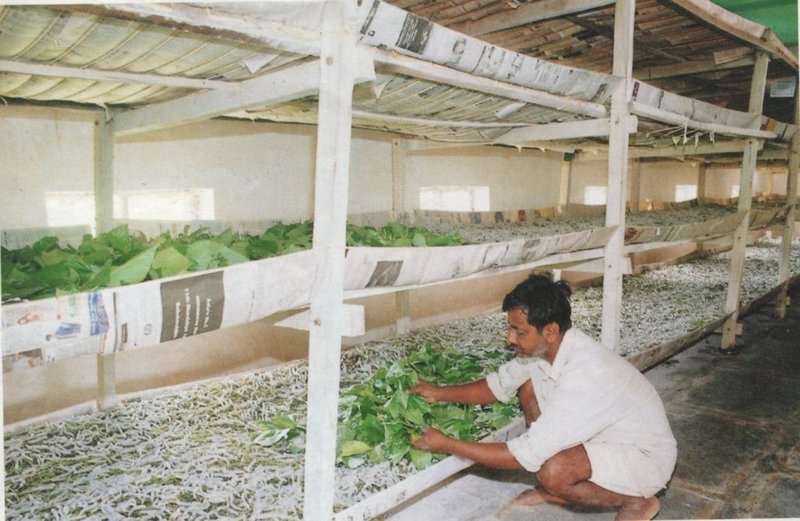
When it comes to housing silkworms, the right setup is crucial. You want to create a cozy environment that mimics their natural habitat. You’ll need a container—something like a large plastic tub or a wooden frame with mesh for ventilation. Here’s what you should consider:
- Size: Your container should be spacious enough to allow for growth. A tub measuring at least 2 feet long is a good start.
- Ventilation: Silkworms breathe through tiny holes in their bodies, so good air circulation is essential. Make sure to include mesh or holes for proper airflow.
- Temperature: Aim for a warm spot, around 70-80°F (21-27°C). You can use a light bulb or a space heater if necessary, but keep an eye on it to prevent overheating.
Establishing this home base will help your silkworms thrive. Just like setting up a cozy nook for a puppy, it’s all about comfort and security!
Feeding Silkworms: What To Provide
Feeding your silkworms is one of the most exciting parts of the process. They have a simple diet: primarily mulberry leaves. But here’s the thing—if you don’t have access to these leaves, you can also buy specially formulated silkworm chow, which is a convenient alternative.
When feeding:
- Freshness is key: Always offer fresh leaves. Wilted or dried leaves won’t cut it, as they won’t provide the nutrients your silkworms need.
- Quantity matters: Young silkworms eat less, while older ones will munch like there’s no tomorrow. You’ll want to provide enough leaves to satisfy their hunger, and keep an eye on leftovers—remove any uneaten food to prevent mold.
- Timing: Feed them twice a day during their active growth stages. Early morning and late afternoon are ideal times.
Trust me, when you see them happily chomping down, it’ll warm your heart!
Maintaining a Clean Environment
Just like any pet, silkworms appreciate a clean living space. A messy habitat can lead to health issues, so it’s crucial to keep things tidy. Here’s how to maintain a clean environment:
- Daily checks: Inspect the container regularly for waste, uneaten food, or any signs of mold or pests.
- Cleaning schedule: Do a thorough clean of the habitat at least once a week. Remove old food remnants and replace the bedding or substrate. You might use shredded paper or soft cloth for bedding.
- Disinfection: Every 2-3 weeks, consider lightly disinfecting the container with a mild soap and water solution to keep bacteria at bay.
This will help ensure your silkworms stay happy and healthy. Plus, who doesn’t love a clean home?
Monitoring Growth and Development
Silkworms go through several stages as they grow: they hatch from eggs into tiny larvae, then grow and molt several times before spinning silk and ultimately becoming moths. You might find it fascinating to watch them progress through these stages.
Keep an eye on the following signs of growth:
- Molting: Silkworms shed their skin about 4-5 times before they’re fully grown. This process can take a week or two, depending on the temperature and feeding.
- Size changes: As they grow, you’ll notice them getting bigger and often changing from a light color to a darker shade.
- Silk production: Once they reach maturity, they start spinning cocoons. This is a beautiful process to witness—like watching a little worker at its craft.
Remember, each stage is a step closer to seeing the full lifecycle. It’s nature’s masterpiece right before your eyes!
Handling Common Issues
Even with the best care, issues may arise while rearing silkworms. Don’t worry; you’ve got this! Here are a few common problems and how to tackle them:
- Overfeeding: If you notice mold or uneaten leaves piling up, it might be a sign you’re giving too much food. Adjust your feeding routine accordingly.
- Temperature fluctuations: If your space isn’t maintaining a consistent temperature, consider using a thermometer to monitor changes and make adjustments like relocating or adding heat sources.
- Health issues: Watch for signs of distress or illness, like lethargy or brown spots. If you suspect your silkworms are unwell, consult online forums or local experts to get advice.
Handling these problems early can save your silkworms and improve their living experience!
Harvesting Silk: The Final Step
If you’re in this for the silk, it’s time to get excited! Harvesting silk is the grand finale of your silkworm rearing journey. Once your silkworms create their cocoons, you’ll want to wait a few days for them to harden before proceeding.
To harvest:
- Careful collection: Gently collect the cocoons, taking care not to damage them. You can use scissors to cut them from the container.
- Boiling process: Boiling the cocoons in water will kill the pupae inside and loosen the silk fibers, making it easier to unravel.
- Spinning the silk: Once boiled, you can start to unwind the silk fibers, which can then be spun into thread for various projects.
It’s a bit of work, but seeing the final product—an exquisite thread of silk—makes it all worth it!
Connecting With Other Enthusiasts
Raising silkworms can be even more enjoyable when you connect with others in the community. Whether you look for online forums, local clubs, or social media groups, sharing tips and experiences can enrich your journey.
Here are some benefits of joining a community:
- Troubleshooting help: Other enthusiasts can offer insights into common challenges or solutions you might not have considered.
- Resource sharing: Find out where to get supplies or learn about great mulberry sources from people in your area.
- Encouragement: When you’re feeling overwhelmed, having a support system can keep you motivated and inspired.
Plus, you’ll likely pick up some valuable tips along the way!
In closing, housing silkworms at home can be a fascinating and fulfilling endeavor. Whether you’re interested in the art of silk production or simply enjoy observing nature, raising these little caterpillars is sure to be an adventure. With the right setup, care, and a little patience, you’ll be well on your way to becoming a silkworm expert. So, roll up your sleeves and get started—it’s time to embrace this unique hobby!