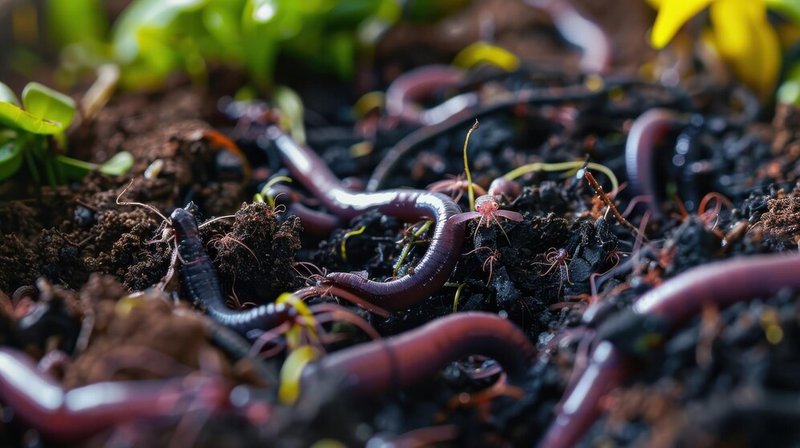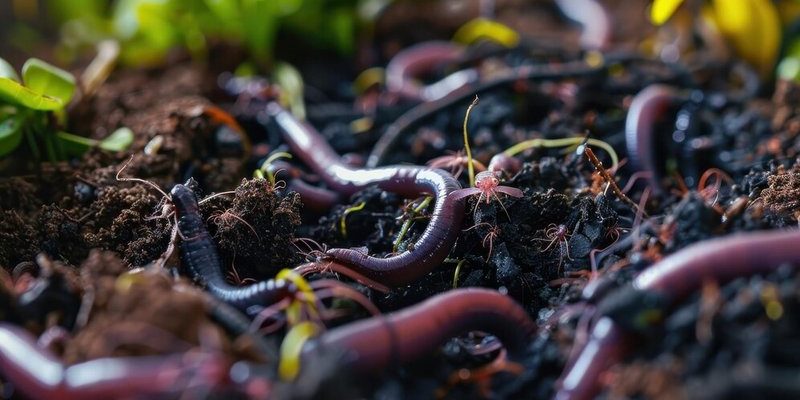
So, what’s vermicomposting all about? At its core, it’s a fancy term for composting that specifically involves worms. The process is simple yet effective: worms eat your kitchen scraps, like fruit peels and vegetable trimmings, and then poop out what’s essentially garden gold—castings that enrich the soil. Brands like Red Wigglers or European Nightcrawlers are popular choices for this task, and once you understand their role, you’ll see why gardeners swear by them.
What is Vermicomposting?
Vermicomposting is basically composting with worms. Instead of relying solely on microorganisms in a traditional compost pile, this method engages earthworms to speed up the process. The worms break down organic materials like food scraps and yard waste into a dark, crumbly substance known as worm castings or vermicompost. This material is packed with nutrients and beneficial microorganisms.
The beauty of vermicomposting is that it can be done indoors or outdoors, making it accessible for folks with limited space. If you’ve got a little corner in your kitchen or a balcony, you can set up a worm bin and start composting your scraps right away. Honestly, it’s a great way to reduce waste and contribute to a healthier environment while giving your plants a boost.
You might be wondering how the worms manage to turn waste into something so valuable. Well, they digest the organic matter, breaking it down with the help of bacteria in their gut. The result? Nutrient-rich compost that enhances soil quality and promotes healthy plant growth.
The Benefits of Using Earthworms in Composting
Using earthworms in composting offers a plethora of benefits, both for the environment and for your garden. Here are some highlights:
- Faster Composting: Earthworms can speed up the composting process significantly. What might take weeks or months in a traditional compost pile can be reduced to just a few weeks with worms. They munch away at organic matter, breaking it down much quicker.
- Nutrient-Rich Castings: Worm castings are packed with nutrients like nitrogen, phosphorus, and potassium. These nutrients are released slowly, providing your plants with a steady supply of food.
- Improved Soil Structure: Earthworm activity helps aerate the soil, improving drainage and reducing compaction. This leads to healthier root systems and better overall plant growth.
- Eco-Friendly: By composting with worms, you help reduce landfill waste. It’s a sustainable way to manage organic materials that would otherwise be thrown away and contribute to greenhouse gas emissions.
These benefits make vermicomposting not just a good idea for gardeners, but also a smart choice for anyone looking to be environmentally conscious. The worms do the hard work while you sit back and watch your garden thrive.
Choosing the Right Earthworms
When it comes to vermicomposting, not just any old worm will do! The most commonly used types are the Red Wigglers (Eisenia fetida) and the European Nightcrawlers (Eisenia hortensis). Let’s break down the differences:
- Red Wigglers: These are small, reddish worms that thrive in compost piles. They are tough and can eat their weight in food scraps daily. They prefer a warm and moist environment, making them perfect for indoor setups.
- European Nightcrawlers: Larger than Red Wigglers, these worms are more versatile and can be used for both composting and fishing. They’re excellent for outdoor vermicomposting and are a bit more tolerant of temperature fluctuations.
Whichever type you choose, ensure that the worms come from a reputable source. You might find them at local garden centers or online worm farms. Once you have your worms, create a welcoming environment for them by setting up a bin with bedding like shredded newspaper and adding food scraps.
Setting Up Your Vermicomposting Bin
Setting up your vermicomposting bin is easier than you might think! Here’s a quick step-by-step guide to get started:
1. **Choose a Bin:** You can use a plastic or wooden bin, but it needs to be well-ventilated. Drill holes in the lid and sides to allow airflow.
2. **Add Bedding:** Fill the bin with shredded newspaper or cardboard, moisten it lightly. This will provide a comfortable home for your worms while also adding carbon to the mix.
3. **Introduce the Worms:** Add your chosen earthworms to the bin. They’ll need time to adjust, so don’t be alarmed if they don’t start eating immediately.
4. **Feed Them:** Start adding kitchen scraps like fruit and vegetable peels, crushed eggshells, and coffee grounds. Avoid meat, dairy, and oils, as these can attract pests.
5. **Maintain the Environment:** Keep the bedding moist but not soggy. Check the bin regularly to ensure that it has a pleasant smell and that the worms are active.
In no time, you’ll have a thriving worm population and a wonderful supply of rich compost. Just remember to be patient; good things come to those who wait!
Managing Your Worm Bin
Once your worm bin is up and running, managing it is quite straightforward. Here are some tips to keep your worms happy and productive:
– **Monitor Moisture Levels:** The bedding should feel like a damp sponge. If it’s too dry, lightly mist it with water. If it’s overly wet, add dry bedding to absorb the excess moisture.
– **Feed Them Wisely:** Aim to feed your worms once a week. Start small to gauge how quickly they consume the scraps. If you notice they’re leaving food behind, cut back on the amounts you’re giving them.
– **Harvesting Castings:** In about 3 to 6 months, your worms will produce castings that you can harvest. Move the contents to one side of the bin, add fresh bedding to the empty side, and the worms will migrate to the new food source. You can then collect the rich compost from the other side.
By keeping an eye on your worm bin and ensuring they have the proper conditions, you’ll create a thriving ecosystem right in your own home.
Common Challenges and Solutions
While vermicomposting is generally low-maintenance, you may face a few challenges. Here are some common issues and how to tackle them:
– **Odor Problems:** If your bin starts to smell bad, it’s usually a sign of overfeeding or excess moisture. Remove any uneaten food and add more dry bedding to balance things out.
– **Pests:** Fruit flies or other pests may invade your bin if food scraps are left too long. Cover food scraps with bedding immediately after feeding and keep the bin covered.
– **Worm Migration:** Sometimes, worms might try to escape the bin. This can happen if temperatures are too high or if they’re not getting enough food. Ensure the environment is suitable and that you’re feeding them enough.
With a little care and attention, these challenges are easily manageable, allowing you to enjoy the many benefits of vermicomposting without too much hassle.
To wrap it all up, earthworms play a critical role in vermicomposting, transforming organic waste into nutrient-rich compost that your plants will love. By choosing the right worms, setting up a proper bin, and managing it effectively, you can create a small ecosystem that benefits both your garden and the environment.
So, next time you consider tossing those vegetable scraps in the trash, remember that with a little help from our wriggly friends, you can turn waste into a valuable resource. Happy composting, and may your plants thrive with the goodness of earthworm castings!

