
Acclimating your wrasse isn’t just a neat trick; it’s essential for their health. Wrasses are known for their vibrant colors and playful personalities, but they come from specific environments, often in warmer waters filled with plenty of nooks and crannies. If you drop them directly into your tank without easing the transition, they can get shocked. This isn’t just about keeping them alive; it’s about giving them the best chance to thrive and get comfy in their new home.
In this article, we’ll explore various methods of acclimating your new wrasse, focusing on the most effective strategies to ensure a smooth transition. So, grab your favorite cup of coffee and let’s dive in!
Understanding the Importance of Acclimation
You might be wondering why acclimation is such a big deal. Well, when a wrasse arrives at your home, it’s coming from a completely different environment—usually a store or another aquarium. The water conditions, temperature, and even the tank mates can be different. By taking the time to acclimate your fish, you’re reducing the stress they experience, which can lead to a healthier and happier wrasse.
Stress is a significant factor in fish health. When fish are stressed, they can become susceptible to diseases. Plus, a new wrasse might not eat properly if they’re feeling overwhelmed. Think of it like a new job: you wouldn’t expect someone to jump right in and perform their best without getting to know the work environment first, right? Providing your wrasse with a gentle introduction can make all the difference.
Acclimating your wrasse involves introducing it to the tank’s water parameters gradually. This can include temperature, pH levels, and salinity. The key is to go slow. Rushing the process might lead to shock, which can be fatal.
Gathering Your Supplies
Before you start the acclimation process, you’ll need to gather some supplies. Here’s a handy list to get you started:
- A clean bucket or container (not treated with chemicals)
- Thermometer
- A test kit for pH and ammonia levels
- Airline tubing (for drip acclimation)
- Net (to transfer the fish)
Having everything ready will help the process go smoothly. You don’t want to be scrambling for supplies while your new wrasse is waiting in the bag!
Using a clean bucket is crucial. You don’t want any chemicals or residues from other items affecting your new friend. It’s a small step that can prevent big problems later.
Floating Method for Acclimation
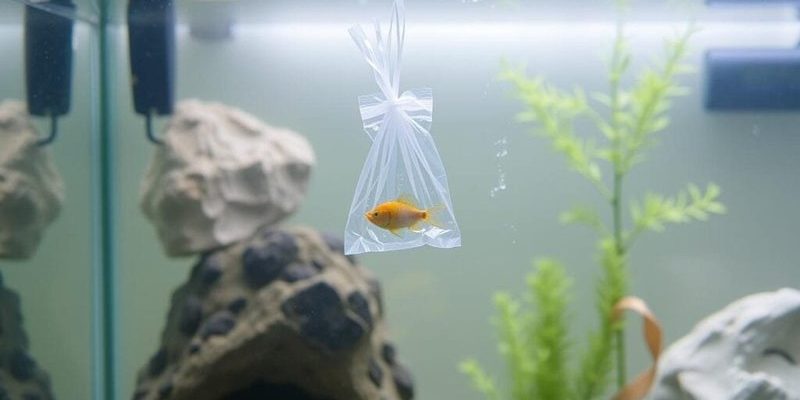
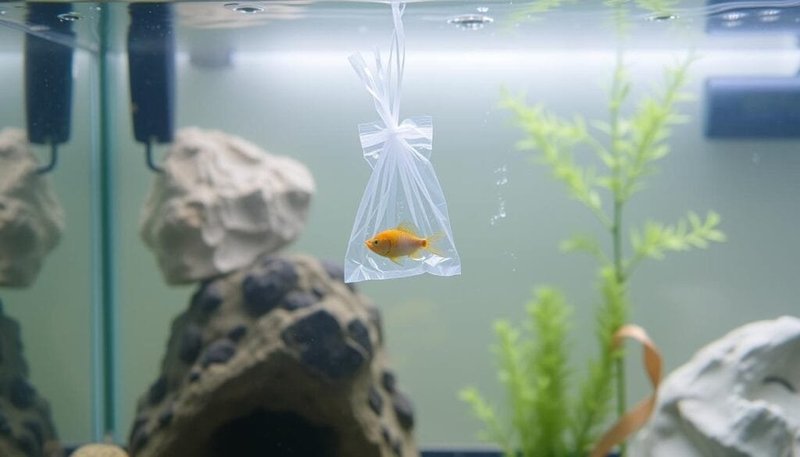
One of the simplest ways to acclimate a new wrasse is the floating method. This technique involves letting the fish adjust to the water temperature in your tank before introducing it fully. Here’s how it works:
1. Prepare your tank: Ensure your aquarium is stable with the right temperature and water parameters suitable for your wrasse.
2. Float the bag: While your tank is ready, keep your new wrasse in its sealed bag. Place the entire bag in the tank for about 15-20 minutes. This helps equalize the water temperature.
3. Add tank water: After the initial float time, open the bag and add a small amount of tank water (about a cup) to the bag. This will help your wrasse slowly get used to the new water chemistry.
4. Repeat: Wait another 10 minutes, then add another cup of tank water to the bag. You can repeat this process two or three times until the bag is nearly full.
The floating method is gentle and allows for a gradual change that reduces stress. You might be thinking, “How long should I wait?” A good rule of thumb is to allow for about an hour of acclimating total.
Drip Method for Acclimation
If you’re feeling a bit more advanced, the drip method is another effective way to acclimate your wrasse. This method is particularly beneficial if you’re concerned about differences in water chemistry between your aquarium and the bag. Here’s how to do it:
1. Set up your equipment: You’ll need your clean bucket and some airline tubing. Cut the tubing to a manageable length and secure one end in the tank with a weight to keep it submerged.
2. Start the drip: Siphon water from the tank into the bucket at a slow drip rate—around 2-4 drops per second. This will gently mix the water from your tank with the water in the bag.
3. Monitor the volume: Let the water level in the bucket rise to about double the initial amount. You’ll want to keep an eye on the salinity and pH levels as you go.
4. Transfer the wrasse: After about 1-2 hours of dripping, you can net the wrasse and gently place it into your aquarium. Make sure to avoid adding the water from the bag to the tank.
The drip method can be a bit more labor-intensive, but it often results in a smoother transition for your fish. Remember, the goal is to minimize shock and stress.
Water Quality and Testing
Once your wrasse is in the tank, keeping an eye on *water quality* is crucial. New fish can introduce new strains of bacteria, and it’s essential to monitor your tank’s parameters closely. Here’s what to check:
– Ammonia levels: Ideally, this should be at zero. High levels can be toxic to your fish.
– pH balance: Wrasses generally thrive in a pH range of 7.8 to 8.5. Testing this regularly helps ensure you’re within healthy limits.
– Nitrate levels: A level below 20 ppm is ideal.
You might be thinking, “How often should I test my water?” When you first introduce your wrasse, test at least once a day for the first week to ensure everything is stable.
If you notice any spikes or issues, consider doing a water change to balance things out. Keeping a consistent environment will encourage your wrasse to explore confidently.
Post-Acclimation Tips
After acclimating your new wrasse, there are some easy steps you can take to help them settle into their new environment:
– Provide hiding spots: Wrasses are naturally curious but may be shy at first. Adding caves or live rock gives them a sense of security.
– Monitor feeding: Offer small amounts of food like flakes or frozen food. Don’t be surprised if they don’t eat right away; it can take time for fish to adjust to their new home.
– Limit tank changes: Avoid making big changes in the tank for a week or so. Stability is key for your wrasse to feel comfortable.
You might think about observing your wrasse during this time. Their behavior can tell you a lot about how they’re adjusting. If they’re exploring and interacting with decorations, that’s a good sign!
Acclimating a new wrasse to your aquarium might seem like a lot of work, but taking the time to do it right can lead to a happier, healthier fish. Remember, patience is crucial. Rushing the process can lead to stress and health problems down the line.
By using methods like floating or drip acclimation, testing water parameters, and providing a comfortable environment, you can help your wrasse thrive in its new home. Your new friend will appreciate the thoughtful transition, and soon enough, you’ll have a lively addition to your underwater world. Happy fishkeeping!