

Pupation is a fascinating process where the larvae undergo a dramatic change. It’s like watching a caterpillar turn into a butterfly, only in this case, we’re dealing with the hawk moth, specifically the *Manduca sexta*. These caterpillars are known for being quite the garden nuisances, but if you’re interested in rearing them or simply observing their life cycle, knowing the right soil conditions for hornworm pupation is essential. So grab a cup of coffee, and let’s dig into the details!
Understanding Hornworm Pupation
Pupation is when hornworms enter their pupal stage, a crucial part of their life cycle. During this time, they essentially go into a sort of “metamorphosis retreat,” where they’ll turn from caterpillars to moths. This phase can last anywhere from a week to a couple of weeks, depending on their environment and conditions.
The transformation happens inside a protective shell called a pupa or chrysalis. Think of this stage like a teenager going through a growth spurt—there’s a lot happening below the surface. Choosing the right soil conditions can ensure these little guys have a happy and healthy pupation experience. They’ll emerge from the soil as stunning adult moths, ready to continue the cycle.
You might wonder why soil conditions matter so much. Well, the right environment influences factors like moisture, temperature, and even the nutrients they need as they transform. All these play a role in ensuring successful pupation.
Ideal Soil Composition for Hornworms
When it comes to soil types, hornworms thrive best in a loose, well-draining substrate. Imagine planting your feet in soft sand on a beach; it’s comfortable and allows for movement. Similarly, hornworms prefer soil that keeps them snug but not too wet. A mix that’s about 50% compost and 50% vermiculite or perlite works wonders.
Why compost? Compost is rich in nutrients, providing the hornworms with essential elements as they transition. The perlite or vermiculite helps aerate the soil, ensuring it drains well. This prevents water from pooling, which could lead to mold or rot—definitely not ideal for our pupating friends.
Another option to consider is a blend of organic soil. Many garden stores offer pre-packaged organic mixes designed for good drainage and nutrient availability. Just make sure you avoid any fertilizers that may be too strong; hornworms aren’t looking for a hot tub of nutrients—they need a balanced environment.
Moisture Levels for Successful Pupation
Moisture is one of the most critical factors in soil conditions for hornworm pupation. Too little moisture can lead to dehydration, while too much can drown them. It’s a delicate balance, much like balancing a diet; you need just the right amount to keep everything functioning optimally.
The ideal moisture level should be slightly damp, almost like a wrung-out sponge. To achieve this, you can mist the soil lightly with water, ensuring no puddles form. One simple trick is to use your finger to check the moisture level. If it comes out damp but not soggy, you’re on the right track!
Make sure to check the moisture daily, especially in warmer temperatures. If the soil starts to dry out, give it a little spritz. But always be cautious; a little goes a long way. And remember, hornworms will naturally burrow into the soil, so they can regulate their moisture needs too.
Temperature Considerations for Pupation
Temperature plays a massive role in the pupation process. Hornworms prefer a cozy spot that mimics their natural habitat. Ideally, the temperature should be around 70°F to 80°F (21°C to 27°C). Think of it like a warm summer day—perfect for a beach outing, right?
If it’s too cold, hornworms can be sluggish and may struggle to pupate. On the flip side, if it’s too hot, they can become stressed or even die. To maintain this temperature, place the container in a warm, sheltered area away from direct sunlight. A little shade can be a lifesaver!
Using a thermometer to check the soil temperature can also help. It’s similar to checking the oven temperature before baking—if it’s not just right, your results won’t be what you hoped for.
Choosing the Right Container for Hornworm Pupation
The container you choose for pupating hornworms is just as important as the soil conditions. A container that’s deep enough allows them to burrow down and feel secure. Think of it like a cozy cave where they can hibernate.
You can use plastic bins or pots, but make sure they have drainage holes. This will help keep the soil ventilated and avoid standing water. A depth of about 6 inches is usually sufficient, giving them enough space to bury themselves while ensuring they feel safe.
It’s also a good idea to cover the container with a breathable fabric or mesh. This will keep pests out while allowing air to circulate. Some folks even use fine insect netting—just make sure it’s secure enough that curious critters can’t get in!
Maintaining Soil Health During Pupation
Just like you’d want to keep your living space clean and healthy, hornworms benefit from healthy soil too. Regularly monitor the soil for any signs of mold or pests. If you notice anything funky, act quickly to remove the problem, ensuring the larvae remain safe.
You might also want to replace the soil partially if it starts to look tired. A little refresh can do wonders for maintaining a nurturing environment. Just be gentle when doing this, as the pupae can be delicate.
Additionally, some enthusiasts like to add a layer of clean sand on top of the soil. This can help deter pests and provide a drier surface layer while keeping the lower soil moist.
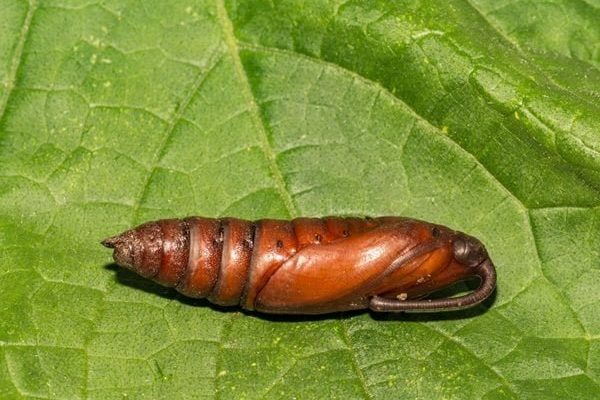
Signs of Successful Pupation
After providing optimal soil conditions, the moment of truth will come when you see signs that pupation is happening successfully. You might notice the hornworms digging down deeper into the soil and curling up—this is a good indication they’re preparing to pupate.
You can also look for changes in their color. As they develop into pupae, they often change from a bright green to a darker shade, which means they’re on the right path. Once they’ve settled in, it’s usually a waiting game.
After about a week or so, you may find them emerging as stunning adult moths. It’s like waiting for a flower to bloom; the anticipation can be thrilling!
Creating the best soil conditions for hornworm pupation requires a little attention and care, but it’s well worth the effort. By understanding their needs for soil composition, moisture, temperature, and container type, you’re setting the stage for a successful transformation.
Remember, these larvae are just as much a part of nature as the plants they thrive on. Giving them the right environment not only helps ensure their survival but also enriches your gardening experience. So whether you’re a curious observer or an aspiring hornworm rearer, these tips will definitely help you along the way. Happy gardening!