
Imagine a cozy blanket of soil, providing warmth and comfort for these tiny creatures as they prepare for their big change. The conditions must be just right—too dry or too wet, and it can derail their metamorphosis. In this guide, we’ll dive into the best soil conditions for hornworm pupation, which will help you create a nurturing environment for them if you’re raising these fascinating insects. Whether you’re gardening to attract butterflies or simply curious about their lifecycle, let’s explore how you can give hornworms the perfect place to pupate.
Understanding the Hornworm Life Cycle
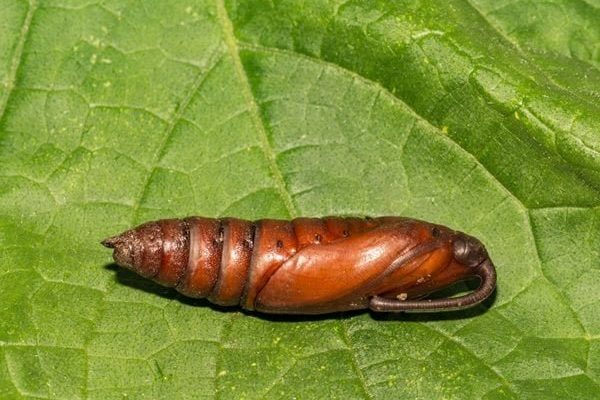
Hornworms, predominantly the larvae of the Five-Spotted Hawkmoth, go through several stages before turning into moths. They start as eggs laid on the underside of leaves, hatch into caterpillars, and then enter the pupation stage. This stage is where soil conditions come into play. When hornworms are ready to pupate, they look for a safe spot to bury themselves in the soil.
Here’s something you might not know: hornworms can’t just pupate anywhere. They prefer a specific type of soil that provides them with the right temperature and moisture levels. If the soil is too compact or filled with too many rocks, they may struggle to dig in and find a comfortable resting place.
By understanding this life cycle, you’ll appreciate why the right soil conditions are vital not just for hornworms, but for the ecosystem around them. Healthy soil supports healthy larvae—and ultimately leads to beautiful adult moths.
Soil Texture and Composition
When it comes to soil texture, hornworms thrive in **loose, well-aerated soil**. Think about it like a soft bed of fluff where they can easily burrow down. Soil that’s too hard or has a lot of clay can make it difficult for these little guys to dig in.
You’ll want to aim for a soil composition that balances clay, sand, and silt. Here’s a quick breakdown of what each type brings to the table:
- Sandy soil: Drains well and creates a light texture.
- Clay soil: Holds moisture but can be too compacted.
- Silty soil: Retains moisture but needs good drainage to prevent rot.
Mixing these types can help create a balanced environment. You might try adding compost or organic matter to enrich the soil—a little bit of goodness can go a long way in creating an inviting spot for hornworms.
Moisture Levels: Not Too Wet, Not Too Dry
You might be wondering, “How much moisture do hornworms need?” The answer is that they need just the right amount. Soil that is **too dry** can lead to desiccated pupae, while soil that is **too wet** can cause them to rot. It’s a delicate balance!
Aim for soil that feels damp but isn’t muddy. You can check the moisture level by grabbing a handful of soil; it should hold together loosely without dripping water. If the soil crumbles in your hand, it’s too dry. On the other hand, if it forms a mud ball, it’s too wet.
A tip to keep moisture levels consistent is to cover the soil with mulch. This not only helps retain moisture but also protects the pupating hornworms from harsh weather and predators.
Temperature and Location Considerations
Temperature plays a significant role in hornworm pupation. Ideally, the soil should be in the **60-75°F (15-24°C)** range. If it’s too cold, the pupae might remain dormant and could even die before emerging as moths. On the flip side, soil that’s too hot can cook them!
To create a suitable environment, consider where you place your soil. If you’re gardening outdoors, a sunny spot can help keep the soil warm during the day. If you’re raising hornworms indoors, using a heating mat underneath the soil can help maintain those ideal temperatures.
Also, remember that different species may have slightly different temperature requirements, so it’s always a good idea to research the specific type of hornworm you’re working with.
Preventing Predators and Pests
Protecting your hornworms during the pupation stage is crucial. Many predators, like birds and insects, might dig them up, or their burrowing could attract unwanted pests. You can create a protective environment by covering the soil with mesh or small screens to keep larger animals and pests at bay.
Another option is to incorporate natural repellents like neem oil, which can deter pests without harming your hornworms. Just make sure any pest control methods are safe for the larvae, as they are sensitive during this life stage.
Sometimes, it’s about creating a peaceful ecosystem around your pupating hornworms, so they can focus on their transformation without the fear of becoming someone else’s dinner.
Feeding Before Pupation
You might be thinking, “What do hornworms eat before they pupate?” Well, a healthy diet is essential for them to grow strong enough to make it through the pupation stage! Hornworms primarily feast on the leaves of plants like tomatoes, peppers, and eggplants.
Providing a steady supply of fresh leaves not only nourishes them but also prepares them for the transition. Ideally, they should be fat and healthy when they dig into the soil for pupation. This stage is like a final feast before their big change, so don’t skimp on their meals!
You can also monitor their eating habits. If they’re munching through leaves rapidly, that’s a good sign they’re healthy and ready for their next phase—pupation!
Creating an Ideal Pupation Environment
So, what’s the takeaway? To create the best soil conditions for hornworm pupation, you need to focus on the right **texture, moisture, temperature, and protection**. Think of it as crafting a little sanctuary for them to undergo one of nature’s most magical transformations.
By providing loose, well-aerated soil with optimal moisture levels and a safe haven from predators, you can help ensure that your hornworms have the best chance of successfully transitioning into beautiful moths.
Remember, nurturing these creatures not only supports them but also contributes to the larger ecosystem. The more we understand and provide for our natural world, the better everything flourishes.
In conclusion, creating the best soil conditions for hornworm pupation is a blend of science and art. With a little attention and care, you can witness the incredible journey of these small caterpillars as they metamorphose into moths. Happy gardening, and enjoy being part of their transformation!