
Time-lapse photography lets us speed up time, creating a powerful visual effect that can showcase the beauty of nature and the delicate movements of creatures like ribbon worms. Whether you’re a science enthusiast, an aspiring photographer, or just someone with a keen interest in marine life, learning how to use a time-lapse to record these fascinating creatures can open up a whole new world of discovery. Let’s dive in and explore how this technique works and what you need to get started.
Understanding Time-Lapse Photography
Time-lapse photography is a technique where you take a series of photos at set intervals, then compile them to create a smooth video that plays back much faster than real-time. It’s like watching a flower bloom or a sunset — stunningly beautiful and often quite captivating. The secret lies in how you set up your camera and choose your intervals.
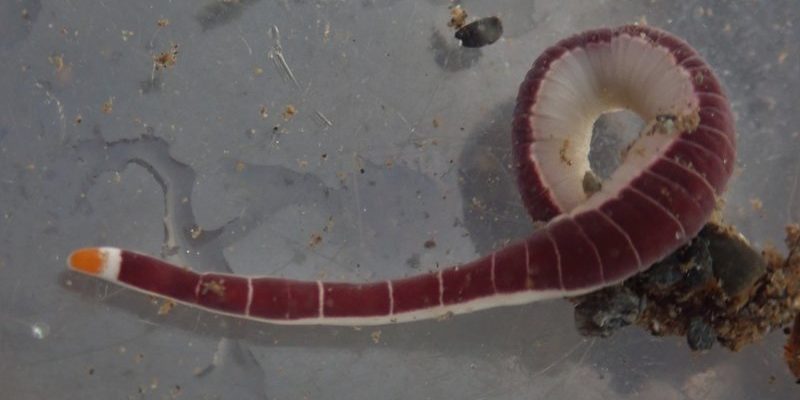
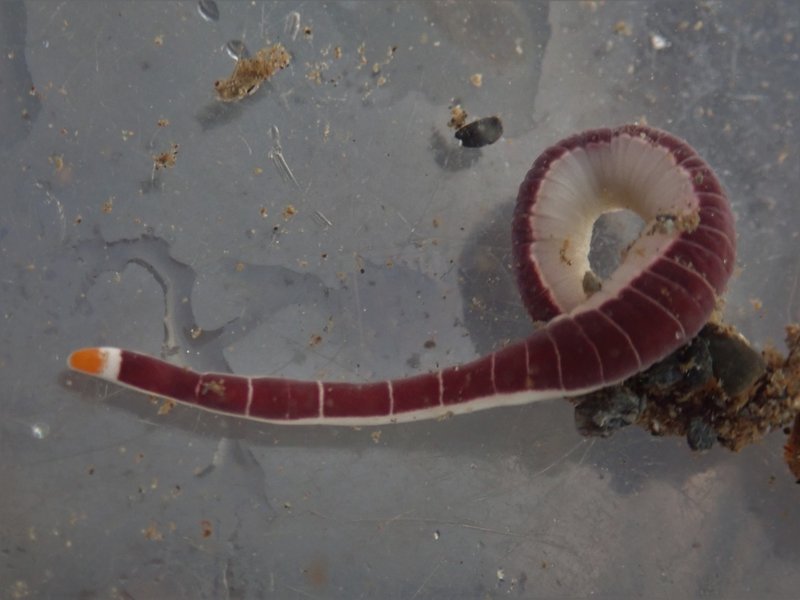
To record **ribbon worm movement**, you’ll want to understand the basics of capturing images over time. Typically, you might take a picture every few seconds—much longer than the usual frame rates in standard video—allowing you to condense hours or even days of movement into a short clip. This not only highlights the worm’s fluid motions but also gives us a unique view of how they interact with their surroundings.
Choosing Equipment for Time-Lapse Recording
Before you start recording, you need the right gear. While you could use a basic camera or even a smartphone for time-lapse photography, having a few specific tools can greatly enhance your results. Here are some options to consider:
- Camera: A DSLR or mirrorless camera works best due to their ability to capture high-quality images. Look for features that allow you to set time intervals manually.
- Tripod: Stability is key. A sturdy tripod will prevent any shakes or movements in your footage, which could ruin your time-lapse video.
- Intervalometer: This nifty device works with your camera to automatically take pictures at predetermined intervals, giving you consistent results.
- Smartphone Apps: If you’re using a smartphone, there are plenty of apps available that can help with time-lapse recording and editing.
Each of these tools can help you capture the ribbon worm’s movement more effectively. Honestly, it’s about finding what works for you and your style.
Setting Up Your Shoot
Now that you have your equipment ready, it’s time to set up. Here’s a straightforward approach:
1. **Find the Right Location:** Look for a spot where ribbon worms are known to be active. This could be near the shoreline where the sand meets the water.
2. **Position Your Camera:** Make sure your camera is stable and aimed at the area where you expect to see the worm. Adjust the angle to capture the best view.
3. **Adjust Settings:** If you’re using a DSLR, set your camera to manual mode to have full control over exposure settings. Use a slower shutter speed to let in more light, especially if you’re filming in low-light conditions.
4. **Set the Interval:** Depending on how fast the ribbon worms move, you might take images every 3 to 10 seconds. The slower the action, the longer the interval should be.
Taking the time to set up properly will pay off later when you see those beautiful, flowing movements captured on camera.
Recording the Movement
Once your setup is complete, it’s time to hit record and let nature take its course. Here’s the thing: patience is key. You’ll want to let your camera run for enough time to capture meaningful movement.
You might leave it running for several hours, depending on the time of day and your location. It can be a bit tedious, but think of it as nature’s own show. During this time, keep an eye on your equipment. Check your battery life and storage space to avoid missing those critical moments.
If something seems to be obstructing your view, don’t hesitate to make small adjustments. Just try to minimize disruptions to the environment for the best outcomes.
Editing Your Time-Lapse Video
Once you’ve captured your footage, it’s time to bring it all together in the editing phase. This is where you can really have fun and get creative! Here’s how to approach it:
1. **Import Your Photos:** Load your images into your editing software of choice. Many people use programs like Adobe Premiere Pro or even simpler options like iMovie, which can handle time-lapse creation easily.
2. **Set the Frame Rate:** Adjust the frame rate to determine how fast the time-lapse plays. Most videos run at 24–30 frames per second, but feel free to experiment with different speeds.
3. **Add Music or Narration:** Consider adding background music or your own voiceover to guide viewers through the experience. It can make a world of difference in engagement.
4. **Export Your Video:** Once you’re happy with the final product, export it in a suitable format for sharing—whether it’s for social media or a personal project.
Editing is where you can really showcase the ribbon worm’s beauty and grace, turning those slow movements into a captivating visual story.
Why Time-Lapse of Ribbon Worms Matters
You might be wondering: why bother with recording ribbon worms in the first place? Well, aside from the sheer joy of capturing something unique, there are several important reasons:
– **Educational Value:** Time-lapse photography can help illustrate concepts in marine biology, showing students and curious minds how animals behave in their natural habitat.
– **Conservation Awareness:** By showcasing the beauty of ribbon worms and their ecosystems, you can foster a greater appreciation for marine life and the need to protect it.
– **Artistic Expression:** Capturing the world through time-lapse techniques allows for artistic exploration, bringing scientific documentation and creativity together.
With such profound implications, time-lapse photography becomes more than just a visual spectacle; it’s a medium for change and understanding.
Common Challenges and Troubleshooting
Like any other project, you might face some bumps along the way. Here are common challenges and simple solutions:
– **Blurry Images:** If your images come out blurry, double-check that your camera is stable on the tripod and that you’ve locked focus before starting your time-lapse.
– **Insufficient Light:** If you’re shooting in low light, consider using a larger aperture or increasing the ISO to allow more light into your camera without sacrificing image quality.
– **Battery Drain:** Long recording times can drain your battery quickly. Always carry extras, especially if you plan on filming for extended periods.
These tips can save you from that sinking feeling of losing great footage.
Final Thoughts
Using time-lapse photography to record ribbon worm movement is not only a fascinating endeavor but also a unique way to connect with the natural world. By following the steps outlined here, you can create a stunning visual narrative that showcases the beauty of these often-overlooked creatures. Whether you’re doing it for fun, education, or conservation, the joy of watching the ribbon worm come to life through time-lapse is truly rewarding. So grab your camera, set up your gear, and let the magic of time-lapse unfold!