
Setting up your own observation station is a fun and educational project, especially if you’re curious about nature. You can create a mini habitat that allows you to watch these little guys in action. This project isn’t just for kids; adults can find joy and satisfaction in understanding how these creatures help our environment. Plus, it’s a fantastic way to learn about composting and gardening if you’re aiming for a greener lifestyle.
Ready to get started? Let’s break down how you can build your very own earthworm observation station.
Gathering Your Supplies
Before diving into the construction, you’ll need to gather some supplies. It’s straightforward, and most of the items might already be lying around your house or garden. Here’s what you’ll need:
- A clear plastic or glass container (like a terrarium or aquarium)
- Soil, preferably organic or garden soil
- Shredded newspaper or cardboard
- Water
- Earthworms (red wigglers are ideal for observation)
Now, why is each item important? The container acts as the home for your worms. It should be transparent so you can see their fascinating activities. The soil provides a natural habitat, while the shredded newspaper or cardboard serves as food and bedding for your earthworms. Don’t forget the water; just like us, they need a little moisture to thrive.
When it comes to choosing your earthworms, *red wigglers* (Eisenia fetida) are a popular choice. They’re often found in compost bins, making them perfect for your observation station. Plus, they’re active burrowers, so you’ll get a lot of movement to observe!
Creating the Perfect Habitat
Once you’ve gathered your supplies, it’s time to set up the observation station. Here’s how to create a cozy and functional habitat for your earthworms:
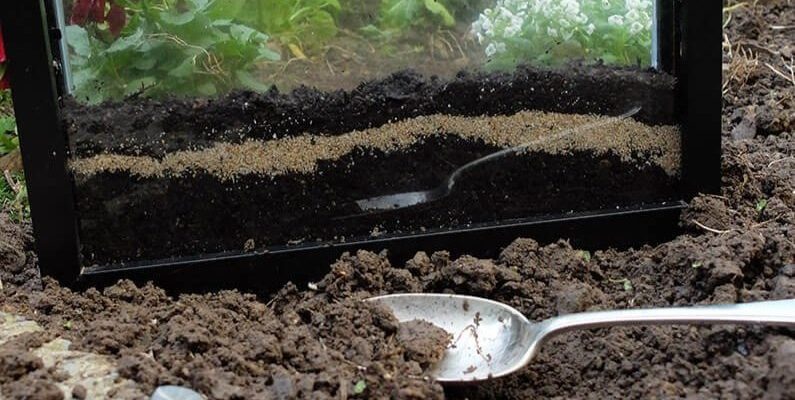
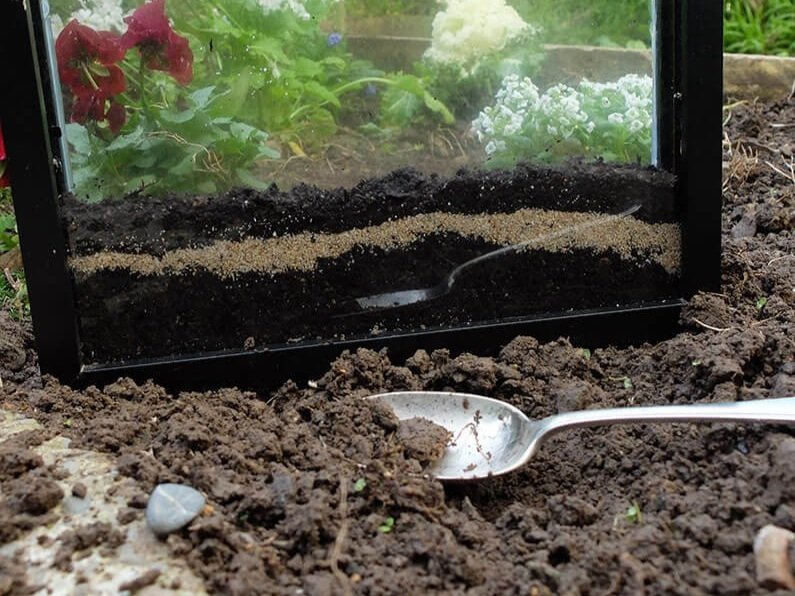
1. **Prepare the Container:** Start by cleaning your container thoroughly. Even if it seems clean, rinsing it out with water can help eliminate any residues or chemicals that might harm your worms.
2. **Add Soil:** Fill the container about halfway with soil. This provides a natural environment where worms can dig and explore. You can use garden soil or a mix designed for earthworms, ensuring it’s free of chemicals and pesticides.
3. **Layering:** On top of the soil, add a thin layer of shredded newspaper or cardboard. This not only gives the worms extra food but also creates a comfortable bedding layer, mimicking their natural habitat.
4. **Moisten the Soil:** Lightly mist the soil with water. You want it damp but not soaking wet. Think of it like a sponge that’s been squeezed out. Too much water can drown the worms, while too little can dry them out.
5. **Introduce the Earthworms:** Finally, it’s time to introduce your red wigglers to their new home! Gently place them on top of the soil and watch them burrow down. It’s like watching little explorers dive into their new world.
Observing Earthworms in Action
Now that your earthworm observation station is set up, it’s time for the fun part: observation! Here’s how to make the most of your experience:
– **Daily Check-ins:** Spend a few minutes each day peeking into the container. Observe how the worms move, dig, and interact with their environment. Are they burrowing deep into the soil, or are they hanging out near the surface?
– **Feeding Time:** You can add small scraps of vegetables, like apple cores or carrot tops, to their bedding. This not only provides additional food but also gives you the chance to see how quickly they consume it. Honestly, watching them munch on scraps can be quite entertaining!
– **Document Your Findings:** Keep a simple journal of your observations. Note what you see each day and any changes in the behavior of your worms. This can deepen your understanding of their role in soil health and decomposition.
Maintaining the Observation Station
Just like a pet, your earthworm observation station requires some maintenance to ensure your slimy friends stay happy and healthy. Here are some tips:
– **Moisture Checks:** Regularly check if the soil is adequately moist. If it feels dry to the touch, mist it lightly. You might be wondering how often to do this—every few days should suffice, depending on your environment.
– **Food Supply:** As mentioned earlier, don’t forget to feed your worms! Add small food scraps every week or so. Just make sure the pieces are small, as it helps the worms break them down more easily.
– **Cleaning Up:** Over time, you might notice some organic matter and worm castings (worm poop!) building up. This is a good sign they’re doing their job! However, if it becomes excessive, gently remove some with a spoon and add it to your compost pile or garden for a nutrient boost.
Exploring Educational Opportunities
Building an earthworm observation station isn’t just fun; it’s full of learning opportunities. You can dive deeper into topics like:
– **Composting:** Understanding how earthworms help break down organic material is a great introduction to composting. You could even start a small compost pile alongside your observation station.
– **Soil Health:** Learning about how worms aerate the soil and contribute to its richness can be a fascinating study, especially if you love gardening or want to grow your own vegetables.
– **Ecosystem Roles:** You can explore how earthworms fit into the larger ecosystem. For example, did you know they create tunnels that help water and air reach plant roots? This is a great topic for a research project or discussion.
Building an earthworm observation station is a simple yet rewarding way to connect with nature. You get to peer into the captivating world of these often-overlooked creatures while learning valuable lessons about sustainability and gardening. Plus, it’s a hands-on activity that’s perfect for all ages!
So, whether you’re looking to boost your gardening skills, teach kids about ecosystems, or just pass the time observing these little wrigglers, your observation station will certainly bring joy and knowledge. Enjoy the journey and embrace the wonders of nature right from your home!