

Setting up an earthworm farm isn’t complicated, and it doesn’t require a lot of space. You can start small, using simple materials and just a little effort. We’ll walk through everything you need, from choosing the right type of worms to maintaining the farm. Whether you’re an experienced teacher or just starting your educational journey, you might find this project to be a memorable addition to your curriculum.
Why Start an Earthworm Farm?
You might be wondering, why earthworms? Well, these little creatures play a crucial role in our ecosystem. They help break down organic matter, which enriches the soil and promotes plant growth. By starting an earthworm farm in your classroom, you provide students with a unique learning opportunity and a chance to see these benefits firsthand.
Also, earthworms are relatively low maintenance compared to other classroom pets. They don’t require fancy feed or special habitats. A simple living environment will keep them happy. Plus, they can help raise awareness about composting and sustainable practices, all while students witness the life cycle in action.
Imagine the excitement when students get to dig their hands into the soil, feeling the worms wiggle between their fingers. It’s like a mini adventure in ecology, and it can spark conversations about the environment and how we impact it.
Choosing the Right Worms
When it comes to building your classroom earthworm farm, the first step is selecting the right type of worms. The most common choice is the red wiggler worm (Eisenia fetida). These worms are great for composting and thrive in a confined space, making them perfect for a classroom setting.
Here’s what to look for:
- Red Wigglers: These worms are known for their composting abilities. They’re hardy and reproduce quickly, which means your farm can grow in size.
- European Nightcrawlers: Slightly larger than red wigglers, these worms are also effective for composting and can serve as fish bait if needed.
- Common Nightcrawlers: While they’re great in gardens, they are less suited for an indoor farm due to their size and burrowing habits.
Using red wigglers is often the best choice for classroom settings. They can eat half their weight in food scraps each day. Plus, they help create nutrient-rich compost, which can be used for classroom plants or a school garden.
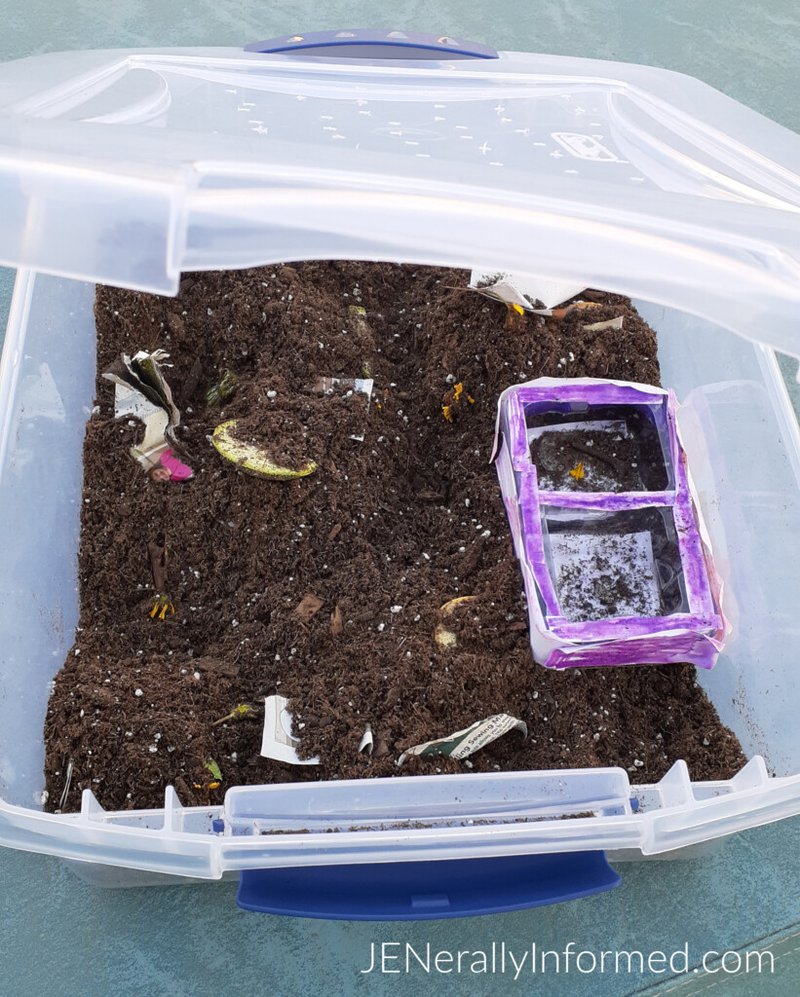
Setting Up Your Earthworm Farm
Setting up your earthworm farm is straightforward and fun! Start by gathering the materials you need, such as a bin, bedding, and, of course, your worms. Here’s a simple list to get you going:
- A plastic or wooden bin (at least 12 inches deep)
- Moistened bedding (such as shredded newspaper, cardboard, or coconut coir)
- Your chosen worms (around 500 grams is a good start)
- Kitchen scraps (fruits, vegetables, coffee grounds)
To set it up, follow these steps:
1. **Prepare the Bin:** Drill small holes in the sides and top of the bin for ventilation. This prevents the worms from suffocating.
2. **Add Bedding:** Place about 4-6 inches of moistened bedding in the bin. It should feel like a damp sponge, not soaking wet.
3. **Introduce the Worms:** Gently place your worms on top of the bedding. They’ll naturally burrow down to settle in.
4. **Feed Responsibly:** Start with a small amount of kitchen scraps. Remember to avoid citrus peels, onion, and garlic, as they can be harmful to worms.
Let me explain one thing: it’s crucial to maintain proper conditions. Too much moisture can drown your worms, while too little can dry them out. Aim for that “damp sponge” feeling.
Daily Care and Maintenance
Taking care of your classroom earthworm farm is pretty simple, but consistency is key. Here’s what you need to keep in mind for daily care:
– **Check the Moisture Level:** Every few days, lift the bin lid and feel the bedding. If it’s too dry, add a little water. If it’s too wet, add some dry bedding to soak up excess moisture.
– **Feed the Worms:** Add kitchen scraps regularly, but don’t overfeed. Start small; a handful of scraps a few times a week is ideal. Let the worms eat all the scraps before adding more.
– **Watch for Harvesting Signs:** After a few months, you might notice a significant decrease in food scraps. This means your worms are doing their job!
You might find it interesting that as they eat, worms produce castings, which are nutrient-rich and make great fertilizer. This provides a perfect opportunity to teach students about sustainable practices.
Common Challenges and Solutions
Like any living system, your earthworm farm may face a few challenges. Here are some common issues and how to tackle them:
1. **Odors:** If your bin starts to smell, it might be due to overfeeding or using the wrong food scraps. Ensure you’re not adding citrus or too many scraps at once. Remove any uneaten food and give them less in the future.
2. **Pests:** Sometimes, fruit flies might take an interest in your worm bin. You can easily solve this by covering the bedding with a layer of dry leaves or shredded paper. This also keeps moisture in and pests out.
3. **Dying Worms:** If worms are dying, check your moisture level and food. They could be stressed from too much water or not enough food. Adjust your care accordingly.
Facing these challenges can be frustrating at times, but they also provide great learning moments for students. Encourage problem-solving and creativity when addressing these issues.
Integrating into the Classroom Curriculum
Integrating your classroom earthworm farm into lessons can make learning come alive. Here are a few ideas:
– **Science Lessons:** Discuss the role of earthworms in the ecosystem. Use your farm as a case study to illustrate concepts like decomposition, soil health, and nutrient cycling.
– **Math Skills:** Have students measure the growth of the worm population or track how much waste is turned into compost over time.
– **Art Projects:** Students could create drawings or models of earthworm anatomy. This can help reinforce biology lessons and enhance creativity.
You might consider assigning students specific tasks like feeding, monitoring moisture, or taking notes on worm behavior. This builds responsibility and encourages teamwork.
Building a classroom earthworm farm is more than just a project; it’s a chance to foster curiosity and responsibility among your students. From learning about the environment to understanding the intricacies of life cycles, the benefits are numerous.
Plus, it’s a great way to engage with sustainability and composting right in the classroom. As students care for their earthworm farm, they’ll not only watch the worms do their work but also learn valuable lessons about nature, teamwork, and responsibility.
So, roll up your sleeves, gather those materials, and get ready to create a tiny ecosystem right in your classroom. Who knew that such small creatures could bring so much joy and learning? Happy worm farming!