
Grub worms, those sneaky little devils hiding beneath the soil, can cause significant issues for your plants. It’s kind of like inviting a party guest who ends up eating all the snacks and leaving a mess. Understanding how grub worms affect your potted plants can help you tackle the problem before it spirals out of control. So, let’s dig in!
What are Grub Worms?
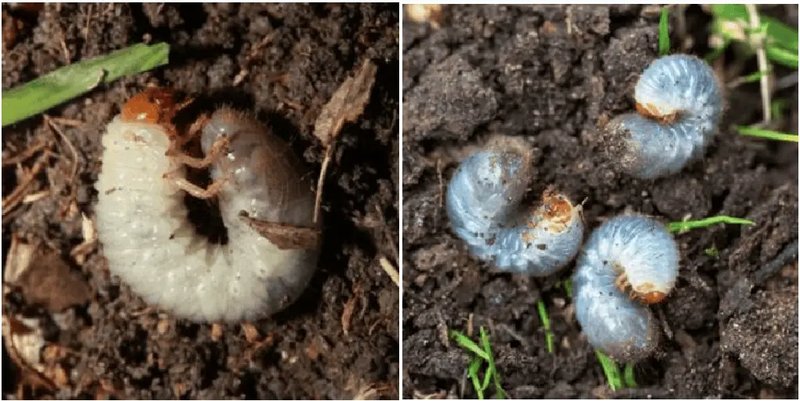
Grub worms are the larvae of various beetles, like Japanese beetles or June bugs. They may look innocent, but these soft, white, curled-up creatures can be a gardener’s nightmare. Typically found in the soil, they feed on roots, which can severely harm your plants when you least expect it.
Think of them as the underground invaders—while you’re focusing on watering and sunlight, they’re munching away at the roots. A thriving grub population can lead to wilting, yellowing leaves, or even plant death. Honestly, it’s like a hidden threat that sneaks up on you while you’re just trying to enjoy your gardening hobby.
Signs of Grub Worm Infestation
So, how do you know if your potted plants have become a buffet for these pesky critters? There are a few telltale signs you should watch out for:
- Wilting Leaves: If your plants look thirsty even after watering, it could be because the roots are being damaged.
- Yellowing Foliage: A change in color can indicate stress due to root loss.
- Loose Soil: If the soil seems crumbly or unstable, it might be because the roots are being eaten away.
- Visible Grubs: Digging in the soil can sometimes expose these white larvae.
You might be thinking, “Is it worth checking for grubs?” Absolutely! Catching the problem early can save your plants from serious damage. If you spot even one of these signs, it’s time to take action.
How Grub Worms Damage Your Plants
When grub worms munch on the roots, it creates a domino effect that can impact your entire plant. Roots are essential—they absorb water and nutrients, anchoring the plant in place. Without healthy roots, your plants struggle to survive.
Imagine trying to run a marathon with one leg; that’s what your plants experience when their roots are compromised. Grubs can lead to *stunted growth*, *poor nutrient absorption*, and ultimately, *plant death*. If you’re emotionally invested in your plants (and who isn’t?), the thought of losing them can be pretty distressing.
How to Identify Grub Worms in Your Potted Plants
If you’ve noticed any of those signs and want to confirm the presence of grub worms, here’s how you can check:
1. Inspect the Roots: Take a gentle look at the root system of your plants by removing them from their pots. Look for any signs of damage or visible grubs.
2. Soil Dig Test: Use a garden trowel to dig a small section of your soil. If you find grubs, that’s a strong indication they’re present.
3. Check for Movement: Sometimes, you may see them wriggling around as you dig. If that’s the case, you know you’ve got a grub problem!
It’s important to be thorough here. The quicker you identify these pests, the better your chances of saving your plants.
Preventing Grub Worm Infestations
Let’s talk about prevention. No one wants to deal with grubs, so keeping them at bay is essential. Here are some tips:
- Healthy Soil: Use quality potting soil that drains well. This helps to keep the roots healthy.
- Rotation: Alternate your plants every season—planting different varieties can disrupt the life cycle of grubs.
- Beneficial Nematodes: These microscopic worms can be added to your soil to target grub larvae without harming your plants.
- Regular Monitoring: Check your plants frequently. Early detection is key!
By taking these preventive measures, you can reduce the risk of a grub worm takeover. It’s all about being proactive instead of reactive!
Treating Grub Worms in Potted Plants
If you’ve confirmed that your plants are indeed hosts to grub worms, don’t panic! There are steps you can take to treat the infestation effectively:
1. Remove Grubs Manually: If you’ve found only a few, you can remove them by hand. It sounds gross, but it’s effective!
2. Apply Insecticidal Soap: This can help eliminate grubs without harming the plants. Just follow the instructions on the label for the best results.
3. Use Neem Oil: This natural pesticide disrupts the life cycle of grubs and is safe for your plants. Spray it onto the affected areas and the soil.
4. Drench Treatment: For severe infestations, consider using a more potent pesticide. Make sure it’s safe for potted plants and follow the application guidelines closely.
Remember, treating grub worms requires patience. It might take some time to see improvement, but with the right approach, your plants can bounce back.
Best Practices for Long-Term Health of Your Potted Plants
Okay, you’ve tackled the grub problem, but what can you do to ensure it doesn’t happen again? Here are some best practices for maintaining healthy potted plants:
- Regular Watering: Keep your plants hydrated—just don’t overdo it. They need a balance!
- Nutrient Supply: Use organic fertilizers to keep your soil rich and aid root growth.
- Sunlight Exposure: Understand your plant’s light requirements and place them accordingly.
- Routine Checks: Inspect your plants often for signs of pests or disease.
By following these practices, you keep your plants thriving and reduce the chance of grub worm infestations. Healthy plants are less likely to attract pests, and you’ll find gardening much more rewarding!
In conclusion, understanding how grub worms affect potted outdoor plants is crucial for any gardener. These tiny pests might seem insignificant, but they can wreak havoc on your beautiful green friends. Stay vigilant, take preventive measures, and treat infestations promptly. Your plants will thank you with their vibrant colors and healthy growth! Happy gardening!