
Let me explain how you can easily set up a silkworm farm. Think of it as caring for a pet that doesn’t just need food and water, but also a comfy home. The primary silkworm species you’ll want to focus on is the *Bombyx mori*. This little guy is the star of the show when it comes to silk production. With a few simple steps and a bit of patience, your backyard can transform into a mini silkworm haven.
Why Start a Silkworm Farm?
So, why should you even consider starting a silkworm farm? For starters, they’re fascinating creatures that offer a unique opportunity to learn about life cycles and sustainability. Watching them grow from tiny eggs to fully grown moths is like a front-row seat to nature’s magic show.
Additionally, maintaining a silkworm farm is relatively low-maintenance. Unlike traditional farming, you don’t need extensive space or expensive equipment. You’ll just need a small area, some mulberry leaves (their primary food), and a little bit of time each day. Plus, you can produce your own silk, which is something truly special. Whether you’re into sewing, crafting, or just appreciate the beauty of silk, having your own supply can be incredibly rewarding.
Another perk is the educational aspect. If you have kids or even if you just want to learn something new, raising silkworms can be a great hands-on experience. You can teach others about biodiversity, the importance of insects in our ecosystem, and even how to care for these little animals.
Getting Started: Basic Requirements
To kick off your mini silkworm farm, you’ll need a few supplies. First, let’s talk about space. Silkworms don’t require much room; a simple container or box will do. Just make sure it’s well-ventilated, as silkworms produce a lot of waste, and you want to avoid any unpleasant odors.
You’ll also need:
- **Silkworm eggs**: You can purchase these online or from local suppliers.
- **Mulberry leaves**: These are essential for feeding your silkworms. You can grow your own mulberry tree or source leaves from stores.
- **A suitable container**: A plastic or cardboard box will work great. Just ensure it has airflow and isn’t too big—silkworms feel safer in smaller spaces.
Here’s the thing: before you jump in, take a moment to read up on the lifecycle of the silkworm. Understanding their needs at different stages—from eggs to larvae, and then to cocoons—will help you care for them effectively.
Setting Up Your Silkworm Habitat
Creating the perfect habitat for your silkworms is crucial for their development. You’ll want a clean space that mimics their natural environment. Here’s how to set it up:
1. **Choose a Container**: Start with a small box or a large plastic tub. Make sure it’s shallow enough for easy access but deep enough to give them space to grow.
2. **Ventilation**: Cut or poke holes in the lid to allow airflow. Silkworms need fresh air, but they also need a warm environment. Aim for a temperature between 70°F and 80°F.
3. **Bedding**: Place a layer of clean paper or cloth at the bottom. This will help absorb waste and keep the habitat clean.
4. **Add Food**: Place fresh mulberry leaves in the container. If possible, avoid crushed or wilted leaves, as fresh ones are more nutritious.
Remember, you’ll need to change the leaves regularly—silkworms are eating machines and can devour a lot of leaves in one sitting!
Caring for Your Silkworms
Once your habitat is set up and your silkworms have hatched, it’s time to play caretaker. Here’s what you need to do:
- **Feeding**: Offer fresh, clean mulberry leaves daily. You can tell they’re hungry when they start wandering around more than usual.
- **Hygiene**: Remove any leftover leaves and waste to prevent mold and pests. Cleaning should be done every couple of days.
- **Monitoring Growth**: Keep an eye on their size. Silkworms will molt several times, so be prepared to see them grow rapidly.
You might be wondering how to tell if they’re healthy. Healthy silkworms are plump, active, and have a creamy white appearance. If they look shriveled or discolored, something might be off.
The Lifecycle of Silkworms
Understanding the lifecycle of silkworms is key to successfully raising them. Here’s a quick overview:
1. **Egg**: Silkworms start as tiny eggs, which can take about 10 days to hatch under the right conditions.
2. **Larvae**: This is the biggest phase where they eat a lot and grow quickly. They will molt several times—up to five times—during this stage, expanding significantly.
3. **Pupa**: Once they stop eating, they spin cocoons and enter the pupal stage. This can take around two weeks.
4. **Moth**: Finally, they emerge as moths. If you want to harvest silk, you’ll want to do this before they break out of the cocoon.
Knowing this lifecycle helps you plan care and feeding schedules effectively, ensuring your silkworms thrive.
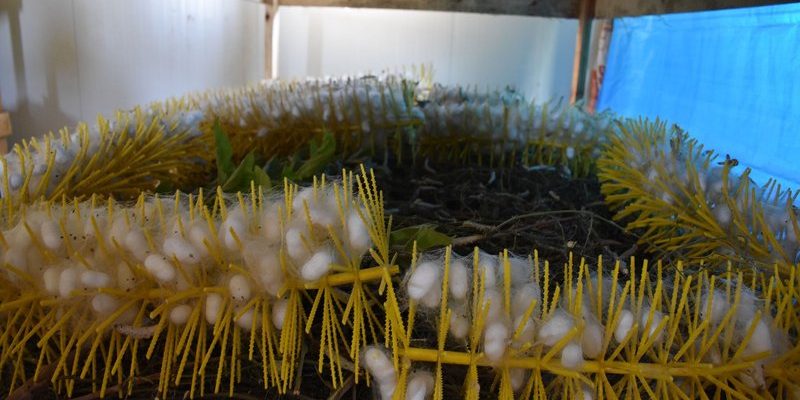
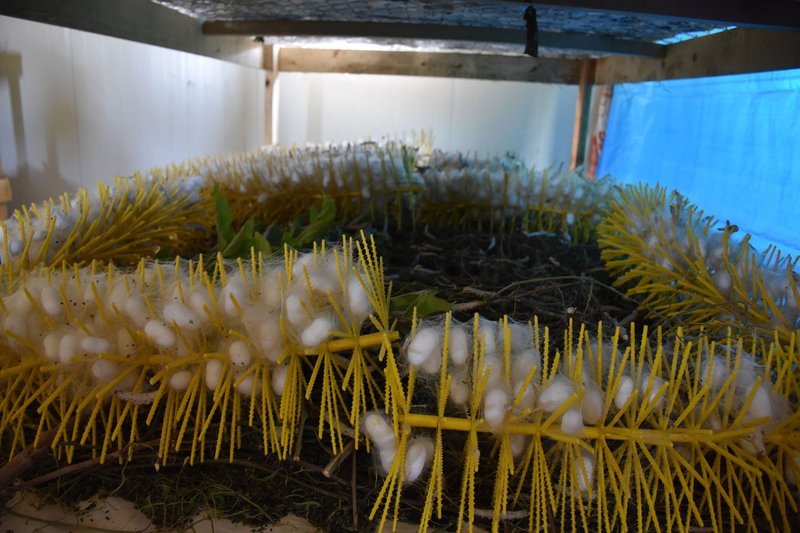
Harvesting Silk: A Simple Guide
When the time comes to harvest silk, it’s important to know the right steps. Here’s how to do it:
1. **Timing**: Wait until the silkworms have formed their cocoons. This is when you’ll gather the cocoons for silk production.
2. **Boiling**: To extract the silk, you’ll need to boil the cocoons for a few minutes. This softens the sericin (the protein that binds silk threads together), making it easier to unspool.
3. **Reeling**: After boiling, gently unwind the silk thread from the cocoon. It can take quite a bit of patience, but the result is rewarding!
4. **Drying**: Once you’ve collected the threads, hang them to dry. Make sure they’re in a cool, dry area to prevent mold.
Here’s the thing: the first harvest might take some practice, but it’s a learning experience. Each attempt will get you closer to mastering the art of silk production.
Common Challenges and Solutions
Like any farm, raising silkworms can come with its own set of challenges. Here are a few common issues and how to tackle them:
– **Mold**: This can happen if the habitat is too humid or leaves are left too long. Keep your space clean and ensure good ventilation.
– **Pests**: Keep an eye out for pests like ants or fruit flies. If you spot them, remove any infested food and clean the area thoroughly.
– **Health Issues**: If silkworms appear lethargic or stop eating, check their environment. Sometimes, a slight adjustment in temperature or cleanliness can make a huge difference.
Honestly, staying proactive and observant will help you catch problems early on and keep your silkworm farm thriving.
Final Thoughts: Embrace the Journey
Starting a mini silkworm farm in your backyard can be a delightful adventure. It gives you a chance to connect with nature, learn about life cycles, and even produce something beautiful. While it takes some effort, the joy of watching these amazing creatures grow and turn into silk makes it all worthwhile.
So, grab those eggs and mulberry leaves, and embrace the journey ahead. You might even find yourself feeling like a proud parent as you nurture these little critters. Who knows? You could end up with a gorgeous blanket or a beautiful piece of clothing made from silk that you raised yourself. Now that’s something to brag about!