
Silkworms are quite remarkable creatures. They’re the larvae of the silk moth and are primarily raised for their silk. Think of them as tiny, fluffy factories that produce one of the world’s most luxurious materials. By growing them in your own space, you’re not only engaging in a unique hobby but also contributing to sustainable practices. Let’s dive a little deeper into what it takes to cultivate silkworms in an urban environment.
What Are Silkworms and Their Lifecycle?
To get started with silkworm cultivation, it’s essential to understand what they are and how they grow. Silkworms (Bombyx mori) are small caterpillars that are bred for their silk. Their lifecycle consists of four major stages: egg, larva, pupa, and adult moth. You might think of it as a mini-drama unfolding right in your home.
1. **Egg Stage**: It all starts when you purchase silkworm eggs, which are tiny and often laid on paper or leaves. This stage lasts about 10 days, and the eggs will hatch when conditions are just right.
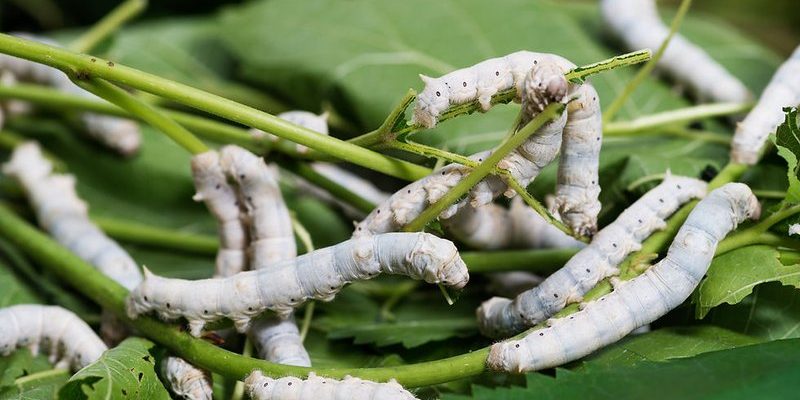
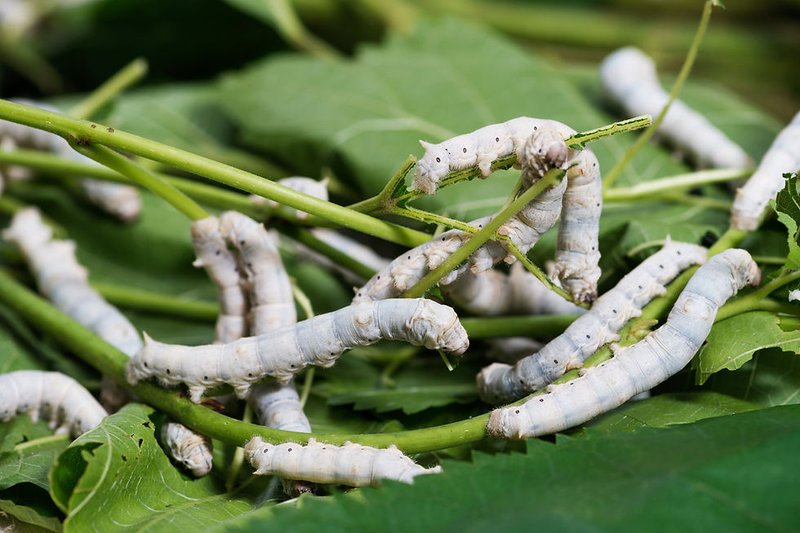
2. **Larva Stage**: Once hatched, the larvae—commonly known as silkworms—begin munching on mulberry leaves. This stage lasts about 4-6 weeks and is when the silkworms grow rapidly. They can eat their body weight in leaves every day!
3. **Pupa Stage**: After the larval stage, the silkworms spin a cocoon around themselves, transforming into pupae. This phase can last around 2-3 weeks.
4. **Adult Stage**: Finally, the adult moth emerges from the cocoon. Unfortunately, these adults don’t eat and only live for about a week, which is primarily to mate and lay more eggs.
Understanding this lifecycle is critical, especially when planning your silkworm farm in an urban setting.
Setting Up Your Urban Silkworm Farm
So, how do you set up a silkworm farm in your urban microfarm? It’s easier than you might think. Here’s a step-by-step guide to help you get started.
1. **Choose the Right Location**: Look for a space that’s warm, dry, and has good airflow. A small room, a corner of your backyard shed, or even a balcony can be ideal. Just remember that silkworms thrive in temperatures between 70°F and 80°F (20°C to 27°C).
2. **Gather Supplies**: You’ll need a few essential items:
– **Mulberry Leaves**: Fresh leaves are vital as they serve as the primary food for silkworms.
– **Breeding Containers**: Simple plastic bins or cardboard boxes can work well. Ensure they’re breathable to allow airflow.
– **Temperature Control**: If you live in a cooler climate, consider heat lamps to keep the environment warm.
3. **Start Your Silkworms**: Once you’ve set up, place the eggs in your containers with fresh mulberry leaves. Ensure they’re well-spaced to allow the tiny caterpillars to grow without overcrowding.
4. **Maintain the Environment**: Regularly check the temperature and humidity levels. You might want to mist the leaves lightly to maintain humidity but avoid overdoing it.
By keeping a close eye on your silkworms and adjusting the environment as necessary, you can create a thriving urban silkworm farm.
Feeding Your Silkworms
Feeding silkworms may seem straightforward, but there are a few tricks to make it more efficient. Your silkworms will primarily eat **fresh mulberry leaves**, so it’s essential to have a constant supply.
1. **Feeding Frequency**: You’ll need to feed them at least twice a day. During their most rapid growth (usually the first three weeks), they can consume a lot of leaves. Skipping meals might slow down their growth.
2. **Leaf Quality**: Always use fresh leaves. Wilting or dried leaves won’t provide the necessary nutrients and can harm your silkworms.
3. **Avoid Pesticides**: If you grow your own mulberry trees, ensure you don’t use any harmful chemicals. Organic practices are best for both your health and the silkworms.
When you take the time to understand their dietary needs, you’ll notice how quickly your silkworms grow and develop.
Harvesting Silk: When and How
After your silkworms have spun their cocoons, it’s time to think about harvesting the silk. This part of the process can feel a bit daunting, but it’s incredibly rewarding.
1. **Cocoon Harvesting**: Wait for about two weeks after the silkworms have spun their cocoons. By this time, the pupae inside have developed, and you’ll see that the cocoons have hardened.
2. **Boiling the Cocoons**: To harvest silk, boil the cocoons in water for a few minutes. This kills any pupae inside and makes it easier to unravel the silk thread.
3. **Unraveling the Silk**: After boiling, use a tool or your hands to carefully unwind the silk fibers. You can collect a remarkable amount of silk from just a few cocoons!
Remember, harvesting silk is a delicate process, but it’s a major highlight of your silkworm cultivation journey.
Common Challenges and Solutions
Like any agricultural endeavor, silkworm cultivation comes with its own set of challenges. Here are some common issues and tips for overcoming them.
1. **Overpopulation**: Silkworms can grow surprisingly fast, leading to overcrowding in your containers. If you notice the worms getting too crowded, consider transferring some to a new container or even giving them away to fellow urban farmers.
2. **Health Problems**: Watch for signs of disease, such as discoloration or sluggish behavior. If you notice these signs, it might be time to change the food or clean the containers to avoid contamination.
3. **Temperature and Humidity Control**: If your silkworms aren’t thriving, check the temperature and humidity. Making small adjustments can lead to significant improvements in their health.
These common challenges shouldn’t discourage you but rather empower you to learn more about the art of silkworm cultivation.
Benefits of Silkworm Cultivation in Urban Microfarms
You might be wondering why you should invest your time in silkworm cultivation. Well, there are several impactful benefits to consider.
1. **Sustainable Practice**: Raising silkworms can contribute to sustainable living. You’re utilizing space efficiently and producing your own silk without relying on large, industrial operations.
2. **Educational Experience**: Cultivating silkworms can be a fantastic educational opportunity—whether for you or your kids. It’s an eye-opening way to understand the lifecycle and agricultural processes.
3. **Potential Income**: If you’re interested in entrepreneurship, you can sell your silk or silkworms to local businesses or crafters. It’s a niche market but can be rewarding.
Honestly, there’s a certain magic in watching these tiny creatures transform. You’re not just a passive observer—you’re part of their journey.
Incorporating silkworm cultivation into your urban microfarm can be an enriching experience that connects you to nature and offers numerous benefits. It’s a journey that combines patience, curiosity, and a bit of creativity. From understanding their lifecycle to harvesting silk, every step invites you to embrace a unique aspect of agriculture.
So, as you think about starting your own silkworm farm, remember that it’s not just about producing silk; it’s about engaging with the world around you and discovering the joys of urban farming. Whether you’re a seasoned gardener or a complete beginner, cultivating silkworms can add an exciting layer to your microfarming adventure. So why not give it a try?