
When it comes to housing velvet worms, it’s not just about the basics like food and water; their habitat needs to cater specifically to their quirks. Imagine creating a little ecosystem that mirrors their damp, humid forest floor—complete with the right temperature, moisture levels, and even companions. Setting up their habitat isn’t a daunting task; it’s all about blending the right materials and conditions together. Let’s dive into the essentials of **building a suitable habitat for captive velvet worms** so you can become the ultimate velvet worm caretaker.
Understanding Velvet Worms’ Natural Habitat
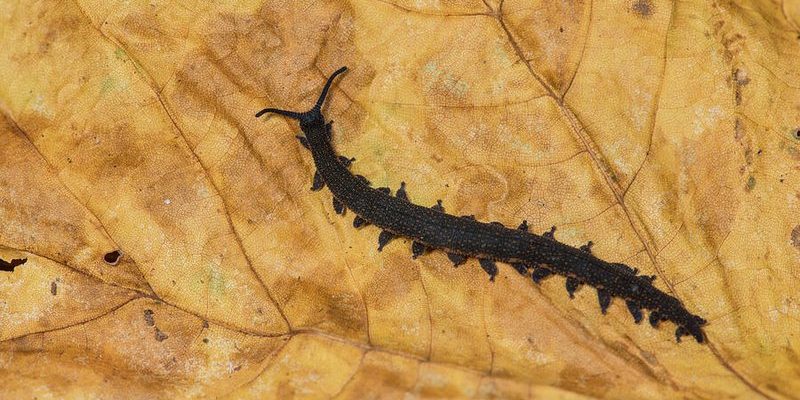
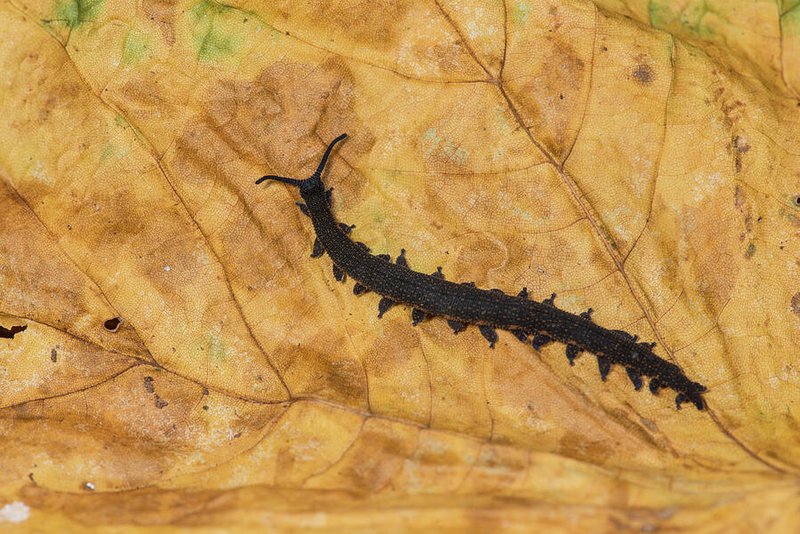
Before you start outfitting your velvet worm’s home, let’s take a step back and look at where they come from. Velvet worms thrive in moist environments, typically found in tropical and subtropical forests. Picture a rich, green forest floor blanketed in damp leaves and decaying wood; this is the lush terrain they naturally inhabit. This very setting is important because it influences how they feed, reproduce, and interact with their surroundings.
Though they may look simple, velvet worms have specific needs. They prefer dark, humid places where they can hide from predators and hunt for food, such as insects and small invertebrates. When designing their habitat, think about replicating this setup. You want to keep it dark and moist—a bit like a cozy cave, but with enough space to roam.
Choosing the Right Enclosure
When selecting an enclosure for your velvet worms, you have various options. A simple glass terrarium is a great start. It’s transparent, allowing you to observe their fascinating behavior, while also providing enough room for ventilation. Make sure the size is suitable for the number of worms you plan to keep. Larger enclosures are better, as they replicate the spaciousness of their natural environment.
Here are a few key factors to consider when choosing your enclosure:
- Size: Aim for at least 20 gallons for a small group.
- Material: Glass or acrylic is ideal; avoid plastic as it can hold too much heat.
- Ventilation: Ensure there’s enough airflow to prevent mold and stagnant air.
You might be wondering, “What if I want to keep more than one?” The good news is that velvet worms are fairly social creatures. Just be sure there’s enough space for each one to establish its own territory without feeling cramped.
Creating the Right Substrate
The substrate is the foundation of your velvet worm’s home. This mixture not only helps retain moisture but also provides a natural surface for them to burrow and explore. Think of it as their cozy blanket. A mix of coconut coir, peat moss, and shredded leaves works wonders. This combination not only feels familiar to them but also retains moisture effectively.
To set it up, follow these steps:
1. **Prepare the Mixture:** Combine equal parts of coconut coir and peat moss. Add some shredded leaves or wood chips for extra texture.
2. **Layer it Up:** Spread a 2-3 inch layer of the substrate on the bottom of the enclosure.
3. **Moisten it:** Lightly dampen the substrate but avoid soaking it. You want it to feel like a damp sponge—not a swimming pool!
Don’t forget to check the moisture levels regularly; a dry substrate can make your velvet worms unhappy, leading to stress or even mortality.
Maintaining Humidity and Temperature
Humidity and temperature are crucial for your velvet worms to thrive. In their natural habitat, humidity levels are typically between 75% and 90%. Here’s how to keep your enclosure in the sweet spot:
– **Humidity:** Use a hygrometer to monitor moisture levels. Mist the habitat regularly with water to maintain humidity, but avoid creating puddles.
– **Temperature:** Keep the temperature stable between 65°F and 75°F. A simple heating pad under the enclosure can help if your home is cooler.
Consider using a small fan or a heater to help regulate air flow and temperature, but be careful not to dry out the habitat. A little bit of trial and error may be necessary, so be patient and observant.
Lighting and Decor
Unlike many pet species, velvet worms prefer low-light conditions. Natural daylight is great, but avoid direct sunlight since it can overheat their habitat. Instead, keep the enclosure in a shaded area or use a low-powered LED light for a few hours a day.
When it comes to decor, think of it as adding “furniture” for your velvet worms. They love to have places to hide and explore. Here are some ideas:
- Rocks and Logs: These provide hiding spots and climbing opportunities.
- Plants: Live plants can help maintain humidity and add an attractive touch.
- Leaf Litter: Adding a layer of leaves resembles their natural environment.
Make sure everything you add is safe and won’t harm your worms. Regularly check and remove any decaying materials to keep their home clean and inviting.
Feeding Your Velvet Worms
Now that you’ve set up a lovely home, let’s talk about feeding your velvet worms. These critters are carnivorous, so you’ll need to provide them with live food, such as small insects. Fruit flies are a great choice for smaller worms, while larger ones can handle mealworms.
How to feed them? Here’s a quick breakdown:
1. **Frequency:** Feed your worms once or twice a week.
2. **Portion Size:** Offer a few insects at a time. Observe how much they eat; they’ll usually consume what they need.
3. **Monitor Their Health:** Keep an eye on your worms after feeding to ensure they’re active and hunting.
You’ll soon find that watching them hunt their prey is one of the most rewarding parts of being a velvet worm caretaker!
Common Problems and Troubleshooting
Even with the best intentions, things can go awry. It’s important to be prepared for common challenges. One issue you might face is maintaining humidity. If it drops too low, your velvet worms might become lethargic or even die. Regular misting and monitoring can help, but if you notice that the humidity still fluctuates a lot, consider adding a small water dish or using a humidity dome over the enclosure.
Another potential problem could be mold growth due to excessive moisture. If you see mold, it’s time to do a bit of cleaning. Remove the substrate, clean the enclosure thoroughly with hot water (no soap!), and replace the substrate with fresh material.
Always keep an observant eye on your velvet worms. If they’re not moving or are sitting in an unusual position, they might be stressed or unhealthy. Knowing what to look for can save you a lot of heartache.
Final Thoughts
Building a suitable habitat for your captive velvet worms doesn’t need to feel overwhelming. With the right setup—focused on humidity, temperature, and a well-planned substrate—you can create a thriving environment for these ancient creatures. Remember, the key is to mimic their natural habitat as closely as possible, and that means being attentive to their unique needs.
So, as you embark on your journey in velvet worm care, remember that patience and observation are your best friends. Enjoy the process of creating their habitat and the joy of watching them thrive. After all, they may be small, but they have big personalities just waiting to shine!