
If you’re new to glow worm photography, you might be feeling a bit overwhelmed. After all, these little guys don’t come with a manual. To help you shine a light on the process (pun intended!), I’ll share some tips to get started on your glow worm photography journey. You won’t need fancy gear to begin; a decent camera, a tripod, and a bit of patience will take you far. So grab your equipment, and let’s dive in!
Understanding Glow Worms and Their Habitat
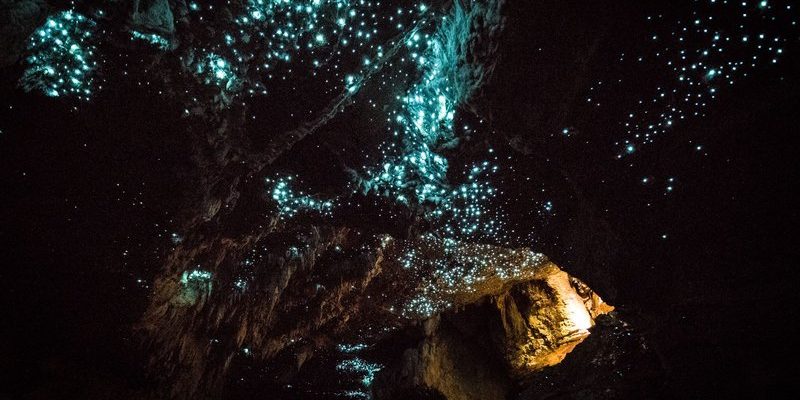
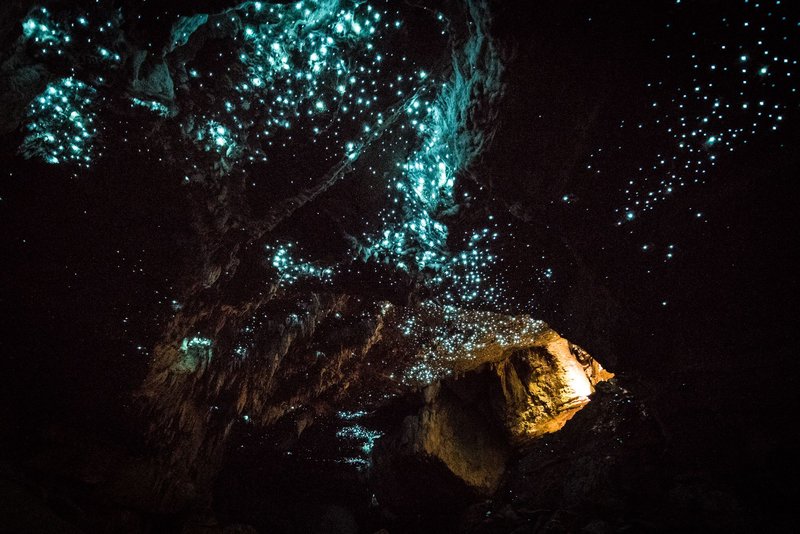
Before you start snapping pictures, it’s essential to understand what glow worms are and where to find them. Glow worms aren’t actually worms; they’re the larvae of a type of fly called the *Arachnocampa*. You’ll usually find them in damp, dark places like caves or rainforests. The light they emit comes from a chemical reaction in their bodies, which they use to attract food—usually small insects.
You might be wondering why location matters in glow worm photography. Here’s the thing: not all places are created equal. Locations with minimal light pollution and high humidity provide the best chances of seeing these bioluminescent beauties. Think about it like fishing: the right bait (or, in this case, the right spot) is key to landing a great shot.
Look for areas near water sources, as glow worms thrive in such environments. National parks and nature reserves are also fantastic spots to explore, especially during peak seasons, usually from spring to autumn.
Choosing the Right Equipment
Now that you know where to find glow worms, let’s talk about the gear you’ll need. While you might think you need a high-end camera, you can actually get started with just a smartphone or a basic DSLR. Here are a few essentials to consider:
- Camera: A camera with manual settings is ideal. This allows you to control exposure, aperture, and ISO settings. If you’re using a smartphone, explore apps that let you tweak these settings to help you out.
- Tripod: A sturdy tripod is crucial. Since you’ll often be shooting in low light, using a tripod will prevent blurry images caused by shaky hands. There are lightweight options available that are easy to carry on hikes.
- Lens: If you’re using a DSLR, consider a lens with a wider aperture (like f/2.8). This lets in more light, which is essential for low-light photography.
- Remote Shutter Release: This is a handy tool to avoid shaking the camera when you press the shutter button. Some cameras even allow you to use your smartphone for this!
Remember, you don’t need the latest and greatest gear to begin. Focus more on technique and practice, and you’ll see great improvements over time.
Mastering Camera Settings
Getting your camera settings right is crucial for capturing glow worms effectively. Here’s a breakdown of the key settings you’ll want to pay attention to:
– ISO: Start with a higher ISO setting (like 1600 or 3200). This sensitivity to light helps capture more detail in the dark environments where glow worms thrive. Just be careful; too high can introduce noise (that grainy look) to your photos.
– Aperture: A lower f-stop number (like f/2.8) allows more light in, which is essential when shooting in low light. However, if you want more depth of field (ensuring both the glow worms and surrounding background are in focus), experiment with higher numbers like f/8.
– Shutter Speed: A slower shutter speed (around 10-30 seconds) will help capture the light emitted by glow worms. You might need to go even slower depending on how bright the glow worms are, but be aware that anything moving in your shot will appear blurry.
Setting your camera can feel like a juggling act at first, but practice makes perfect. Experiment with these settings to see what works best for your setup.
Finding the Perfect Time
Timing is everything in photography, especially when it comes to glow worms. These creatures are typically more active during the warmer months, often after rain, when humidity levels rise. Try visiting your location shortly after sunset to catch them in their prime.
The best time to capture those glowing lights is usually between 8 PM and 11 PM. Keep in mind that moonlight can wash out the glow, so aim for nights with little to no moonlight.
Doing a little research about the lunar cycle can help you plan your outing. Consider visiting local forums or photography groups online to find the best times in your area. You might even meet fellow enthusiasts who can share tips and locations.
Composing Your Shots
Creating a stunning photograph isn’t just about the subject; composition plays a massive role too. In the realm of glow worm photography, think about how you can enhance the scene. Here are some compositional tips:
– Foreground Elements: Including elements like rocks, plants, or even paths can add depth to your images. It helps guide the viewer’s eyes toward the glow worms, making the photo more engaging.
– Frame the Glow: Try to fill the frame with glow worms or create a contrast between the illuminated areas and the dark surroundings. This contrast can emphasize the magical effect of their glow.
– Angles and Perspectives: Change your angles. Don’t just shoot straight on; get low to the ground or try different vantage points. This can lead to unique shots that stand out.
Taking the time to compose your shots can be the difference between a good photo and a fantastic one. Don’t rush this part; enjoy the process of finding creative angles.
Editing Your Photos
Once you’ve captured your shots, the fun doesn’t stop there. Editing can truly elevate your glow worm photos. There are many options out there, both free and paid. Here are some simple editing tips to enhance your images:
– Adjust Exposure and Contrast: Increasing exposure slightly can help show more detail in the glow worms, while boosting contrast can make the glow pop against the dark background.
– Color Correction: Sometimes, your photos may have an unwanted yellow or green tint—especially in low light. Adjusting the white balance can help bring back true colors.
– Crop and Straighten: Sometimes a simple crop can bring focus to the glow worms and eliminate distractions. Straightening your images can also make them more visually pleasing.
Editing can feel daunting at first, but it’s all about practice. You’ll find what works for you as you become more comfortable with the software.
Respecting Nature and Glow Worms
While it’s exciting to capture these beautiful creatures, it’s crucial to remember to respect their environment. Glow worms are sensitive to light and disturbances. Here are some ways to ensure you’re a responsible photographer:
– Keep a Safe Distance: Use a zoom lens if you have one and avoid getting too close. This helps protect the glow worms and allows you to capture photos without disturbing them.
– Minimize Light Pollution: Use red filters on your flashlight or use dim lighting. Bright lights can scare away glow worms or affect their feeding behavior.
– Leave No Trace: Always clean up after yourself and be mindful of your surroundings. The ecosystem is delicate, and we want to make sure these magical creatures can thrive for years to come.
By following these guidelines, you can enjoy glow worm photography while protecting the environment. After all, it’s about capturing beauty without disrupting nature’s magic.
In the end, glow worm photography can be an incredible adventure. With the right tips under your belt, you’ll find yourself not just capturing beautiful images but also connecting with the enchanting world around you. So grab your camera and explore—it’s time to light up your photography skills!