
Live rock dipping is a simple process that involves treating your live rock with a special solution to help eliminate pests. It’s something many aquarium enthusiasts swear by, and it can be a game-changer for keeping your tank healthy. Brands like Seachem and H2O Life have products specifically designed for this purpose, making it easy even for beginners to tackle their bristle worm problem without feeling overwhelmed.
What Are Bristle Worms?
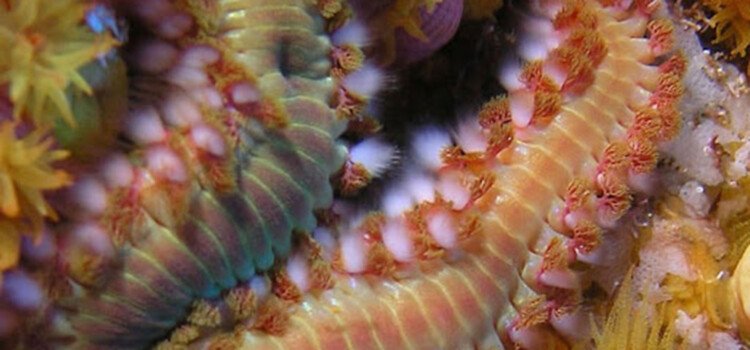
Bristle worms are segmented worms that can be found in many marine environments. They come in various colors but are typically long and slender, with bristles that can irritate skin if touched. While they can help break down organic matter in your tank, when their population explodes, they might outcompete other beneficial species for food and space. This is why it’s important to monitor their numbers.
So, what causes a sudden spike in these worms? Overfeeding your fish and having excess detritus in your tank are common culprits. Just like in a garden where weeds grow if you overwater, in your aquarium, poor maintenance can lead to a bristle worm bonanza. If you notice them taking over, it’s a sign that something needs adjusting, which is where live rock dipping comes into play.
Why Live Rock Dipping Works
Live rock dipping helps by removing pests directly from the live rock before introducing it into your aquarium. Consider it a proactive approach: you’re inspecting and treating the rock before any potential issues arise. By using specific solutions designed for this purpose, you can effectively clear away bristle worms and other unwanted hitchhikers.
The process works by temporarily removing the live rock from your tank and soaking it in the dip solution. The chemical action of the dip encourages bristle worms and similar pests to detach themselves. It’s like giving the rock a little shake in its own gentle wash, helping keep your main tank cleaner and healthier.
Choosing the right solution is crucial. Some dips focus on soft corals, while others can be more aggressive. You’ll want a balanced approach, ensuring you’re not harming the beneficial bacteria that help maintain your aquarium’s ecosystem. Here’s where a product like Seachem’s Reef Dip can be handy, as it’s designed to safely treat live rock while dealing with unwanted pests.
Step-by-Step Guide to Live Rock Dipping
Now that you have a basic understanding, let’s get into the nitty-gritty of how to perform a live rock dip. Here’s a simple step-by-step guide to help you through the process:
- Gather Your Supplies: You’ll need your live rock, a dip solution (like Seachem’s Reef Dip), a clean bucket, and a turkey baster or soft brush.
- Prepare the Dip: Fill the bucket with water from your aquarium to help keep your live rock’s beneficial bacteria alive. Follow the instructions on your dip solution to mix it properly.
- Soak the Rock: Place the live rock in the bucket and fully submerge it in the dip solution. Let it soak for the recommended time, usually around 10-15 minutes.
- Agitate the Rock: While it’s soaking, gently swish the rock around. If you have a turkey baster, you can use it to squirt water over the rock, helping to dislodge any bristle worms.
- Rinse and Return: After the soak, rinse the rock thoroughly with clean aquarium water before reintroducing it to your tank. This flushes away dead pests and any leftover dip solution.
Remember, the goal here is to minimize stress to the beneficial organisms in your live rock while effectively removing the bad ones. The more care you take during this process, the healthier your aquarium will be.
Best Practices for Live Rock Dipping
To maximize the effectiveness of the live rock dipping process, keep a few helpful tips in mind:
1. **Don’t Overdo It:** While it can be tempting to dip all your rocks at once, it’s best to do it in smaller batches. This minimizes stress and allows you to inspect each piece under close scrutiny.
2. **Regular Maintenance:** Dive into this process regularly, especially if you’re noticing a spike in bristle worms. Regular maintenance can prevent them from becoming a big issue.
3. **Keep an Eye on Your Fish and Coral:** After performing a live rock dip, watch how your fish and coral react. If you notice any unusual behavior, it might be a sign of stress from the dip or the disturbance.
4. **Supplement with Other Treatments:** Sometimes, live rock dipping isn’t enough. Consider pairing this method with other pest control solutions or even investing in a fish that eats bristle worms.
Bristle worms aren’t all bad, but keeping them in check ensures your aquarium stays a thriving ecosystem.
Alternatives to Live Rock Dipping
If live rock dipping doesn’t sound like your cup of tea, there are alternatives to consider. One option is to introduce natural predators into your aquarium. Some fish, such as certain wrasses, will feast on bristle worms and help control their population. Think of them as the eco-friendly solution to your bristle worm dilemma.
Another choice is using traps designed specifically for bristle worms. These can help capture and remove them without using chemicals, which is a bonus if you’re concerned about affecting other marine life. Just remember to check these traps regularly—no one wants a bristle worm party in their living room!
The Bottom Line: Keeping Your Aquarium Healthy
Live rock dipping is an effective and straightforward method to eliminate bristle worms and maintain a healthy aquarium. By following the steps and best practices outlined above, you can enjoy the beauty of your tank without worrying about pesky pests taking over.
Ultimately, your goal is to create a balanced ecosystem. This means monitoring your rock, controlling the bristle worm population, and regularly maintaining your tank water quality. With a little effort and awareness, you can keep your aquarium thriving for both you and your fish friends.
Remember, every aquarium is unique, so adapt these methods in ways that work best for your environment. Happy dipping, and enjoy your beautiful underwater world!