
Understanding Bristle Worms
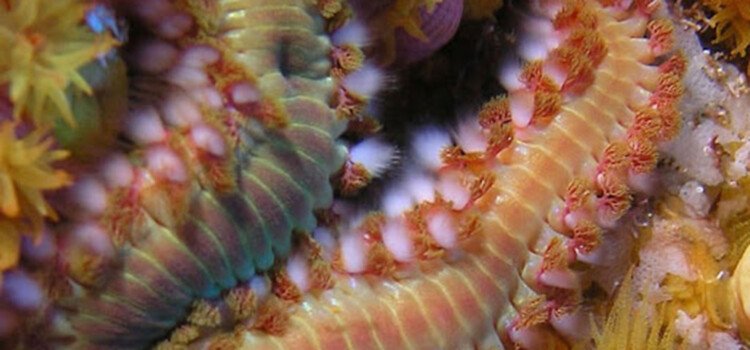
Bristle worms are marine polychaete worms commonly found in reef tanks. They often hide in crevices and are known for their long, segmented bodies, which can be covered in hair-like bristles. While they do play a role in breaking down organic matter, their rapid reproduction can lead to an overcrowded tank.
Here’s the thing: a few bristle worms can be beneficial, helping with waste decomposition. But when they start multiplying, they can disrupt the balance of your aquarium. You might notice them munching on corals or competing for food with your fish. That’s when live rock dipping becomes an essential part of your tank maintenance routine.
Bristle worms are usually harmless to tank inhabitants unless they overpopulate. But if you’re wondering why these worms can be a problem, think of your aquarium like a delicate ecosystem. If one species grows too much, it can throw the whole balance off. Removing excess bristle worms helps maintain a healthy environment for your fish and corals.
What is Live Rock Dipping?
Live rock dipping is a process where you immerse your live rock in a solution designed to eliminate unwanted pests, including bristle worms. Consider it like giving your aquarium’s decorations a thorough cleaning, but specifically targeting harmful critters.
To perform live rock dipping, you’ll need to create a dipping solution. This can include commercially available dip solutions or a homemade mix, such as a saltwater blend or hydrogen peroxide solution. The purpose of this dip is to kill off unwanted pests while minimizing harm to beneficial organisms.
You might be wondering why you can’t just rinse the rock with fresh water. Here’s the deal: fresh water can be damaging to the beneficial bacteria that are essential for reef tank health. That’s why using a designated dipping solution is crucial for effective pest management without harming your tank’s ecosystem.
Gathering Your Supplies
Before you start, let’s gather everything you need for live rock dipping. Here’s a quick list to get you organized:
- A clean bucket or container
- Your dipping solution (commercial dip or homemade)
- A net or fine mesh strainer
- A soft brush or toothbrush
- A water source (preferably saltwater from your tank)
- Gloves (for your protection)
Having these supplies handy will make your dipping process smooth and efficient. It’s like preparing for a mini project—you want to have everything within reach so you don’t have to scramble halfway through.
Once you have your supplies ready, it’s time to set up your dipping station. Choose a clean, well-lit area where you can work comfortably. Make sure to keep your aquarium water nearby—this will be essential for rinsing your rock after the dip.
The Dipping Process Step-by-Step
Now that you have your supplies, let’s walk through the dipping process. Don’t worry; it’s not complicated—just follow these steps, and you’ll do great!
1. **Prepare the Dipping Solution**
Mix your dipping solution according to the package instructions or your homemade recipe. Make sure the solution is fully dissolved before proceeding.
2. **Dip the Rock**
Submerge the live rock in the solution for 5–10 minutes. Keep an eye on it during this time. You’ll likely see bristle worms and other pests starting to emerge from the rock.
3. **Gently Brush Off Debris**
Use a soft brush to gently scrub the rock, focusing on any areas where bristle worms or other unwanted guests may be hiding. This helps dislodge them from their hiding spots.
4. **Rinse the Rock**
After the dipping time is up, rinse the rock thoroughly in your aquarium water. This step is crucial to remove any remaining dipping solution and dead pests.
5. **Return the Rock to Your Tank**
Finally, place the freshly dipped rock back into your aquarium. Make sure to monitor your tank’s conditions afterward to ensure everything stabilizes.
That’s it! You’ve successfully dipped your live rock to eliminate bristle worms. It’s like a breath of fresh air for your aquarium.
Considerations and Precautions
While live rock dipping is effective, there are a few things to keep in mind to ensure you don’t harm your tank’s ecosystem.
First, always check the ingredients in your dipping solution. Some chemicals can harm beneficial organisms, so opt for solutions designed specifically for reef tanks.
Also, avoid dipping any corals or other sensitive organisms. They can be more susceptible to stress from the dipping solution. If you have corals attached to your live rock, consider removing the rock and only dipping the portion that’s free of corals.
Lastly, remember to monitor your tank conditions after dipping. Check water parameters like pH, salinity, and ammonia levels. You want to ensure that your tank remains a safe haven for your fish and other inhabitants.
Alternatives to Live Rock Dipping
If live rock dipping doesn’t sound like your cup of tea, there are alternative methods to manage bristle worms in your aquarium.
One option is to introduce natural predators. Certain fish species, like wrasses, are known to feed on bristle worms. However, make sure the fish are compatible with your existing tank inhabitants.
Another method is to reduce food waste in your tank. Bristle worms thrive on leftover food and detritus. By keeping your tank clean and avoiding overfeeding, you can help control their population naturally.
You could also consider using traps specially designed for catching bristle worms. These traps allow you to monitor their numbers and remove them without resorting to dipping.
Wrapping It Up
Dealing with bristle worms in your aquarium doesn’t have to be a daunting task. Live rock dipping is an effective, straightforward method to help manage their population while keeping your tank healthy. By gathering the right supplies and following the steps, you can give your live rock a thorough cleaning and ensure a thriving environment for your fish and corals.
So, the next time you notice those little wrigglers taking over, remember you have options. Whether you go for live rock dipping, introduce natural predators, or maintain a clean tank, you’re well on your way to maintaining a harmonious aquarium. Happy fishkeeping!